-
Search Results
-
Feels alll wrong when i play Mario 64.
Question
Where is the config-file where i can change the mapping?
If any kind soul out there that can help me with this
[IMG]http://i59.tinypic.com/w9xv5u.png[/IMG]
Help thanks :)
Topic: Mupen64Plus missing?
Just got sorted with RetroPie yesterday after having to reinstall it from scratch due to controllers not working.
I’ve just tried to load a few ROMs onto the pi. PSX working fine. SNES fine. But there’s no folder for Mupen64Plus. Is the N64 emulator missing from my device? Can I install it on it’s own?
Help!
Topic: Controller Chaos!
Hello all,
I would like to start off saying the concept of this retropie is amazing!
However, I am having a rough time with the controller setups and I had a few questions. Here is my idea and you can tell me if it is possible. I wanted to make this retropie use retrolink usb NES, SEGA, SNES, and N64 controllers. I was going to do 2 each. Now when I was messing with the controllers, I guess it uses the retroarch file? This file seems to be global? Is there a way to have each of these controllers just for their respective system? Also, is it possible to get a powered USB hub and attach it? (Assuming that the RPIE doesn’t have enough juice to run all the extra ports without it)Topic: No auto config for joystick
Hello, first off i am kind of new to retropie. I installed it a couple days ago and i have been figuring everything out slowly. I used to have an issue were the rom load sequence would start but then it would kick me back into the ES gui. I was able to fix that with using an older verion of libmupen64plus.so.2.0.0 But now when the rom loads I cannot use the joystick. Maybe its just that i am doing something wrong or just misinformed. I have read alot of the forums and on the code.google’s site of mupen64plus. Everything there is kind of said vaguely and in a general sense and nothing specific.
My current dilemma is that I bought a USB controller from Walmart (Local store) mostly because I didnt want to wait for shipping if i were to buy a n64 controller because of the holidays and such. So i was able to configure the controller with ES and i can navigate through the gui and play some of the pre-installed roms, but my controller doesnt work in the mupen64plus environment. I get a error code in the loading sequence: Input Error: No auto-config found for joystick named ‘My-POWER CO.,LTD. 21n2 USB Joystick’ in InputAutoConfig
So from there i located the file for inputautoconfig and i tried renaming the controller to the above description but still got the same error message. So i am not sure if there is a way to configure it through mupen instead of inputting the information manually. I copied some controller configs just to test out and see if the controller would be recognized at all, but with no success.
This is the config that I used. I removed i think it was SDL1 controller and pasted this in instead (I renamed the name to my My-POWER CO.,LTD. 21n2 USB Joystick.
[My-POWER CO.,LTD. 21n2 USB Joystick]
plugged = True
plugin = 2
mouse = False
AnalogDeadzone = 4096,4096
AnalogPeak = 32768,32768
DPad R = hat(0 Right)
DPad L = hat(0 Left)
DPad D = hat(0 Down)
DPad U = hat(0 Up)
Start = button(9)
Z Trig = button(7)
B Button = button(0)
A Button = button(2)
C Button R = axis(3+)
C Button L = axis(3-)
C Button D = axis(2+)
C Button U = axis(2-)
R Trig = button(6)
L Trig = button(4)
Mempak switch =
Rumblepak switch =
X Axis = axis(0-,0+)
Y Axis = axis(1-,1+)
Any help is appreciated!
Hi.
So I managed to get Mario Kart 64 working smoothly on my Raspberry Pi (EmulationStation Mupen64Plus). Problem is, when I start up Mario Kart 64, it prompts me to “PUSH START BUTTON”. In the config file, it looks like that’d be Enter (key(“13”)) just the default that is, but nothing happens when I click it! Escape doesn’t take me away from Mario Kart 64 either, it’s like it doesn’t detect my keyboard at all!
All my .cfg settings are default, except the video ones that are required to make Mupen64Plus work properly. My keyboard works fine in RetroPie elsewise.
Anyone have any ideas?
Need some help and I am getting tired, so here goes. I am not sure if anyone has one of these or has tried to use one, but I am having some success with a minor set back.
I am interested in getting NES, SNES, and Sega Genesis working (classic 3 button Genesis controller).
I have the latest 2.3 installed correctly running on a revision B pi. I went through the initial retroarch controller setup with an SNES controller. Here is my layout.
I have a 4 hub (NES, SNES, Sega, & N64 [do not plan on using N64]) that allows me to use all retro original controllers. That hub runs (via gamecube connector) to another hub (allow for 2 4 port hubs to be connected for 2 player games) which then runs to USB. Following me?
Anyways, regardless of which controller I plug into the 4 port hub, they ALL register as a Huijia USB Gambepad. The SNES AND the NES both are using the same mapping buttons, so that works out really well. Since I initially set up retroarch gamepad in the beginning with the SNES, the NES (which has less buttons) also works perfectly.
SNES Mappings:
up 12
down 14
left 15
right 13
a1
b2
start 9
select 7
left up 4
right up 5
y3
x0NES Mappings:
b 2
sel 7
start 9
u 12
d 14
l 15
r 13
a 1Sega is not working right though – I have not mapped out all of the buttons yet because I need to go to sleep, but what I do know is that C is registering as 0 and from what I can tell (playing Alladin) it is not working (C should throw apples I think). I believe A and B and working right – the D-pad and start works perfect.
My question…
Because each of the 3 controllers will ALWAYS register as the same type because of the hub, is there a way to fix the Sega?
If not, I guess I am happy with NES and SNES, and I may try and enclose everything including the pi in some sort of 3D mold when I am all finished.
Any help is appreciated!
I have been through files and folders to try and edit, but again, all the controllers show as the same type.
Hi there,
I’m editing the mupen64plus.cfg file under ~/.config/mupen64plus/ and I can’t get the resolution to change (by changing ScreenWidth and ScreenHeight under [Video-General]). Also, Joy Mapping Stop isn’t working either. I set it equal to “j0b9” after confirming using jstest that the button I want is button 9 on joystick 0.
Does anyone have any advice/input on this? My config file is below:
# Mupen64Plus Configuration File # This file is automatically read and written by the Mupen64Plus Core library [Audio-OMX] # Mupen64Plus OMX Audio Plugin config parameter version number Version = 1 # Frequency which is used if rom doesn't want to change it DEFAULT_FREQUENCY = 33600 # Swaps left and right channels SWAP_CHANNELS = False # Audio output to go to (0) Analogue jack, (1) HDMI OUTPUT_PORT = 1 # Audio Output Frequncy mode: 0 = Rom Frequency, 1 ROM Frequency if supported (HDMI only), 2 = Standard frequency < Rom Frequency, 3 = Standard frequency > Rom Frequency, [N] Force output frequency DEFAULT_MODE = 0 [Core] # Mupen64Plus Core config parameter set version number. Please don't change this version number. Version = 1.010000 # Draw on-screen display if True, otherwise don't draw OSD OnScreenDisplay = True # Use Pure Interpreter if 0, Cached Interpreter if 1, or Dynamic Recompiler if 2 or more R4300Emulator = 2 # Disable compiled jump commands in dynamic recompiler (should be set to False) NoCompiledJump = False # Disable 4MB expansion RAM pack. May be necessary for some games DisableExtraMem = False # Increment the save state slot after each save operation AutoStateSlotIncrement = False # Activate the R4300 debugger when ROM execution begins, if core was built with Debugger support EnableDebugger = False # Save state slot (0-9) to use when saving/loading the emulator state CurrentStateSlot = 0 # Path to directory where screenshots are saved. If this is blank, the default value of ${UserConfigPath}/screenshot will be used ScreenshotPath = "" # Path to directory where emulator save states (snapshots) are saved. If this is blank, the default value of ${UserConfigPath}/save will be used SaveStatePath = "" # Path to directory where SRAM/EEPROM data (in-game saves) are stored. If this is blank, the default value of ${UserConfigPath}/save will be used SaveSRAMPath = "" # Path to a directory to search when looking for shared data files SharedDataPath = "" # Scheduling policy. 0 for Standard (SCHED_OTHER), 1-99 RealTime FIFO policy with Priority of [N] Scheduler = 10 [CoreEvents] # Mupen64Plus CoreEvents config parameter set version number. Please don't change this version number. Version = 1 # SDL keysym for stopping the emulator Kbd Mapping Stop = 27 # SDL keysym for switching between fullscreen/windowed modes Kbd Mapping Fullscreen = 323 # SDL keysym for saving the emulator state Kbd Mapping Save State = 286 # SDL keysym for loading the emulator state Kbd Mapping Load State = 288 # SDL keysym for advancing the save state slot Kbd Mapping Increment Slot = 0 # SDL keysym for resetting the emulator Kbd Mapping Reset = 290 # SDL keysym for slowing down the emulator Kbd Mapping Speed Down = 291 # SDL keysym for speeding up the emulator Kbd Mapping Speed Up = 292 # SDL keysym for taking a screenshot Kbd Mapping Screenshot = 293 # SDL keysym for pausing the emulator Kbd Mapping Pause = 112 # SDL keysym for muting/unmuting the sound Kbd Mapping Mute = 109 # SDL keysym for increasing the volume Kbd Mapping Increase Volume = 93 # SDL keysym for decreasing the volume Kbd Mapping Decrease Volume = 91 # SDL keysym for temporarily going really fast Kbd Mapping Fast Forward = 102 # SDL keysym for advancing by one frame when paused Kbd Mapping Frame Advance = 47 # SDL keysym for pressing the game shark button Kbd Mapping Gameshark = 103 # Joystick event string for stopping the emulator Joy Mapping Stop = "j0b9" # Joystick event string for switching between fullscreen/windowed modes Joy Mapping Fullscreen = "" # Joystick event string for saving the emulator state Joy Mapping Save State = "" # Joystick event string for loading the emulator state Joy Mapping Load State = "" # Joystick event string for advancing the save state slot Joy Mapping Increment Slot = "" # Joystick event string for taking a screenshot Joy Mapping Screenshot = "" # Joystick event string for pausing the emulator Joy Mapping Pause = "" # Joystick event string for muting/unmuting the sound Joy Mapping Mute = "" # Joystick event string for increasing the volume Joy Mapping Increase Volume = "" # Joystick event string for decreasing the volume Joy Mapping Decrease Volume = "" # Joystick event string for fast-forward Joy Mapping Fast Forward = "" # Joystick event string for pressing the game shark button Joy Mapping Gameshark = "" [Input-SDL-Control1] # Mupen64Plus SDL Input Plugin config parameter version number. Please don't change this version number. version = 2 # Controller configuration mode: 0=Fully Manual, 1=Auto with named SDL Device, 2=Fully automatic mode = 2 # Specifies which joystick is bound to this controller: -1=No joystick, 0 or more= SDL Joystick number device = 0 # SDL joystick name (or Keyboard) name = "Jess Technology Co., Ltd. 3 IN 1 Conversion-Box" # Specifies whether this controller is 'plugged in' to the simulated N64 plugged = True # Specifies which type of expansion pak is in the controller: 1=None, 2=Mem pak, 5=Rumble pak plugin = 2 # If True, then mouse buttons may be used with this controller mouse = False # Scaling factor for mouse movements. For X, Y axes. MouseSensitivity = "2.00,2.00" # The minimum absolute value of the SDL analog joystick axis to move the N64 controller axis value from 0. For X, Y axes. AnalogDeadzone = "4096,4096" # An absolute value of the SDL joystick axis >= AnalogPeak will saturate the N64 controller axis value (at 80). For X, Y axes. For each axis, this must be greater than the corresponding AnalogDeadzone value AnalogPeak = "32768,32768" # Digital button configuration mappings DPad R = "hat(0 Right)" DPad L = "hat(0 Left)" DPad D = "hat(0 Down)" DPad U = "hat(0 Up)" Start = "button(8)" Z Trig = "button(10)" B Button = "button(5)" A Button = "button(2)" C Button R = "button(1)" C Button L = "button(3)" C Button D = "button(11)" C Button U = "button(0)" R Trig = "button(7)" L Trig = "button(6)" Mempak switch = "" Rumblepak switch = "" # Analog axis configuration mappings X Axis = "axis(0-,0+)" Y Axis = "axis(1-,1+)" [Input-SDL-Control2] # Mupen64Plus SDL Input Plugin config parameter version number. Please don't change this version number. version = 2 # Controller configuration mode: 0=Fully Manual, 1=Auto with named SDL Device, 2=Fully automatic mode = 2 # Specifies which joystick is bound to this controller: -1=No joystick, 0 or more= SDL Joystick number device = -1 # SDL joystick name (or Keyboard) name = "" # Specifies whether this controller is 'plugged in' to the simulated N64 plugged = False # Specifies which type of expansion pak is in the controller: 1=None, 2=Mem pak, 5=Rumble pak plugin = 1 # If True, then mouse buttons may be used with this controller mouse = False # Scaling factor for mouse movements. For X, Y axes. MouseSensitivity = "2.00,2.00" # The minimum absolute value of the SDL analog joystick axis to move the N64 controller axis value from 0. For X, Y axes. AnalogDeadzone = "4096,4096" # An absolute value of the SDL joystick axis >= AnalogPeak will saturate the N64 controller axis value (at 80). For X, Y axes. For each axis, this must be greater than the corresponding AnalogDeadzone value AnalogPeak = "32768,32768" # Digital button configuration mappings DPad R = "" DPad L = "" DPad D = "" DPad U = "" Start = "" Z Trig = "" B Button = "" A Button = "" C Button R = "" C Button L = "" C Button D = "" C Button U = "" R Trig = "" L Trig = "" Mempak switch = "" Rumblepak switch = "" # Analog axis configuration mappings X Axis = "" Y Axis = "" [Input-SDL-Control3] # Mupen64Plus SDL Input Plugin config parameter version number. Please don't change this version number. version = 2 # Controller configuration mode: 0=Fully Manual, 1=Auto with named SDL Device, 2=Fully automatic mode = 2 # Specifies which joystick is bound to this controller: -1=No joystick, 0 or more= SDL Joystick number device = -1 # SDL joystick name (or Keyboard) name = "" # Specifies whether this controller is 'plugged in' to the simulated N64 plugged = False # Specifies which type of expansion pak is in the controller: 1=None, 2=Mem pak, 5=Rumble pak plugin = 1 # If True, then mouse buttons may be used with this controller mouse = False # Scaling factor for mouse movements. For X, Y axes. MouseSensitivity = "2.00,2.00" # The minimum absolute value of the SDL analog joystick axis to move the N64 controller axis value from 0. For X, Y axes. AnalogDeadzone = "4096,4096" # An absolute value of the SDL joystick axis >= AnalogPeak will saturate the N64 controller axis value (at 80). For X, Y axes. For each axis, this must be greater than the corresponding AnalogDeadzone value AnalogPeak = "32768,32768" # Digital button configuration mappings DPad R = "" DPad L = "" DPad D = "" DPad U = "" Start = "" Z Trig = "" B Button = "" A Button = "" C Button R = "" C Button L = "" C Button D = "" C Button U = "" R Trig = "" L Trig = "" Mempak switch = "" Rumblepak switch = "" # Analog axis configuration mappings X Axis = "" Y Axis = "" [Input-SDL-Control4] # Mupen64Plus SDL Input Plugin config parameter version number. Please don't change this version number. version = 2 # Controller configuration mode: 0=Fully Manual, 1=Auto with named SDL Device, 2=Fully automatic mode = 2 # Specifies which joystick is bound to this controller: -1=No joystick, 0 or more= SDL Joystick number device = -1 # SDL joystick name (or Keyboard) name = "" # Specifies whether this controller is 'plugged in' to the simulated N64 plugged = False # Specifies which type of expansion pak is in the controller: 1=None, 2=Mem pak, 5=Rumble pak plugin = 1 # If True, then mouse buttons may be used with this controller mouse = False # Scaling factor for mouse movements. For X, Y axes. MouseSensitivity = "2.00,2.00" # The minimum absolute value of the SDL analog joystick axis to move the N64 controller axis value from 0. For X, Y axes. AnalogDeadzone = "4096,4096" # An absolute value of the SDL joystick axis >= AnalogPeak will saturate the N64 controller axis value (at 80). For X, Y axes. For each axis, this must be greater than the corresponding AnalogDeadzone value AnalogPeak = "32768,32768" # Digital button configuration mappings DPad R = "" DPad L = "" DPad D = "" DPad U = "" Start = "" Z Trig = "" B Button = "" A Button = "" C Button R = "" C Button L = "" C Button D = "" C Button U = "" R Trig = "" L Trig = "" Mempak switch = "" Rumblepak switch = "" # Analog axis configuration mappings X Axis = "" Y Axis = "" [UI-Console] # Mupen64Plus UI-Console config parameter set version number. Please don't change this version number. Version = 1 # Directory in which to search for plugins PluginDir = "./" # Filename of video plugin VideoPlugin = "mupen64plus-video-rice.so" # Filename of audio plugin AudioPlugin = "mupen64plus-audio-omx.so" # Filename of input plugin InputPlugin = "mupen64plus-input-sdl.so" # Filename of RSP plugin RspPlugin = "mupen64plus-rsp-hle.so" [Video-General] # Use fullscreen mode if True, or windowed mode if False Fullscreen = False # Width of output window or fullscreen width ScreenWidth = 1024 # Height of output window or fullscreen height ScreenHeight = 768 # If true, activate the SDL_GL_SWAP_CONTROL attribute VerticalSync = False [Video-Rice] # Frame Buffer Emulation (0=ROM default, 1=disable) FrameBufferSetting = 0 # Frequency to write back the frame buffer (0=every frame, 1=every other frame, etc) FrameBufferWriteBackControl = 0 # Render-to-texture emulation (0=none, 1=ignore, 2=normal, 3=write back, 4=write back and reload) RenderToTexture = 0 # Control when the screen will be updated (0=ROM default, 1=VI origin update, 2=VI origin change, 3=CI change, 4=first CI change, 5=first primitive draw, 6=before screen clear, 7=after screen drawn) ScreenUpdateSetting = 4 # Force to use normal alpha blender NormalAlphaBlender = True # Use a faster algorithm to speed up texture loading and CRC computation FastTextureLoading = False # Use different texture coordinate clamping code AccurateTextureMapping = True # Force emulated frame buffers to be in N64 native resolution InN64Resolution = False # Try to reduce Video RAM usage (should never be used) SaveVRAM = False # Enable this option to have better render-to-texture quality DoubleSizeForSmallTxtrBuf = False # Force to use normal color combiner DefaultCombinerDisable = False # Enable game-specific settings from INI file EnableHacks = True # If enabled, graphics will be drawn in WinFrame mode instead of solid and texture mode WinFrameMode = False # N64 Texture Memory Full Emulation (may fix some games, may break others) FullTMEMEmulation = False # Enable vertex clipper for fog operations OpenGLVertexClipper = False # Enable/Disable SSE optimizations for capable CPUs EnableSSE = False # Use GPU vertex shader EnableVertexShader = True # If this option is enabled, the plugin will skip every other frame SkipFrame = True # If this option is enabled, the plugin will only draw every other screen update SkipScreenUpdate = True # If enabled, texture enhancement will be done only for TxtRect ucode TexRectOnly = False # If enabled, texture enhancement will be done only for textures width+height<=128 SmallTextureOnly = False # Select hi-resolution textures based only on the CRC and ignore format+size information (Glide64 compatibility) LoadHiResCRCOnly = True # Enable hi-resolution texture file loading LoadHiResTextures = False # Enable texture dumping DumpTexturesToFiles = False # Display On-screen FPS ShowFPS = True # Use Mipmapping? 0=no, 1=nearest, 2=bilinear, 3=trilinear Mipmapping = 0 # Enable, Disable or Force fog generation (0=Disable, 1=Enable n64 choose, 2=Force Fog) FogMethod = 0 # Force to use texture filtering or not (0=auto: n64 choose, 1=force no filtering, 2=force filtering) ForceTextureFilter = 1 # Primary texture enhancement filter (0=None, 1=2X, 2=2XSAI, 3=HQ2X, 4=LQ2X, 5=HQ4X, 6=Sharpen, 7=Sharpen More, 8=External, 9=Mirrored) TextureEnhancement = 0 # Secondary texture enhancement filter (0 = none, 1-4 = filtered) TextureEnhancementControl = 0 # Color bit depth to use for textures (0=default, 1=32 bits, 2=16 bits) TextureQuality = 0 # Z-buffer depth (only 16 or 32) OpenGLDepthBufferSetting = 32 # Enable/Disable MultiSampling (0=off, 2,4,8,16=quality) MultiSampling = 0 # Color bit depth for rendering window (0=32 bits, 1=16 bits) ColorQuality = 0 # OpenGL level to support (0=auto, 1=OGL_1.1, 2=OGL_1.2, 3=OGL_1.3, 4=OGL_1.4, 5=OGL_1.4_V2, 6=OGL_TNT2, 7=NVIDIA_OGL, 8=OGL_FRAGMENT_PROGRAM) OpenGLRenderSetting = 0 # Enable/Disable Anisotropic Filtering for Mipmapping (0=no filtering, 2-16=quality). This is uneffective if Mipmapping is 0. If the given value is to high to be supported by your graphic card, the value will be the highest value your graphic card can support. Better result with Trilinear filtering AnisotropicFiltering = 0Topic: does n64 or not?
Can’t find anything about this. Some topics has a working n64 and many has problems with it. But there is no topics about how to fix it for emulation station
This is my problem

Is it possible to fix?
Hello, I have a raspberry pi b+ and with the retropie setup script I have tried to install mupen64plus libretro, but every time I do it it fails to make new_dynarec for some reason. Is this happening to anyone else? How can I fix this? Thanks in advance.
Topic: will this work?
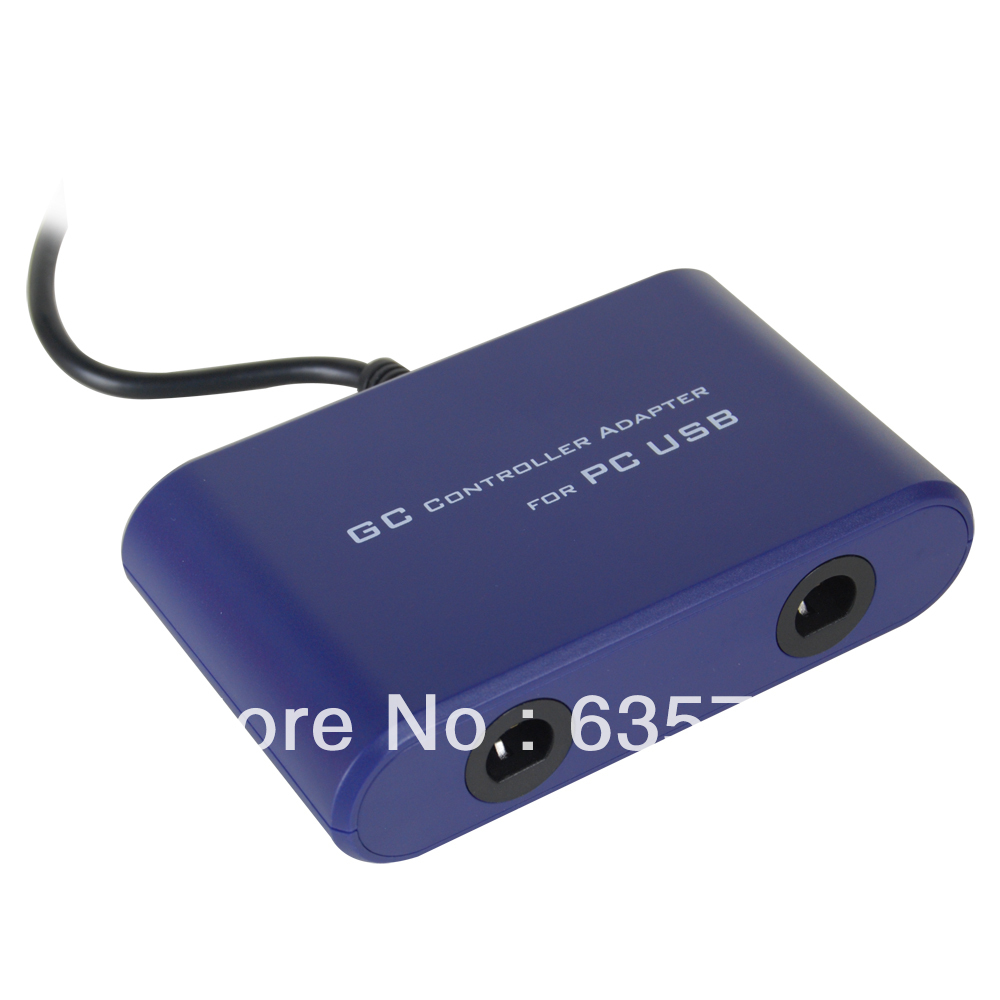
I am wanting to make a setup using original SNES or N64 controllers and hopefully a reset/go-back button so I don’t need a keyboard. First of all will something like this work? http://www.ebay.com/itm/Super-Nintendo-Gtron-SNES-PC-USB-Controller-Adapter-Converter-Free-Shipping-/271565579200?pt=LH_DefaultDomain_0&hash=item3f3a91e3c0
Secondly what about the GPIO adaptor? What else do you need and how hard is it to add this and where do you get the female plugs??
Now is there a easy way to use N64 controllers and if so what is the easiest way?
Thanks~
Topic: another simple question…
While on the topic of simple questions …well I think it is a simple question … how does one go about removing the entries like Apple and IBM and such?? I was wondering if maybe what I need to do (and may solve my other major problem that GBA and N64 doesn’t work) is start from scratch again and run the setup where you load each emulator manually.Would this be your suggestion? Would this get N64 and GBA to work??
Thanks, Jonny
Well I just setup my first retro game project a couple days ago and everything was going great… love the old Mario and Zelda games. I am at the point of trying to load a couple N64 games and they just try to load and goes right back to ES and now I am trying to load a couple GBA games and it says something right away about loading some bios file. I thought the entire point of retropie was to have everything locked, loaded and ready to play BYOG. I would almost pay you if I could if someone would email me personally and walk me through what I have to do to get these systems working as smoothly as all the other systems PLEASE. If anyone can help me I would truly appreciate it.
Thanks, Jonny