-
×
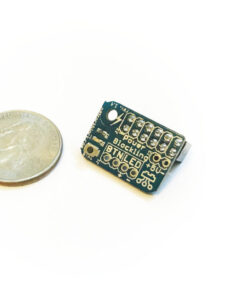 PowerBlockling
1 × $ 8.32
PowerBlockling
1 × $ 8.32 -
×
 USB micro-B Cable - 1 Meter / 3 Foot
1 × $ 2.93
USB micro-B Cable - 1 Meter / 3 Foot
1 × $ 2.93
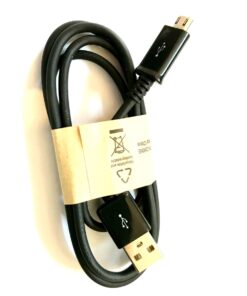 USB micro-B Cable - 1 Meter / 3 Foot
 -
Search Results
-
Well, I’m following this guide on using a Raspberry Pi as an emulation machine:
http://lifehacker.com/how-to-turn-your-raspberry-pi-into-a-retro-game-console-498561192
And I put a blank USB stick into the Pi, then put it onto my PC to copy the roms to the appropriate folders, but there are no Neogeo folder’s for some reason.
So as a complete and utter noob, I have no idea what I need to do in order to get Neogeo games on my Pi :/ Can anyone help me at all, and apologies if I come across as clueless…. because I am lol
hi guys ive searched this and found bits of answers but why in retropie wont pressing my select and start buttons together exit mame it exits all the other emus and all emus run fine buttons setup how i want them etc its jsut this one thing that is baking my noodle thanks for any help Pete

Hey Guys,
i wanted to present you my RetroPie Project.
It isn’t finished yet but i wanted to show it.
I want this console to use while traveling and on a big TV when playing with frinds.
ToDo:
– Find a Place where i can put the USB plugs for Joysticks/WLAN.
– Connect the buttons with the GPIO Pins and write some code that make them recognized by RetroPie.
– Connect a small powerfull rechargeable battery.
– Mini Audio Amplifier and Mini Speaker.
– Power Switch (and LEDs).
– Cut the holes for HDMI and USB.
– Close all the other holes.
– Hedaphone JAck.Problems:
– Very little Space to use the original Start, Select, Volume, etc. Buttons.
– R and L Buttons are very difficult to get working without the original Pads and PCB.
I got everything up and working with retropie, but I found a problem with static electricity. When I’m playing with a usb snes controller everything works great until my dog comes over and gives me a static shock. Once that happens, the controller no longer works and I have to unplug the power to get the rpi to work again. Has this happened to anyone else/any suggestions on how to fix this besides getting rid of my dog!
I wanna use a super nintendo controller (plug and play) for my project but i need an analog stick and 2 more buttons for it to work. do i just use a wii nunchuck adapter and try to sqeeze it into the case or do i have to solder the two controllers to gpio or something? i want it to be for a single player but have 2 controllers under one player. i may consider using
a modified wiimote with some metal rods connecting fake buttons to real buttons and have a nunchuck on it, but i would need a dongle and an extra wiimote and nunchuck, which would exit my $30 budget for peripherals. please help.(P.S: does a mayflash wii classic controller usb adapter need any drivers? this could be a painless way out if its possible but i would still need one more button for the emulators i plan on using.)
To Anyone:
I haven’t been able to get my SRAM files to save. When I cleanly exit the emulator (with select/start on my USB gamepad), I get an error in saving the state and it writes to a recovery file instead. I have tried manipulating the retroarch.cfg to force it to a specifice savefile_directory and it still got the same error. I’m at a loss. Any ideas?
I’m using a Teensy 2.0 with the SNES controller software from Adafruit loaded on it. Got that to work, when I plug it into my computer and go to TextEdit it outputs the characters I tell it to according to each button press. When I launch emulation station it detects it as a keyboard and works fine within emulationstation, but not in the emulators themselves. Two buttons work, it can pause the emulation, and the equivalent of the start button functions, but no d-pad or anything else, however the keyboard works fine within emulators/roms.
Seems to be a fairly common challenge, some posts I read are resolved and most aren’t. I’m using the latest RetroPie version, the one where most directories start with /opt instead of /home, like on most posts about the same problem I’m having. I have run a configuration program, the one where it will give you 4 seconds to input your button presses, but that didn’t help out much either, and I can’t remember or find that command again. Also tried to edit the retroarch.cfg file as well, but that didn’t change much either.
What do I need to do to get this working? It has been a nightmare trying to figure this out
Topic: Help with controller
I am new to retro pie and the raspberry pi in general. I have managed to get the latest sd card image installed and setup playing a few games. I’m struggling to find the file that was created when I setup my USB snes controller. Any help locating this would really be appreciated.
Hi all,
I’ve spent a while looking through this forum trying to find out how to set up a PS2 controller (via a usb adaptor) to work with RetroPie.
I’ve ran
sudo chown pi /opt/retropie/configs/all/retroarch.cfg
cd /opt/retropie/emulators/RetroArch/installdir/bin
sudo ./retroarch-joyconfig -j * >> /opt/retropie/configs/all/retroarch.cfg
And that let me configure the controller, which was nice, however when I came to play a couple of games, it turns out the button mapping is all wrong.
So I plan on manually editing the config file. To do that, I need to know what each button press results in, I’ve seen that jstest /dev/input/js0 will let me do this.
However, when I try to run jstest /dev/input/js0 I just get “-bash: jstest: command not found”
So how do you run jstest?
I’m extremely new to all this, so I realise I might be being incredibly stupid, so please treat me as if you are explaining this to your dog!
Cheers in advance
Andy
Hi All,
Fairly new to this whole thing and hoping someone can help.
I have just purchased a to use with RetroPie.
However, when I try and configure it using emulation station setup the “UP” and “LEFT” keys are not recognised. If I try and manually modify the es_input.cfg file this also does not solve the issue. My current es_input.cfg is as follows:
<?xml version=”1.0″?>
<inputList>
<inputConfig type=”joystick” deviceName=”INNEX SNES Controller USB”>
<input name=”a” type=”button” id=”1? value=”1? />
<input name=”b” type=”button” id=”2? value=”1? />
<input name=”down” type=”axis” id=”1? value=”1? />
<input name=”left” type=”axis” id=”0? value=”-1? />
<input name=”pagedown” type=”button” id=”5? value=”1? />
<input name=”pageup” type=”button” id=”4? value=”1? />
<input name=”right” type=”axis” id=”0? value=”1? />
<input name=”select” type=”button” id=”8? value=”1? />
<input name=”start” type=”button” id=”9? value=”1? />
<input name=”up” type=”axis” id=”1? value=”-1? />
</inputConfig>
</inputList>It looks to me like a driver issue. Has any found a solution to this issue or see something wrong with my es_input.cfg?
Thanks.
Hello guys, I’m new here.
Wanted to know how to set the control to the games, because when I set in the beginning so the squeegee retropie 2.3 it works on the interface, but quanod choose a game he no longer works for the game.
What’s wrong?
I have a usb snes controller and version 2.3 of the retropie
project and the raspberry pi model b All of the ROMS I have
downloaded don’t work with my controller! I got all my ROMS
from CoolROMS.com! I was wondering if there are other good
sites to get ROMS or if I need to configure stuff.Thanks in advance -meattrevorca
Total noob here. I am having a problems getting specific controllers to work with specific emulators. My setup is kinda unique so let me describe that first. My project was to make a NES box that housed everything inside ie you would not know that it is an emulator from just looking at it. Inside there are 2 of these http://www.retrousb.com/product_info.php?cPath=21&products_id=44 that are permanently connected to my USB hub, which is inside. On the other end they are soldered to the NES input. They work great with the NES, Atari, and Gameboy Emulators. The problem is that they are always seen as the #1 and #2 controllers because they are technically always plugged in (even if a NES controller isnt connected to the normal outside connection). I have 2 free USB ports on my hub and would like to configure it where a 360 controller will be the default controller for the PSX emulator (since it has analogs. When I go in to the PSX config file I use the input_player_1=”2″ to force it and have all the other buttons inputs. This is where it gets weird…When I try to play a Playstation game none of the controllers are recognized. It always rolls back to the keyboard. I have tried unplugging everything except the 360 controller (and the 2 internal NES usb’s that cant be unplugged easily) I also know that the 360 controller is connected and should work because it reports on jstest and I also use it with emulationstation. Hopefully I have been sort of clear. Any help would be appreciated. Thanks
Topic: Mame cannot find joystick
Hi all, after installing everything following the step-by-step guide all is working but mame.
The joystick works fine in every other emulator (joystick is a usb mayflash fighting stick). Once Mame is launched only the keyboard and 1 button of the joystick works when i try to set up the keys from the TAB menu.I’m super new to this thanks everyone for helping out –
So I’m using usb snes controllers. Both of them work and I can quit the game with “select + start” but the save/load states don’t work? Anyone help me out?
# Skeleton config file for RetroArch
# Save all save files (*.srm) to this directory. This includes related files like .bsv, .rtc, .psrm, etc …
# This will be overridden by explicit command line options.
savefile_directory = /home/pi/RetroPie/# Save all save states (*.state) to this directory.
# This will be overridden by explicit command line options.
savestate_directory = /home/pi/RetroPie/# If set to a directory, Content which is temporarily extracted
# will be extracted to this directory.
# extraction_directory =# Automatically saves a savestate at the end of RetroArch’s lifetime.
# The path is $SRAM_PATH.auto.
# RetroArch will automatically load any savestate with this path on startup if savestate_auto_load is set.
# savestate_auto_save = false
# savestate_auto_load = true# Load libretro from a dynamic location for dynamically built RetroArch.
# This option is mandatory.# Path to a libretro implementation.
# libretro_path = “/path/to/libretro.so”# A directory for where to search for libretro core implementations.
# libretro_directory =# Sets log level for libretro cores (GET_LOG_INTERFACE).
# If a log level issued by a libretro core is below libretro_log_level, it is ignored.
# DEBUG logs are always ignored unless verbose mode is activated (–verbose).
# DEBUG = 0, INFO = 1, WARN = 2, ERROR = 3.
# libretro_log_level = 0# Enable or disable verbosity level of frontend.
# log_verbosity = false# Enable or disable RetroArch performance counters
# perfcnt_enable = false# Path to core options config file.
# This config file is used to expose core-specific options.
# It will be written to by RetroArch.
# A default path will be assigned if not set.
core_options_path = /opt/retropie/configs/all/retroarch-core-options.cfg# Path to content load history file.
# RetroArch keeps track of all content loaded in the menu and from CLI directly for convenient quick loading.
# A default path will be assigned if not set.
# game_history_path =# Number of entries that will be kept in content history file.
# game_history_size = 100# Sets the “system” directory.
# Implementations can query for this directory to load BIOSes, system-specific configs, etc.
system_directory = /home/pi/RetroPie/roms/../BIOS
# Sets start directory for menu content browser.
# rgui_browser_directory =# Content directory. Interacts with RETRO_ENVIRONMENT_GET_CONTENT_DIRECTORY.
# Usually set by developers who bundle libretro/RetroArch apps to point to assets.
# content_directory =# Assets directory. This location is queried by default when menu interfaces try to look for
# loadable assets, etc.
# assets_directory =# Sets start directory for menu config browser.
# rgui_config_directory =# Show startup screen in menu.
# Is automatically set to false when seen for the first time.
# This is only updated in config if config_save_on_exit is set to true, however.
# rgui_show_start_screen = true# Flushes config to disk on exit. Useful for menu as settings can be modified.
# Overwrites the config. #include’s and comments are not preserved.
config_save_on_exit = false# Load up a specific config file based on the core being used.
# core_specific_config = false#### Video
# Video driver to use. “gl”, “xvideo”, “sdl”
video_driver = “gl”# Which OpenGL context implementation to use.
# Possible ones for desktop are: glx, x-egl, kms-egl, sdl-gl, wgl.
# By default, tries to use first suitable driver.
# video_gl_context =# Windowed xscale and yscale
# (Real x res: base_size * xscale * aspect_ratio, real y res: base_size * yscale)
# video_xscale = 3.0
# video_yscale = 3.0# Fullscreen resolution. Resolution of 0 uses the resolution of the desktop.
# video_fullscreen_x = 0
# video_fullscreen_y = 0# Start in fullscreen. Can be changed at runtime.
# video_fullscreen = false# If fullscreen, prefer using a windowed fullscreen mode.
# video_windowed_fullscreen = true# Which monitor to prefer. 0 (default) means no particular monitor is preferred, 1 and up (1 being first monitor),
# suggests RetroArch to use that particular monitor.
# video_monitor_index = 0# Forcibly disable composition. Only works in Windows Vista/7 for now.
# video_disable_composition = false# Video vsync.
# video_vsync = true# Attempts to hard-synchronize CPU and GPU. Can reduce latency at cost of performance.
# video_hard_sync = false# Sets how many frames CPU can run ahead of GPU when using video_hard_sync.
# Maximum is 3.
# video_hard_sync_frames = 0# Inserts a black frame inbetween frames.
# Useful for 120 Hz monitors who want to play 60 Hz material with eliminated ghosting.
# video_refresh_rate should still be configured as if it is a 60 Hz monitor (divide refresh rate by 2).
# video_black_frame_insertion = false# Use threaded video driver. Using this might improve performance at possible cost of latency and more video stuttering.
video_threaded = true# Use a shared context for HW rendered libretro cores.
# Avoids having to assume GL state changes inbetween frames.
# video_shared_context = false# Smoothens picture with bilinear filtering. Should be disabled if using pixel shaders.
video_smooth = false# Forces rendering area to stay equal to content aspect ratio or as defined in video_aspect_ratio.
# video_force_aspect = true# Only scales video in integer steps.
# The base size depends on system-reported geometry and aspect ratio.
# If video_force_aspect is not set, X/Y will be integer scaled independently.
# video_scale_integer = false# A floating point value for video aspect ratio (width / height).
# If this is not set, aspect ratio is assumed to be automatic.
# Behavior then is defined by video_aspect_ratio_auto.
video_aspect_ratio = 1.33# If this is true and video_aspect_ratio is not set,
# aspect ratio is decided by libretro implementation.
# If this is false, 1:1 PAR will always be assumed if video_aspect_ratio is not set.
# video_aspect_ratio_auto = false# Forces cropping of overscanned frames.
# Exact behavior of this option is implementation specific.
# video_crop_overscan = true# Path to shader. Shader can be either Cg, CGP (Cg preset) or GLSL, GLSLP (GLSL preset)
# video_shader = “/path/to/shader.{cg,cgp,glsl,glslp}”# Load video_shader on startup.
# Other shaders can still be loaded later in runtime.
# video_shader_enable = false# Defines a directory where shaders (Cg, CGP, GLSL) are kept for easy access.
video_shader_dir = /opt/retropie/emulators/RetroArch/shader/# CPU-based video filter. Path to a dynamic library.
# video_filter =# Path to a font used for rendering messages. This path must be defined to enable fonts.
# Do note that the _full_ path of the font is necessary!
# video_font_path =# Size of the font rendered.
# video_font_size = 32# Enable usage of OSD messages.
# video_font_enable = true# Offset for where messages will be placed on screen. Values are in range 0.0 to 1.0 for both x and y values.
# [0.0, 0.0] maps to the lower left corner of the screen.
# video_message_pos_x = 0.05
# video_message_pos_y = 0.05# Color for message. The value is treated as a hexadecimal value.
# It is a regular RGB hex number, i.e. red is “ff0000”.
# video_message_color = ffffff# Video refresh rate of your monitor.
# Used to calculate a suitable audio input rate.
# video_refresh_rate = 59.95# Allows libretro cores to set rotation modes.
# Setting this to false will honor, but ignore this request.
# This is useful for vertically oriented content where one manually rotates the monitor.
# video_allow_rotate = true# Forces a certain rotation of the screen.
# The rotation is added to rotations which the libretro core sets (see video_allow_rotate).
# The angle is <value> * 90 degrees counter-clockwise.
# video_rotation = 0#### Audio
# Enable audio.
# audio_enable = true# Audio output samplerate.
# audio_out_rate = 48000# Audio resampler backend. Which audio resampler to use.
# Default will use “sinc”.
# audio_resampler =# Audio driver backend. Depending on configuration possible candidates are: alsa, pulse, oss, jack, rsound, roar, openal, sdl, xaudio.
# audio_driver =# Override the default audio device the audio_driver uses. This is driver dependant. E.g. ALSA wants a PCM device, OSS wants a path (e.g. /dev/dsp), Jack wants portnames (e.g. system:playback1,system:playback_2), and so on …
# audio_device =# Audio DSP plugin that processes audio before it’s sent to the driver. Path to a dynamic library.
# audio_dsp_plugin =# Will sync (block) on audio. Recommended.
# audio_sync = true# Desired audio latency in milliseconds. Might not be honored if driver can’t provide given latency.
# audio_latency = 64# Enable audio rate control.
# audio_rate_control = true# Controls audio rate control delta. Defines how much input rate can be adjusted dynamically.
# Input rate = in_rate * (1.0 +/- audio_rate_control_delta)
# audio_rate_control_delta = 0.005# Audio volume. Volume is expressed in dB.
# 0 dB is normal volume. No gain will be applied.
# Gain can be controlled in runtime with input_volume_up/input_volume_down.
# audio_volume = 0.0#### Overlay
# Enable overlay.
# input_overlay_enable = false# Path to input overlay
# input_overlay =# Overlay opacity
# input_overlay_opacity = 1.0# Overlay scale
# input_overlay_scale = 1.0#### Input
# Input driver. Depending on video driver, it might force a different input driver.
# input_driver = sdl# Joypad driver. (Valid: linuxraw, sdl, dinput)
# input_joypad_driver =# Keyboard layout for input driver if applicable (udev/evdev for now).
# Syntax is either just layout (e.g. “no”), or a layout and variant separated with colon (“no:nodeadkeys”).
# input_keyboard_layout =# Defines axis threshold. Possible values are [0.0, 1.0]
# input_axis_threshold = 0.5# Enable input auto-detection. Will attempt to autoconfigure
# joypads, Plug-and-Play style.
input_autodetect_enable = true# Directory for joypad autoconfigs (PC).
# If a joypad is plugged in, that joypad will be autoconfigured if a config file
# corresponding to that joypad is present in joypad_autoconfig_dir.
# Input binds which are made explicit (input_playerN_*_btn/axis) will take priority over autoconfigs.
# Autoconfigs can be created with retroarch-joyconfig, manually, or with a frontend.
# Requires input_autodetect_enable to be enabled.
joypad_autoconfig_dir = /opt/retropie/emulators/RetroArch/configs/# Enable debug input key reporting on-screen.
# input_debug_enable = false# Sets which libretro device is used for a player.
# Devices are indentified with a number.
# This is normally saved by the menu.
# Device IDs are found in libretro.h.
# These settings are overridden by explicit command-line arguments which refer to input devices.
# None: 0
# Joypad (RetroPad): 1
# Mouse: 2
# Keyboard: 3
# Generic Lightgun: 4
# Joypad w/ Analog (RetroPad + Analog sticks): 5
# Multitap (SNES specific): 257
# Super Scope (SNES specific): 260
# Justifier (SNES specific): 516
# Justifiers (SNES specific): 772# input_libretro_device_p1 =
# input_libretro_device_p2 =
# input_libretro_device_p3 =
# input_libretro_device_p4 =
# input_libretro_device_p5 =
# input_libretro_device_p6 =
# input_libretro_device_p7 =
# input_libretro_device_p8 =# Keyboard input. Will recognize letters (“a” to “z”) and the following special keys (where “kp_”
# is for keypad keys):
#
# left, right, up, down, enter, kp_enter, tab, insert, del, end, home,
# rshift, shift, ctrl, alt, space, escape, add, subtract, kp_plus, kp_minus,
# f1, f2, f3, f4, f5, f6, f7, f8, f9, f10, f11, f12,
# num0, num1, num2, num3, num4, num5, num6, num7, num8, num9, pageup, pagedown,
# keypad0, keypad1, keypad2, keypad3, keypad4, keypad5, keypad6, keypad7, keypad8, keypad9,
# period, capslock, numlock, backspace, multiply, divide, print_screen, scroll_lock,
# tilde, backquote, pause, quote, comma, minus, slash, semicolon, equals, leftbracket,
# backslash, rightbracket, kp_period, kp_equals, rctrl, ralt
#
# Keyboard input, Joypad and Joyaxis will all obey the “nul” bind, which disables the bind completely,
# rather than relying on a default.
input_player1_a = x
input_player1_b = z
input_player1_y = a
input_player1_x = s
input_player1_start = enter
input_player1_select = rshift
input_player1_l = q
input_player1_r = w
input_player1_left = left
input_player1_right = right
input_player1_up = up
input_player1_down = down
# input_player1_l2 =
# input_player1_r2 =
# input_player1_l3 =
# input_player1_r3 =# Two analog sticks (DualShock-esque).
# Bound as usual, however, if a real analog axis is bound,
# it can be read as a true analog.
# Positive X axis is right, Positive Y axis is down.
# input_player1_l_x_plus =
# input_player1_l_x_minus =
# input_player1_l_y_plus =
# input_player1_l_y_minus =
# input_player1_r_x_plus =
# input_player1_r_x_minus =
# input_player1_r_y_plus =
# input_player1_r_y_minus =# If desired, it is possible to override which joypads are being used for player 1 through 8.
# First joypad available is 0.
# input_player1_joypad_index = 0
# input_player2_joypad_index = 1
# input_player3_joypad_index = 2
# input_player4_joypad_index = 3
# input_player5_joypad_index = 4
# input_player6_joypad_index = 5
# input_player7_joypad_index = 6
# input_player8_joypad_index = 7# Joypad buttons.
# Figure these out by using RetroArch-Phoenix or retroarch-joyconfig.
# You can use joypad hats with hnxx, where n is the hat, and xx is a string representing direction.
# E.g. “h0up”
input_player1_joypad_index = 0
input_player1_b_btn =
input_player1_a_btn =
input_player1_y_btn =
input_player1_x_btn =
input_player1_l_btn =
input_player1_r_btn =
input_player1_start_btn =
input_player1_select_btn =
input_player1_l_y_plus =
input_player1_up_axis =
input_player1_l_y_minus =
input_player1_down_axis =
input_player1_l_x_minus =
input_player1_left_axis =
input_player1_l_x_plus =
input_player1_right_axis =# Axis for RetroArch D-Pad.
# Needs to be either ‘+’ or ‘-‘ in the first character signaling either positive or negative direction of the axis, then the axis number.
# Do note that every other input option has the corresponding _btn and _axis binds as well; they are omitted here for clarity.
# input_player1_left_axis =
# input_player1_right_axis =
# input_player1_up_axis =
# input_player1_down_axis =# Holding the turbo while pressing another button will let the button enter a turbo mode
# where the button state is modulated with a periodic signal.
# The modulation stops when the button itself (not turbo button) is released.
# input_player1_turbo =# Describes the period and how long of that period a turbo-enabled button should behave.
# Numbers are described in frames.
# input_turbo_period = 6
# input_turbo_duty_cycle = 3# This goes all the way to player 8 (*_player2_*, *_player3_*, etc), but omitted for clarity.
# All input binds have corresponding binds for keyboard (none), joykeys (_btn) and joyaxes (_axis) as well.# Toggles fullscreen.
# input_toggle_fullscreen = f
# Saves state.
# input_save_state = f2
# Loads state.
# input_load_state = f4# State slots. With slot set to 0, save state name is *.state (or whatever defined on commandline).
# When slot is != 0, path will be $path%d, where %d is slot number.
# input_state_slot_increase = f7
# input_state_slot_decrease = f6# Toggles between fast-forwarding and normal speed.
# input_toggle_fast_forward = space# Hold for fast-forward. Releasing button disables fast-forward.
# input_hold_fast_forward = l# Key to exit RetroArch cleanly.
# Killing it in any hard way (SIGKILL, etc) will terminate RetroArch without saving RAM, etc.
# On Unix-likes, SIGINT/SIGTERM allows a clean deinitialization.
input_exit_emulator = escape# Applies next and previous shader in directory.
input_shader_next = m
input_shader_prev = n# Hold button down to rewind. Rewinding must be enabled.
input_rewind = r# Toggle between recording and not.
# input_movie_record_toggle = o# Toggle between paused and non-paused state
# input_pause_toggle = p# Frame advance when content is paused
# input_frame_advance = k# Reset the content.
# input_reset = h# Cheats.
# input_cheat_index_plus = y
# input_cheat_index_minus = t
# input_cheat_toggle = u# Mute/unmute audio
# input_audio_mute = f9# Take screenshot
# input_screenshot = f8# Netplay flip players.
# input_netplay_flip_players = i# Hold for slowmotion.
# input_slowmotion = e# Enable other hotkeys.
# If this hotkey is bound to either keyboard, joybutton or joyaxis,
# all other hotkeys will be disabled unless this hotkey is also held at the same time.
# This is useful for RETRO_KEYBOARD centric implementations
# which query a large area of the keyboard, where it is not desirable
# that hotkeys get in the way.# Alternatively, all hotkeys for keyboard could be disabled by the user.
input_enable_hotkey = escape# Increases audio volume.
# input_volume_up = kp_plus
# Decreases audio volume.
# input_volume_down = kp_minus# Toggles to next overlay. Wraps around.
# input_overlay_next =# Toggles eject for disks. Used for multiple-disk content.
# input_disk_eject_toggle =# Cycles through disk images. Use after ejecting.
# Complete by toggling eject again.
# input_disk_next =# Toggles menu.
# input_menu_toggle = f1# Toggles mouse grab. When mouse is grabbed, RetroArch hides the mouse,
# and keeps the mouse pointer inside the window to allow relative mouse input
# to work better.
# input_grab_mouse_toggle = f11#### Menu
# Menu driver to use. “rgui”, “lakka”, etc.
# menu_driver = “rgui”#### Camera
# Override the default camera device the camera driver uses. This is driver dependant.
# camera_device =# Override the default privacy permission for cores that want to access camera services. Is “false” by default.
# camera_allow = false#### Location
# Override the default privacy permission for cores that want to access location services. Is “false” by default.
# location_allow = false#### Netplay
# When being client over netplay, use keybinds for player 1.
# netplay_client_swap_input = false# The nickname being used for playing online.
# netplay_nickname =# The amount of delay frames to use for netplay. Increasing this value will increase
# performance, but introduce more latency.
# netplay_delay_frames = 0# Netplay mode for the current user.
# false is Server, true is Client.
# netplay_mode = false# Enable or disable spectator mode for the player during netplay.
# netplay_spectator_mode_enable = false# The IP Address of the host to connect to.
# netplay_ip_address =# The port of the host IP Address. Can be either a TCP or an UDP port.
# netplay_ip_port = 55435#### Misc
# Enable rewinding. This will take a performance hit when playing, so it is disabled by default.
rewind_enable = false# Rewinding buffer size in megabytes. Bigger rewinding buffer means you can rewind longer.
# The buffer should be approx. 20MB per minute of buffer time.
rewind_buffer_size = 10# Rewind granularity. When rewinding defined number of frames, you can rewind several frames at a time, increasing the rewinding speed.
rewind_granularity = 2# Pause gameplay when window focus is lost.
# pause_nonactive = true# Autosaves the non-volatile SRAM at a regular interval. This is disabled by default unless set otherwise.
# The interval is measured in seconds. A value of 0 disables autosave.
# autosave_interval =# Path to XML cheat database (as used by bSNES).
# cheat_database_path =# Path to XML cheat config, a file which keeps track of which
# cheat settings are used for individual games.
# If the file does not exist, it will be created.
# cheat_settings_path =# Directory to dump screenshots to.
# screenshot_directory =# Records video after CPU video filter.
# video_post_filter_record = false# Records output of GPU shaded material if available.
# video_gpu_record = false# Screenshots output of GPU shaded material if available.
video_gpu_screenshot = true# Block SRAM from being overwritten when loading save states.
# Might potentially lead to buggy games.
# block_sram_overwrite = false# When saving a savestate, save state index is automatically increased before
# it is saved.
# Also, when loading content, the index will be set to the highest existing index.
# There is no upper bound on the index.
# savestate_auto_index = false# Slowmotion ratio. When slowmotion, content will slow down by factor.
# slowmotion_ratio = 3.0# The maximum rate at which content will be run when using fast forward. (E.g. 5.0 for 60 fps content => 300 fps cap).
# RetroArch will go to sleep to ensure that the maximum rate will not be exceeded.
# Do not rely on this cap to be perfectly accurate.
# A negative ratio equals no FPS cap.
# fastforward_ratio = -1.0# Enable stdin/network command interface.
# network_cmd_enable = false
# network_cmd_port = 55355
# stdin_cmd_enable = falseinput_enable_hotkey_btn = “8”
input_exit_emulator_btn = “9”input_save_state_btn = “5”
input_load_state_btn = “4”

