-
Search Results
-
I built a fully set up RetroPie game box as a gift for my brother’s birthday. He’s smart, but doesn’t have experience with the Raspberry Pi or RetroPie Project. So I wrote up a QuickStart guide so that he would be able to get gaming immediately:
REKt QuickStart Guide
Congratulations on your purchase of a RetroPie Entertainment Kit (REKt)! Now that you’ve gotten REKt, you can proceed to crush all your friends, and enemies, in classic arcade game style.
Your kit includes:
1 Raspberry Pi model 2B
1 Raspberry Pi model 2B case
1 32g Micro SD card
1 USB Classic Gamepad
1 Power Adapter
1 HDMI cable
various decorative stickersYour kit has come preinstalled and preassembled for ease of use. This still leaves only a few steps to glory:
1. Plug the HDMI cable into your TV and REKt.
2. Connect the USB Gamepad to REKt.
3. Connect REKt to power. This should turn REKt on.If your TV is on and set to the correct input, you should see REKt loading. This can take a minute or two, mainly to load the HUGE number of games that REKt comes with. (If you don’t get to a loading screen, unplug the power, give it a few seconds and plug it back in.)
4. Choose your game system and game of choice using the gamepad, and become a video game hero!
Important Notes:
- Getting back to the REKt console (emulation station) from within a game is as easy as holding the SELECT and START buttons at the same time.
- In MAME, adding coins and player_start can be achieved by holding SELECT and pressing the L or R buttons on the top of the gamepad. START pauses the game, and START + R brings up the Advance Mame options.
- The game systems have been unthoroughly tested and will likely work with varying success. MAME especially is prone to this, but happily the system was beta-tested with Michael Jackson’s “Moonwalker” and we can report that the last listed ROM works well.
- There appears to be some trouble with game metadata. For instance, the game-box image and game description can be added to enhance the REKt console. However, this drastically increased the system load time. To ensure as many barriers to gaming were removed as possible, this feature was foregone.
- The firmware at time of shipping was Version 3.0 BETA 2. So, while mostly stable and feature-rich, there could be a few bugs here and there.
- Currently shipping systems with ROMS included: Atari 2600, NES, SNES, SEGA Genesis (Megadrive), GameBoy Advance, MAME. Many other systems are available.
Get more info at:
The RetroPie Project – https://www.petrockblock.com/retropie/
Emulation Station – http://emulationstation.org/
HELLO!
I’ve been searching everywhere for a definitive answer and have found just a lot of people hitting the same wall as I am.
All I want to do is set up my Raspi to use a keyboard as player 1’s controls and a usb controller as player 2’s.
Currently if I have a keyboard and a USB controller (like an XBox One controller) plugged in they both try to act as player 1 and nothing gives input to player 2.
I have tried things like this:
sudo ./retroarch-joyconfig -j 0 >> /opt/retropie/configs/all/retroarch.cfgNo matter what I try I get this response:
RetroArch: input_joypad_init_first: Found joypad driver: “udev”.
Couldn’t open joystick #0.I’ve tried changing the number after “-j” to 0, 1 and 2 and nothing fixes this.
Any thoughts? Ideas? step by step tutorials would be appreciated !
Topic: Basic initial setup?
I can’t believe there isn’t a step-by-step guide to getting started. Or, if there is, it’s pretty hard to find. I have my roms, I have my pi-2, I have my sd-card, and I have my download. I *assume* you write the retropie image to the sd-card. Score! it boots up… but it complains that there are no roms. I have my roms on another USB… there is no “roms” directory on the sd-card… can somebody point me in the right direction? What’s next??
Hi,
i plug my arcade buttons ans stick with a USB interface. All stick and buttons are recognized in mame emu. The only problem is the slowness when i maintain left or right stick.
For example, in a shoot em up like space invaders, if i maintain left or right, the ship moves but slowly. I feel that there is a dead time between each right or each left. If i use the keyboard, the ship moves normally.
Can you help me ?
Thanks a lotTopic: Config w/ and w/o Keyboard
Hi all,
First of all, I love retropie !
Pi Model: 2
RetroPie Version Used: 3.0.0 Beta 2
Built From: SD Image
USB Devices connected: Keyboard, Wireless XBOX 360 Receiver, WiFi Card
Controller used: XBOX 360 (Wireless)
Error messages received: None
Guide used: Wiki Guide for XBOX 360 controller (Option 3)I managed to get my 2 controller correctly setup in RetroArch.cfg and the emulators which use this config are working, but only when I don’t have the keyboard attached. When the Keyboard is attached, it will always be assigned as P1.
Sometimes I need the keyboard (config of Retroarch etc..). Is there a way that I can assure that the system uses my XBOX 360 controllers as P1 and P2 AND that the keyboard can be used to change config (hotkeys …) ?
Thanks
Topic: Issue loading SNES emulator
Pi Model: 2B
RetroPie Version Used: 3.0.0 Beta 2
Built From: SD Image
USB Devices connected: Madcatz Street Fighter 4 Xbox 360 controller
Controller used: Madcatz Street Fighter 4 Xbox 360 controller
Error messages received: See below
Guide used: None, just flashed using Win32 Disk Imager
File: /home/pi/RetroPie/roms/snes/ActRaiser.smc
Attachment of config files: No changes from default
How to replicate the problem:I’ve uploaded a few SNES roms to this installation from the downloaded 3.0.0. Beta 2 SD Image. When I try to launch any (eg. ActRaiser above) I get a blank screen asking me to press x or m to configure launch options and that the Sound Buffer has been initialised to 4096 samples. The screen hangs. /tmp/runcommand.log contains the following:
RetroArch: rarch_log_libretro: [libretro INFO] :: Frontend supports RGB565 – will use that instead of XRGB1555.
RetroArch [ERROR] :: load_content_dont_need_fullpath :: Could not read content file “/home/pi/RetroPie/roms/snes/ActRaiser.smc”.
RetroArch [WARN] :: gl_glsl_init :: [GL]: Stock GLSL shaders will be used.
RetroArch [WARN] :: udev_input_init :: [udev]: Couldn’t open any keyboard, mouse or touchpad. Are permissions set correctly for /dev/input/event*?Any ideas?
As the title states, certain buttons will not register while I’m doing SNES emulators.
I’ve tried running the Retroarch controller setup, and it detects all the buttons on the controller. (Which is a generic USB SNES controller)
I know that they work correctly in the NeoGeo emulator (although they’re mapped incorrectly).
I’m running Retropie V3 B2, on a Raspberry Pi 2.Any thoughts?
Hi, I watched Floob’s video (all 60 minutes!) on config files in v3b2, and I’m sure the info was in there, but I’m going to have to go back and take detailed notes, I think. In the meantime, can anyone tell me how to specify a controller per emulator?
I’ve built a small console device that has 2 sets of arcade style controls interfaced using the xin-mo usb controller. After a bunch of mucking around, it actually works pretty good. I also have a Logitech dual action usb gamepad that I’d like to use for it’s analog joysticks, basically in the n64 and psx titles. Everything works fine if I plug and unplug the appropriate controllers, but is there a way to specify that the Logitech is to be used for player 1 in those two emulators, while the xin mo is used for P1 in the others? Any help is appreciated!
JaredHey guys,
Thanks for reading.
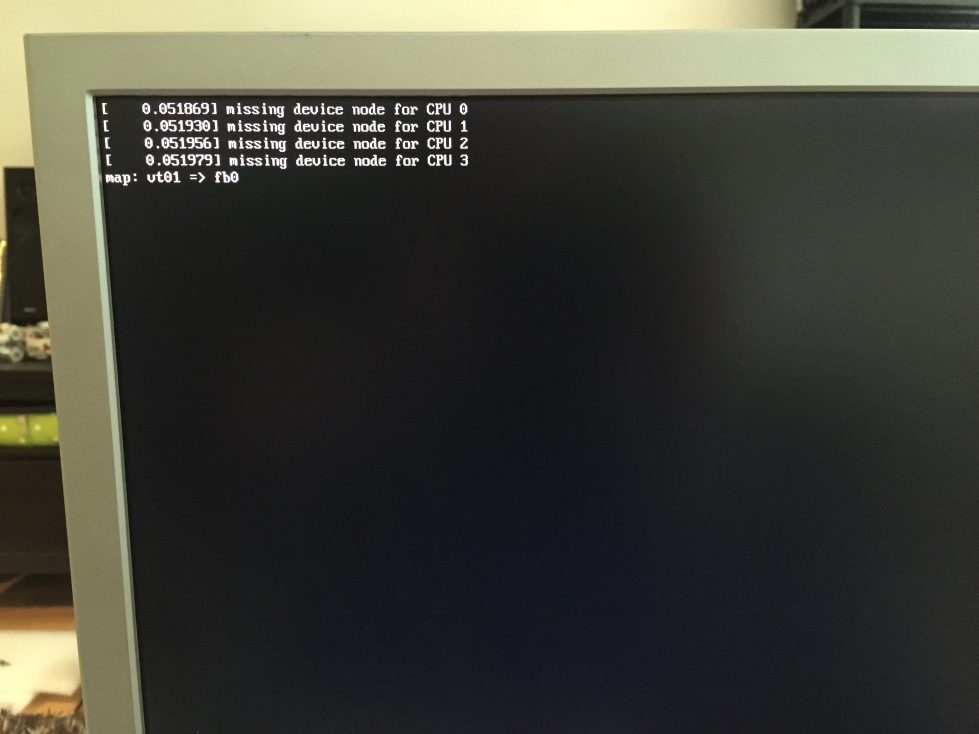
I am receiving a few weird error messages.
My CPUs seem to work fine tho.
And what means:
map: vt01 => fb0?
[attachment file=”error3.JPG”]

Thanks!
///
Raspberry Pi2b
RetroPie Version Used: 2.6
Built From: SD Image
USB Devices connected: Keyboard, XinMo Dual Arcade
///Topic: Red tinted screen
Hello guys,
Thanks for reading.
///
Raspberry Pi2b
RetroPie Version Used: 2.6
Built From: SD Image
USB Devices connected: Keyboard, XinMo Dual Arcade
///I am using a HDMI to DVI cable to connect my BenQ E900T. It works perfectly at first. I run a the SNES Emulator and can play a game. If I now exit the emulator, the screen is suddenly tinted and stays that way:
It happens with: NES, SNES
But not with GBA, which uses another BIOS.
Thanks!!!!
Hi,
First of all I’m a complete newb, so apologies if I’ve missed something obvious.
I’ve got the standard retropie / emulationstation distro up and running on my RPI B model and recently purchased a Logitech F710 wireless gamepad. Problem is I can’t configure it!
When I go into configure input (from main emulationstation menu) it states “1 gamepad detected” but when I press and hold any button on the gamepad, nothing happens on the Pi. At the same time the “mode” button blinks a few times then goes off. I’ve seen other posts suggesting this could be due to low battery but I’ve tried other brand new batteries and still no luck.
It’s so frustrating cos EmulationStation detects that the Wireless receiver is plugged into the USB port! I even unplug it / reconnect it while the Pi is on and I get a brief message in yellow text stating the gamepad is recognised.
The menus in Retroarch even identify it as a Logitech Gamepad F710! Could it be that the USB port on the RPI isn’t providing enough power to the receiver?
Has anyone had any luck getting this controller to work? I haven’t installed any additional drivers and like I say this is the standard Retropie distro I downloaded just a few weeks ago.
Thanks so much in advance.
Phil
I think it would be worthwhile to look into eliminating the USB syncing service and moving to a model where configs, roms, saves, logs etc are all stored on a USB storage device and the “system” is kept to the SD card.
-Minimize writes to the SD card, thereby minimizing wear & potential for corruption during a power dip or failure
-Allow for optimal RPi Performance with use of a SD card that has high random read/write times for the OS/System and a USB device with large capacity and high continuous read times for ROMs or content for KODI and other applications.
-Allow for re-flashing/image based upgrading without having to go through all the reconfiguration/customization (some would obviously still be necessary depending on what is changing)
-Eliminate the boot lag when syncing a lot of data