-
×
 USB micro-B Cable - 1 Meter / 3 Foot
1 × $ 2.93
Gamecon driver module for NES, SNES, and N64 controllers Added to RetroPie Setup Script
If you want to use original NES or SNES controllers with your Raspberry Pi, you could use SNESDev, which I have written about some weeks ago. SNESDev makes use of the user-space input module and simulates a virtual keyboard. This means that button presses on the controllers are mapped to key presses on the Raspberry. Another approach for interfacing a controller with the Raspberry from the software side is to use a specific Linux input driver. Marqs has adapted such a driver to the Raspberry Pi hardware and made it available to the public.
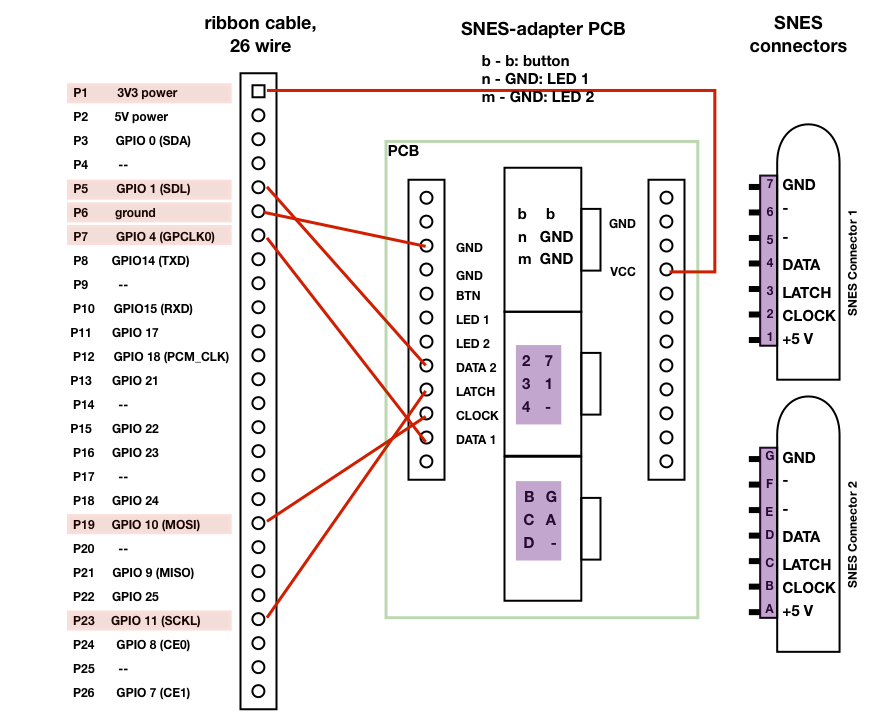
Compared to SNESDev using that driver has the advantage that the whole device handling is done in kernel space. This decreases the performance overhead and allows for lower latencies. The SNES adapter board can be used in combination with this driver. I used this wiring:
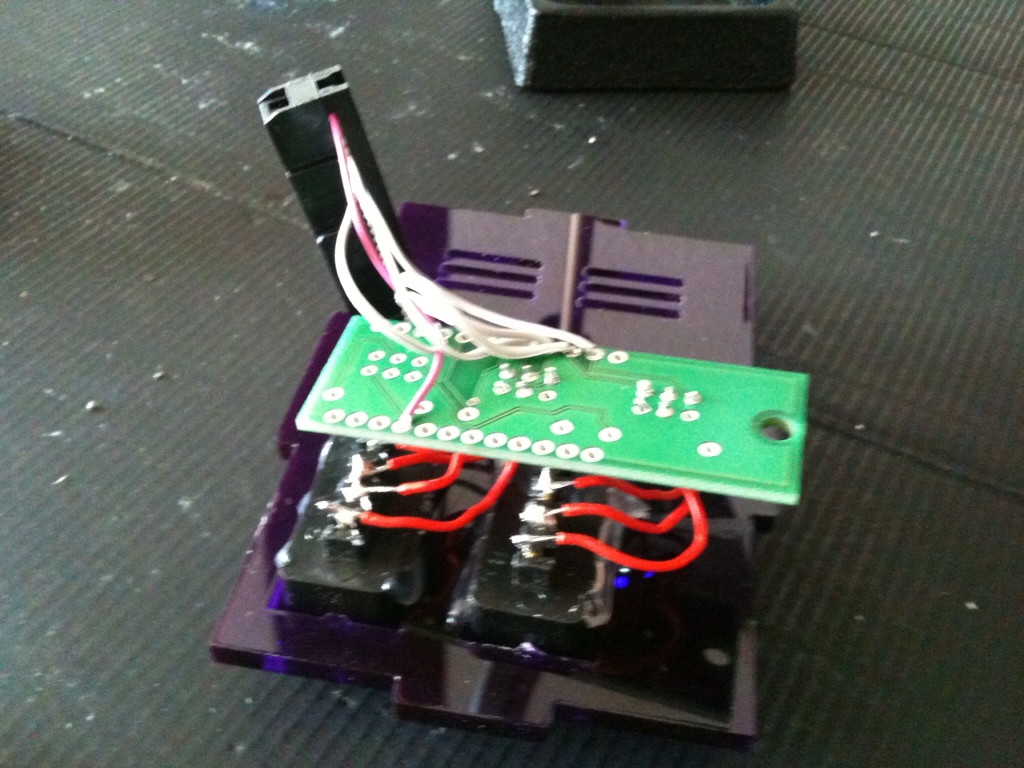
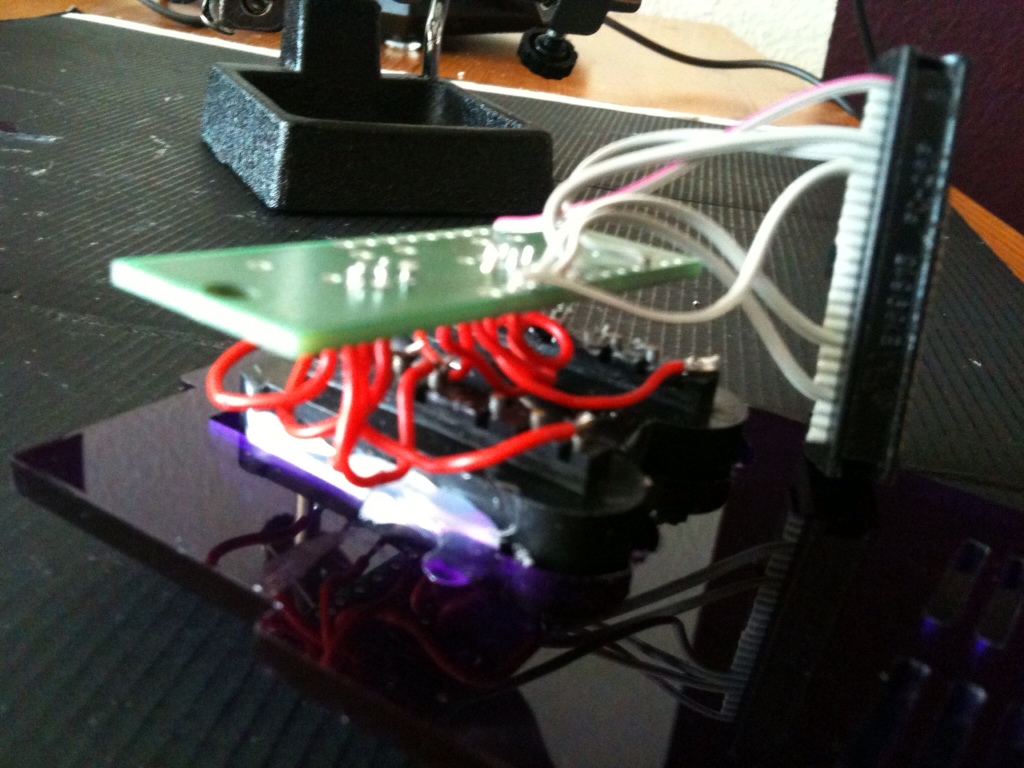
These are images of the adapter board soldered to the connectors and the the ribbon cable connector ready for assembly:
Besides the source code Marqs provides a pre-compiled module for firmware 3.1.9+. He generously allows to provide a zipped archive for download at the Github site of the RetroPie Setup. You can either use the RetroPie setup script for installing the driver automatically or manually put everything in place. The README that is contained in the download explains the necessary steps for that. Note that root privileges are needed to follow these steps:
For future firmware version the module needs to be re-compiled (at least as long as it is not part of the official Raspbian kernel tree). This involves compiling the kernel sources on your own and takes some time. Marqs puts it like this: “Basically you have to download kernel sources and copy the driver and configs to the kernel tree. Then you’ll need to rebuild the kernel after selecting the module in menuconfig (see http://elinux.org/RPi_Kernel_Compilation). Once the kernel is built, the module can be rebuilt separately (kernel compile is needed just for creation of Module.symvers).”
So far, the driver is working without any problems for me.





Invaluable blog post ! BTW , if your business has been looking for a a form , my wife used a fillable version here
http://goo.gl/RqODsx(Since this post is 4+ years old, it shouldn’t come as a surprise that it’s a little outdated; with that said…)
It’s worth noting that these instructions are for Raspberry Pi rev. 1 boards. For rev. 2 and later, pads 1 & 2 are not used since the GPIO pinout changed and pins P1-03 & P1-05 correspond to GPIO2 and GPIO3 respectively (instead of GPIO0 and GPIO1). Be sure to read the README located at /usr/share/doc/gamecon_gpio_rpi/README.gz for further info.
Basically, the modprobe command has two additional pads (5 & 6) that are used in the newer boards while pads 1 & 2 will just be set to 0. Example:
NES controller on pin P1-03 (GPIO2)
modprobe gamecon_gpio_rpi map=0,0,0,0,2,0
This one had me scratching my head for a while. Hope it helps!
Here’s a strange little thing that’s been happening. I’ve been running the RetroPie project straight from the image download. Tried both v1.5 and v1.6 I find that running 2 SNES controllers works great using the gamecon driver and with SNES dev running the poll button mode. So then I decided to make adapter cables to allow either SNES or original NES controllers to be hot swapped into the same connector ports. When I do this I find that I can see all buttons using the jstest /dev/input/js0 (or js1) while the SNES controllers are plugged in. However, when I switch to NES it works perfectly on js0 and not on js1. I can swap adapter cables and it makes no difference so I have high confidence there is no wiring issue. Any ideas?
Btw… if you want to get both buttons working correctly for the NES controllers, you should use b=3 and a =1 in the retroarch.cfg file located in the NES directory (rather than ‘all’). If you leave those settings and decide to use the SNES controller for NES games it uses the y and b buttons of the controller rather than a and b and feels natural just like Super Mario World controls.
i just got this working!!!!
Question. i rebooted and it sees my controller and wants to map my buttons.
i just have a stock NES controller and i just want to do NES things ATM.
but its asking to map keys my controller doesnt have. i Mapped up,down,left,right,accept,back,menu,jump to letter. thats all my buttons…
Glad to hear!
See https://github.com/retropie/RetroPie-Setup/wiki/EmulationStation#i-dont-have-enough-buttons-to-finish-the-input-config-screen.
im going to get to sleep but here is my status. I copied the config file verbatim then substituted (best i can figure out) the linux joystick name of “js1″(verified after running jstest /dev/input/js1 ) i put that into the code where they said to. i saved the config file into the ES folder and rebooted. It no longer asked to map the buttons but they don’t work. right now im just working on one controller. i tried plugging into the other port but no good.. so maybe i have the name wrong?? ill look around while im at work and see what i can figure out.
note: the js1 controller thinks its an SNES controller as well
Don’t know this from heart, but you might need to change the 2s to some other number that corresponds to NES and not SNES controllers. This should be described in the gamecons README.
can i delete the inupts and recreate them?
Answer is just cd into the directory containing EmulationStation (usually~/RetroPie/supplementary/EmulationStation/), run git pull to get the newest changes, and then make to recompile. this gives you the option to skip inputs after 5 or 6. if this doesn’t work for you then you have something wired wrong or you did not disable SNESDev in the retropie_setup.sh
I don’t seem to see the firmware module on the github page, do I need to compile it for the current firmware? I have no idea what I’m doing at this step but I have my snes adaptors made and would just like to test them.
The gamecon driver as well as SNESDev can be installed from the menu “setup” in the RetroPie Setup Script. I would recommend to use SNESDev, if you are using the GPIO adapter.
Would it be possible to get a diagram to connect the ribbon to the connectors directly (without the PCB)?
Thank you for your interest!
Please have a look at http://petrockblog.wordpress.com/2012/07/19/connecting-snes-sockets-to-the-raspberry-pi-an-assembly-guide/ – it is described there!
Reblogged this on Gigable – Tech Blog.
Reblogged this on Gigable – Tech Blog.