Forum Replies Created
-
AuthorPosts
-
 phrazelleParticipant
In WinSCP, when you are logging into your Pi:
• Click the ADVANCED TAB on the login screen for your specific connection (make sure you are running an SCP connection)
• Under the SCP SHELL section, change the SHELL value to SUDO SU –Now your SCP connection sends all commands/requests as a super user and you shouldn’t have issues copying files or folders over.
Hope that helps!
phrazelleParticipantHaha, fair enough. I submitted that and was like…well, that was bs. I would totally have skinned these one way or the other. :) Your base version should be pretty sweet. I’m excited to see the changes you are implementing.
If you’re just trying to create a template for people, I think you are in a great spot. Even though Simple is fairly easy to customize, it definitely isn’t setup as a template. You might want to write a guide to go with it. If you go that route, feel free to use any parts of this pdf that I created for my first go round, or don’t. Haha, I think it’s somewhat easy to follow, but would love for someone else to add to it/get it into something usable.
http://www.instructables.com/files/orig/FB0/EFNY/I48C86QJ/FB0EFNYI48C86QJ.pdf
phrazelleParticipantCustomization is cool, but 90% of the people that grab this won’t go down that road. With Simple being out there as a solid template to work from, I would focus more on polishing yours into the design you think is best.
Idk. There is no color of text that will look good over any random image. Based on the color and complexity of the image you will inevitably run into competing design. So again, I wouldn’t worry incredibly about someone being able to modify your theme at will.
All that being said, it is a cool idea making it easy to switch around if someone was so inclined. Are you talking about throwing it out there with a bunch of fonts/backgrounds/color schemes that you put together integrated? Maybe the files are already included in the asset folders and all the necessary code is added in and commented out? Because that sounds cool too. A theme that is actually a collection of similar themes or something.
If enough people can kick out full themes (I still need to round out Piulator, and I like my new Zelda theme) maybe they could get included as options on future RP builds. Then it’s less about making a unique one out of necessity and more about having options. I think that if there were a solid chunk of preset themes out of the gate, I wouldn’t have skinned any of my builds as far as I did. I just wanted more than Simple. (Not that it sucks, I just like variety.) More selection = less urge to create something new.
Per your current design, you could fade the background a bit (put it over a black layer in a design program and drop the opacity 10-20%) and get a lot more out of the text without adding content boxes. Maybe even just losing the white (highlights) from the background image. If the white areas were more grey I don’t think it would compete with the white text as much.
As for SVG creation, I use Adobe Illustrator, but there are a plethora of resources out there online that boast SVG creation. This free program looks legit: https://inkscape.org/
I suppose SVGs aside, scalability is really only an issue in the sense of 16:9 or 4:3. Someone correct me if I’m wrong here, but as long as you are designing in those aspect ratios at the largest possible resolution (something like 1920×1080 @ 96ppi for 16:9 and 1600×1200 @ 96ppi for 4:3,) the themes should scale down to lower resolution displays in their respective aspect ratios without issue. So you could always just make 2 versions and the user would grab whichever fit their application; 16:9 or 4:3.
phrazelleParticipantAn image can only be displayed at the resolution the display showing it has capability of doing so. Err…yes. So if you are on a high-def 1080p tv, that tv can display up to 1920x1080px. If you throw a 720p (1280×720) image at it, it will stretch the image to fill the screen and you will get pixelation, whether it is totally noticeable or not.
If you throw a 1080p image at a 720p screen, it will crunch that image and you will only see a fraction of the original pixels. (Better explanation is that it averages pixels next to each other and decides what color to make each individual pixel.) That being said, it will look better going down than pulling up, resolution-wise.
If you want the best damn quality you can get out of it (and you should!) then you should be designing your 16:9 splash screens at 1920×1080 @ appropriate ppi. That image can be used on any 16:9 screen with excellent results.
Screen pixel density is defined by resolution and screen size. Here is a post I pulled from a different place on the interwebs around calculating your specific screen’s pixel density (ppi):
Assuming that pixels are as wide as high, you can get the ratio of width (w) and height (h) of screen. It will be 1920/1080 = 16/9.
Let w be 16x and h be 9x.
So diagonal will be (16x *16x) +(9x *9x) = 337*x*x.
40 Inch screen size means length of diagonal is 40 inch.
So 337*x*x = 40*40
x = 2.17893
w = 16*x = 34.863
h = 9*x = 19.61
Area = w*h = 883.663Now total number of pixels = 1920 * 1080 = 2073600.
Now what we want is ppi. Ppi stands for pixels per inch.
Now we have area as 883.77 square inch
Number of pixels 2073600
pixels per inch square will be pixels divided by area in squares
Ppi = 2073600/883.77 = 3033
Pixels per inch is the square root of pixels per square inch so ppi = square root of 3033 = 55
Moral of the story here is that if you are designing for a 16:9 display that is 40″ or under, 1920×1080 @ 55ppi would be perfect resolution. Don’t want to do the math? Make your ppi higher (I usually design at print resolution (300ppi) and dowsample after.) As long as you have the pixel dimensions correct, you can shoot high on the ppi and have a scalable splash screen.
phrazelleParticipant+1
phrazelleParticipantIdk why I couldn’t attach this to the original post. Kept getting a 413 request error saying entity too large.
phrazelleParticipantFWIW, gizmo98 posted these settings on his github for RiceVideoLinux.ini and gles2n64rom.conf. https://github.com/gizmo98/mupen64plus-video-settings
Implementing both of these changed my world. Still fine tuning, but it got me in a workable environment.
phrazelleParticipantUpdate – I was able to hide all of these by putting their position at 1 1, so as follows in the global xml file:
<view name="system, basic, detailed">

<text name="md_lbl_developer, md_lbl_publisher, md_lbl_genre, md_lbl_players, md_lbl_playcount, md_lbl_releasedate, md_lbl_lastplayed, md_lbl_rating">
    <pos>1 1</pos>
    <size>0.01 0.01</size>
</text>

<text name="md_playcount, md_players, md_genre, md_publisher, md_developer">
    <pos>1 1</pos>
    <size>0.01 0.01</size>
</text>

<datetime name="md_lastplayed, md_releasedate">
   <pos>1 1</pos>
   <size>0.01 0.01</size>
</datetime>

<rating name="md_rating">
   <pos>1 1</pos>
   <size>0.01 0.01</size>
</rating>

</view>
This should work across the board and if tested functional you could probably call this resolved.
phrazelleParticipantLast post here and I’ll call it resolved. Running through the non-libretro core fixed the resolution issues as stated.
USB controller configuration was set within the emulator itself. While a rom is running, press TAB on a keyboard to get to the in-emulator menu and you can set global properties from there. The exit emulator hotkey is labeled “UI Cancel” if anyone is wondering. All of my buttons were identified without any additional configuration.
phrazelleParticipantUpdate – when switching to mame4all as the default emulator (non-libretro core,) the resolution issues are fixed, but the joystick config isn’t being honored (not usable at all) so I will be digging on how to add the joystick config to the standard mame4all cfg file.
I really liked the nice, neat cfg setup with the lib core, so I would still be interested in hearing a solution to the issue.
phrazelleParticipantYeah, in the menu screen (x or m when launching) it is set to lr-mame4all and the render resolution is (currently) set to “use config file res.”
phrazelleParticipantI am having the same issues as this thread, but all my labels and values for that info set are being displayed in the top left corner of the system select screen. They are completely missing from the Basic and Detailed views – only present in the System view.
Here is my code trying to get rid of them, placed in the global theme XML file. I tried giving them negative position values to set them off the screen and that is creating the issue…I think…
<view name="system, basic, detailed"> <text name="md_lbl_rating, md_lbl_releasedate, md_lbl_developer, md_lbl_publisher, md_lbl_genre, md_lbl_players, md_lbl_lastplayed, md_lbl_playcount, md_playcount, md_players, md_genre, md_publisher, md_developer"> <pos>-1 -1</pos> <size>0.001 0.001</size> </text> <datetime name="md_lastplayed, md_releasedate"> <pos>-1 -1</pos> <size>0.001 0.001</size> </datetime> <rating name="md_rating"> <pos>-1 -1</pos> <size>0.001 0.001</size> </rating> </view>phrazelleParticipantJust a note on cleaner code, you can group similar elements into the same style definitions.
I.e. instead of this:
<text name="md_lbl_genre">
    <pos>0.05 0.15</pos>
    <size>0.01 0.01</size>
</text>

<text name="md_lbl_players">
    <pos>0.05 0.15</pos>
    <size>0.01 0.01</size>
</text>

<text name="md_lbl_lastplayed">
    <pos>0.05 0.15</pos>
    <size>0.01 0.01</size>
</text>

<text name="md_lbl_playcount">
    <pos>0.05 0.15</pos>
    <size>0.01 0.01</size>
</text>
This instead:
<text name="md_lbl_genre, md_lbl_playcount, md_lbl_lastplayed, md_lbl_players">
    <pos>0.05 0.15</pos>
    <size>0.01 0.01</size>
</text>
That way you have similar modifications for multiple elements in one place.
A further note on this – you can make System, Detailed and Basic view global modifications in the main theme’s XML file. For the Simple theme, you would add your code into the simple.xml file and it would affect every sub-page that is related to the theme. Modifications to individual system’s xml files would override these global parameters. The thought here is that you did the same coding on all of your system’s xml files when you only needed to define the properties once in the global xml file.
phrazelleParticipantThanks for the props! Your theme looks good. I like the dark feel to it.
From a design perspective (I’m a designer by trade, so don’t take this personally – I’ve been through too many creative reviews to let suggestions bother me – please only take this as suggestion) you would get better readability on the lists/description if you put a screened box behind them. A lower opacity white or even green (with a stroke for flair) would give some meat to the areas and might be a little easier on the eyes as far as readability goes, and hopefully not distract from the design too much.
I would hardcode elements like that into my background image.
Even just lowering the opacity of the background white texture (making the background more black than white) would help in terms of readability.
Just a suggestion! Nice work!!
phrazelleParticipantIt’s important to note that <maxsize> is only defining how large the image can be. If you have a smaller file, it won’t force a new size.
Ideally you would batch resize your box art with something like FastStone Photo Resizer (http://www.faststone.org/FSResizerDetail.htm) and then set your dimensions to your new uniform size.
You should be able to force a new size with <size> instead of <maxsize>, though you will see distortion if you are upscaling the image.
phrazelleParticipantWhat throws me off a bit is while a rom is loading, it throws up gfx_width = XXX and gfx_height = XXX. It seems to be adhering to those dimensions, but I can’t change them anywhere.
Altering the resolution from the menu screen (x or m when launching) doesn’t have any affect either.
phrazelleParticipantNo dice. Also tried the following to no avail:
video_aspect_ratio = 1.333333
video_aspect_ratio_auto = falsephrazelleParticipantI noticed these events are added to the current Simple theme, but it seems to be spotty as to what wav files will work. I had the scroll sound working fine, then flipped it for a different file and assigned wavs to all events. None worked but had glitchy sounds for the scrolling, so I converted the wavs I was adding to 44100 stereo wavs, which made the scroll and launch events work, but no other events.
Because they worked and none of the other events worked, I figured I might have bad wavs even though I had converted them. I assigned the working wavs to all events and still none work except for the gamelist scrolling and launching.
Is this element still a work in progress, or am I missing something?
phrazelleParticipantI’m having the same issue with the Buffer Underrun errors, but getting (0), (1) and (2). The system works, buttons are mapped correctly, just no audio.
I am running audio through this USB device (http://www.adafruit.com/products/1475) using this tutorial (https://learn.adafruit.com/usb-audio-cards-with-a-raspberry-pi/updating-alsa-config) without issue on everything except for Mupen64Plus.
My guess is that the OUTPUT_PORT setting in mupen64plus.cfg is trying to send the audio through either the HDMI or the 3.5mm jack and not through the USB.
Thoughts?
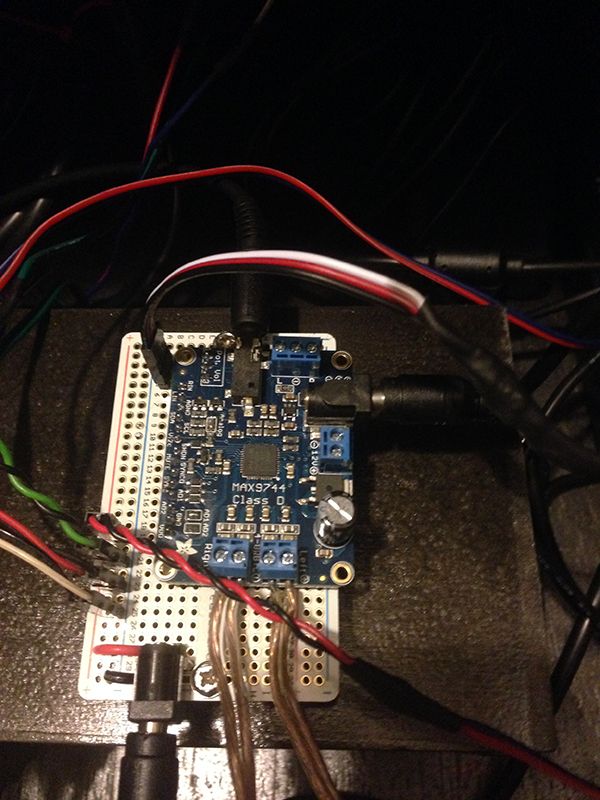
phrazelleParticipant[quote=94915]The LED for the Marquee are from a 12V (2A) PSU that also powers the amplifier for the speakers.[/quote]
Do you have any issues with the amp not getting enough power with your LEDs on the same 2a supply? Mine starts to crackle around 60% volume without it having its own 5a.
phrazelleParticipantThat was pretty pompous of me to assume he was talking about mine! *tugs collar*
phrazelleParticipantOh, and the black is just the wood. I used plywood for cost and weight, spray painted it black and did a few coats of polyurethane.
phrazelleParticipantThanks! This one has been fun, but I’m anxious to finish so I can dominate my next one.
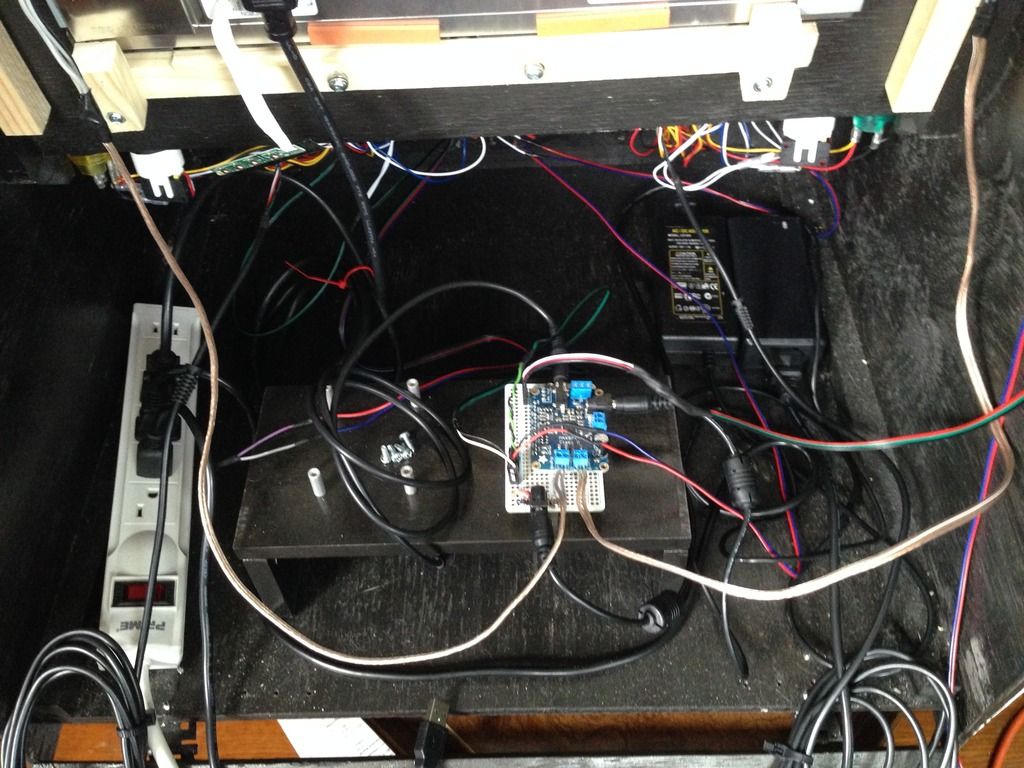
Look back at the pic I posted of the protoboard. The LED strip for the marquee is the red/black wire coming in from the right side. The other wires connected to that power rail are running to the LEDs in the triangle buttons on the front. That whole power rail is powered from the 2.1mm barrel jack wired to it, pulling juice from one of the 12v 5a PSUs.
phrazelleParticipant[quote=94892]Hi Phrazelle, you got a pick of this wall-wart psu setup?[/quote]
This is still in process, so don’t judge. ;) I need to make new wires for most of the connections, tidy up the spider’s web, get my power situation worked out and build an acrylic enclosure for the boards. You can see the 2, 12v 5a PSUs on the right side and the cable coming from the monitor all going into the power strip. The Pi and its PSU are in my office while I finish the backend skinning.

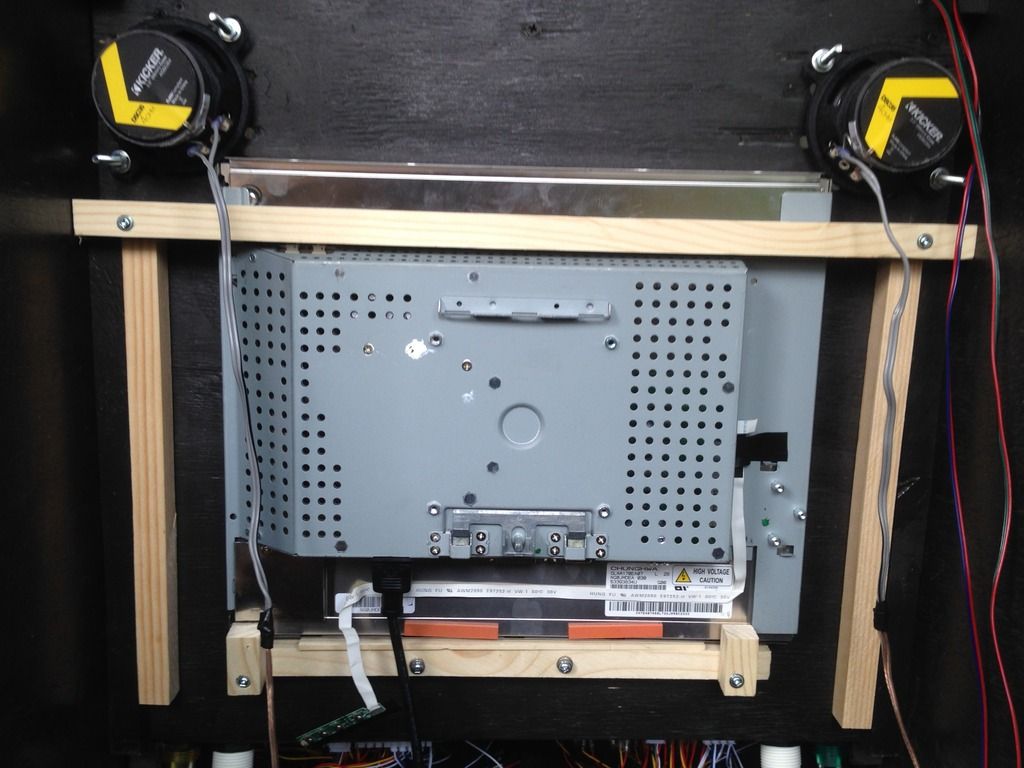
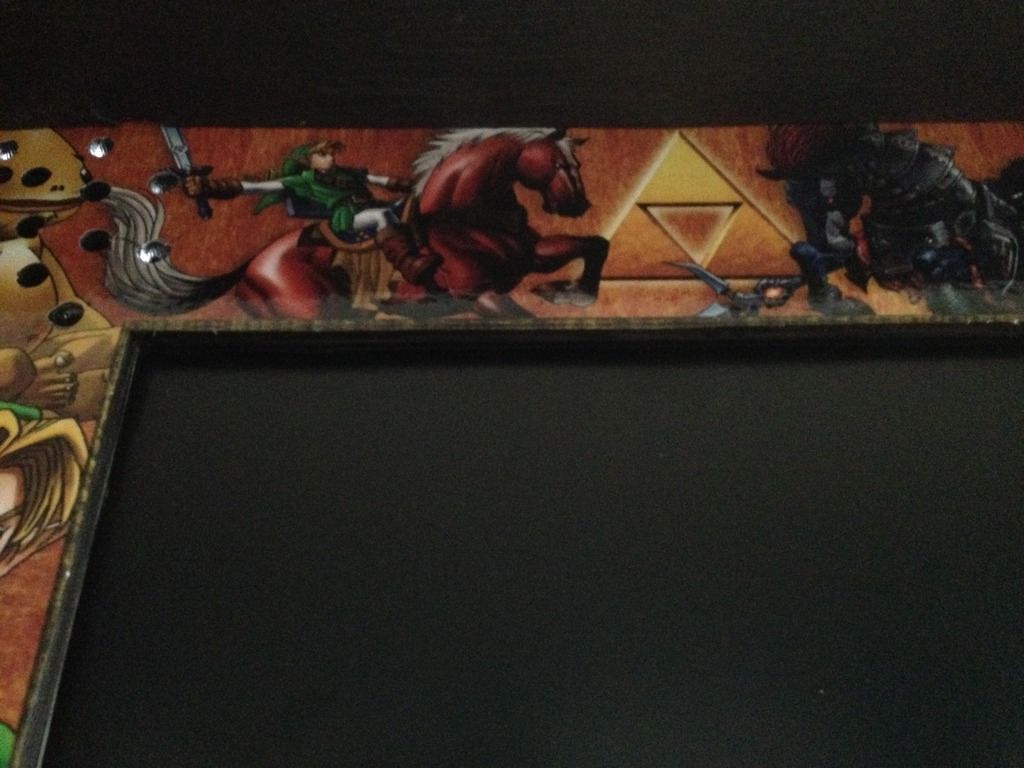
This is how I have my monitor mounted and an image showing the lack of recession on the front of the cabinet. It’s hard to see, but it sits back 3/4″. I want to pull my bezel area off and use a router to make it sit closer to the front of the board. It wasn’t bothering me until recently. I have a piece of acrylic that sits over the entire front, but have to drill out the speaker holes. Where I mounted the speakers is a whole other conversation that I will be addressing on my next build. I like the positioning, but the acrylic covering it is a pain to deal with.
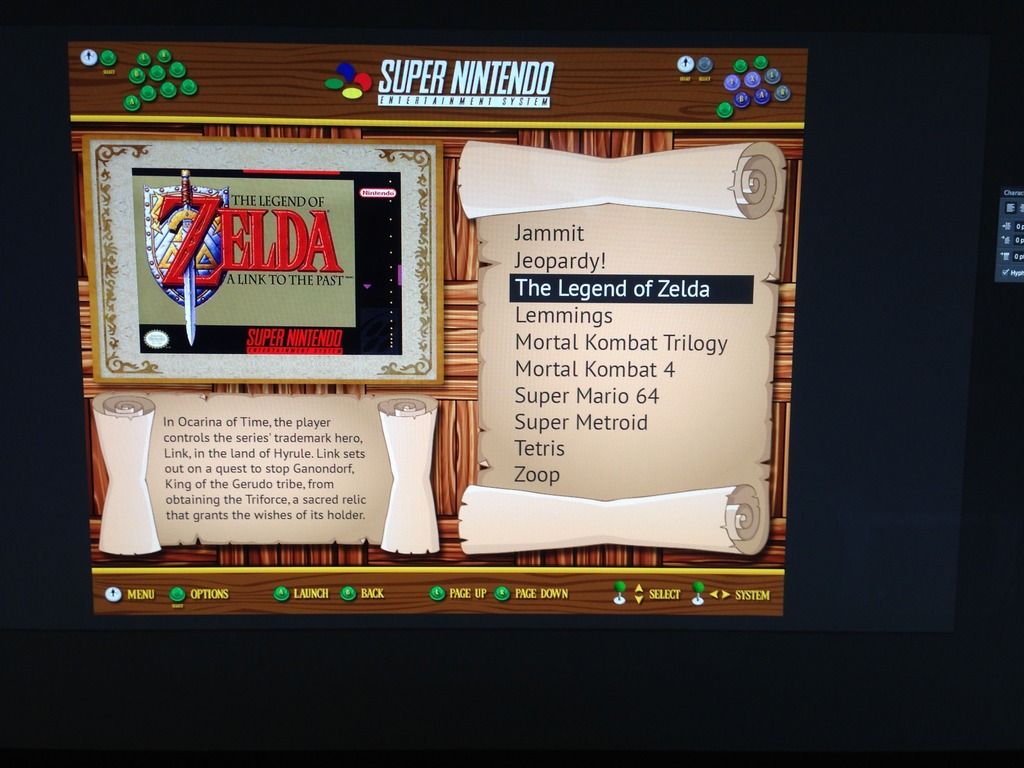
And for kicks, here is a pic of the theme I am building for it! Almost done with it, but it needs some work. Not dead-set on the layout yet.
phrazelleParticipantCurrently I have 3 wall-wart PSUs powering the amp, the LEDs and the Pi, plus the power cable from the monitor all running to a power strip inside the cabinet. The idea is to have one power cable running out the back, so I’ve considered using the “main power switch” method (adding a switch to the outside of the cabinet that turns the power strip on and off,) but powering everything through a single PC ATX PSU that provides 12v and 5v would take care of that, as well as make it a lot cleaner inside the case.
Some noise would definitely be present, and if that is a major concern I would suggest running wall warts. You will get less life out of them, but no noise.
phrazelleParticipant[quote=94508]I think I’m confused with this protoboard. I will have an extension lead in the back to power the pi and monitor, as you say the controls can be all power by the pi. I guess the speakers can be plugged into an extension lead? So it just leaves powering the led strip.[/quote]
So the LED strips only need a 12v source of power to turn on. I have a 2.1mm barrel jack connected to the power rail on that side of the protoboard. There is a 12v 5a PSU providing power to that jack. So, everything plugged into that rail is getting juice from the 12v 5a PSU. I put header pins on the rail and made quick disconnects for the LED strips as well as the LEDs on the front triangle buttons on my build.
As for the speakers, I have them receiving signal and power from the amp that is attached to that protoboard. That amp is getting its own dedicated 12v 5a PSU running into the barrel jack connected to the board.
Moving forward, I will have both of those areas (the LED power rail and the amp) receiving power from the ATX PSU, but it is working setup as-is.
[quote=94731]Where is this config file I can edit please for disable_audio_dither=1?[/quote]
I was having the static issue and changed this in my config.txt file as well, but that dramatically decreased the overall volume for some reason. If you want to clear the static noise and retain full range of volume, use a USB sound card for the Pi like this one: http://www.adafruit.com/product/1475
It’s not plug-and-play and you will need to do some light configuration to get it to work, but it will fix the issue at hand.
04/12/2015 at 00:08 in reply to: After uploading ROMs, system fails automatic file system check #94618phrazelleParticipantThis just happened to me. I am running RP3.0 on a Pi 2 from USB. I was scraping metadata and did a reboot from within ES. When it rebooted it threw this message along with a few lines about a different rooms taking up extra or duplicate blocks.
I fixed it by running as root:
fsck /dev/sda2
While checking my drive, there were a few errors and I told it to fix them as they came up. After that a reboot occurred and it is good to go.
I would assume this would also work if running off SD by replacing sda2 with the address of the card? Barring the card being trashed, though.
phrazelleParticipantdpicc68 – That looks really clean. Nice work!
phrazelleParticipant[quote=94456]Got any screenshots on how the led strip is wired into a PSU? I guess I will have an extension lead in the back with the monitor and pi 2 attached.[/quote]
Here is my current setup, but this is changing to add in the main power switch and when I get my ATX PSU in-hand. I attached the amp to the same protoboard that is running the power rail for the LEDs (on the left of the board) so I could have them all powered by the same PSU. I will run the power lines from the amp to the same power rail and have that tapped into the ATX.
That power rail is 12v, so it is powering the LED strips and the triangle buttons on the front of the machine (they are 12v also.)
[quote=94456]Where does the joystick and illuminated buttons get their power from?[/quote]
On the ones I ordered from eBay, the LEDs in the buttons are 5v and pull power through the USB connection to the Pi.
[quote=94459]did the joysticks that Arcade USB kit have on ebay make any annoying “click” sounds when push arround[/quote]
No clicking on the LED buttons, but the 1 & 2 player and triangle buttons, as well as the joysticks all use the push button micro switches, so you get the “click.”
[quote=94456]So these uses one congtroller for both players?[/quote]
These have individual boards for each player with an independent USB cable for each.
[quote=94459]Why do some use the ipac2 and others the usb method?[/quote]
From what I understand, the ipac system emulates a keyboard (best suited for PC builds) for usage when you can only (or easily) assign button configurations to keyboard layouts instead of USB controllers. The Pi has no issue identifying most USB controllers – or at least with a little tweaking.
[quote=94459]What did you use to cover the monitor, plastic or glass?[/quote]
I used acrylic (plexiglass)
[quote=94459]How did you power the led strips and install a dimmer, very smart idea![/quote]
The power layout is above, and the dimmer will be a 10k potentiometer with a 1-450ohm resistor (haven’t tested yet) in line to keep the LEDs from blowing out.
phrazelleParticipant[quote=94444]
<div class=”d4p-bbt-quote-title”>khayman wrote:</div>
phrazelle and chillimonster, those are some awesome builds. Really great job.Thanks.
[/quote]Yes, thank you! This has been a fun project and I already want to make another one after all I learned throughout this build.
For reference, I got my controller kits off of eBay from China here. They work well, but we will see about longevity. The USB interface was recognized by my Pi 2 without issue; plug-and-play.
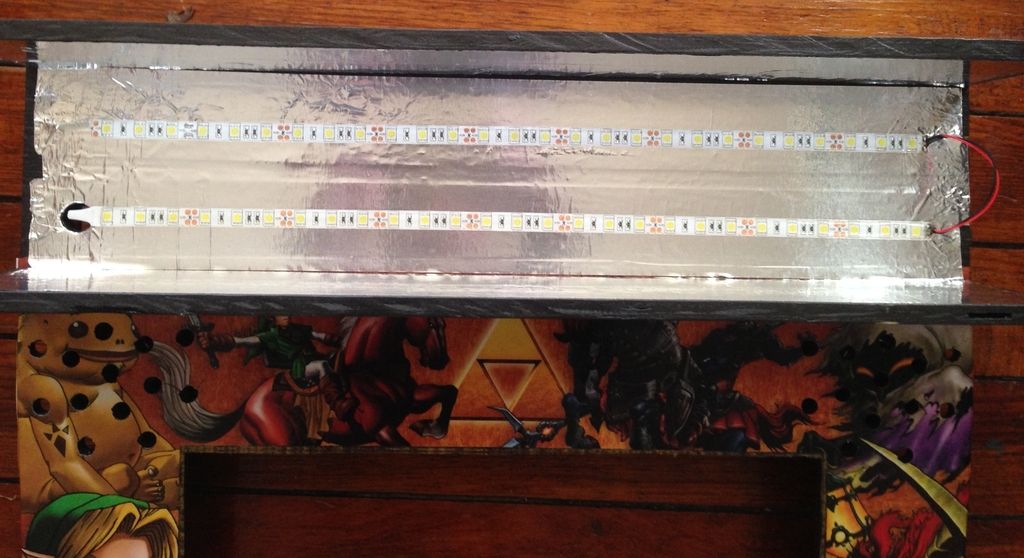
I also used LED strips for my marquee lighting. These were super cheap, as good of quality as at MicroCenter (they look like the same ones but in different packaging,) and fit the application perfectly. They are pretty bright though, and I am adding a dimmer in to adjust to a sweet spot. Maybe the aluminum tape I put in wasn’t totally necessary and could be causing the issue, but it definitely guarantees no spot-lighting from the strips.
I had my marquee graphic reverse-printed on the piece of acrylic I cut for it at my local print shop. *side note* I cut a piece of acrylic to sit on top of the vinyl control board graphic, but the pressure of the buttons screwed down made visible bubble-esque areas under the acrylic around the buttons and the LED illumination accentuated it to the point of it looking tacky. I ended up removing the acrylic altogether. I would have the graphic reverse printed on that acrylic piece if I were to do it again.
As for my display, I bought a 17″ Dell monitor off of eBay for $10 and ran an HDMI > DVI cable to it. I decased it like chilimonster did as well.
I used a set of 3.5″ Kicker car speakers and an amp from Adafruit for my audio. Had to disable audio dithering on the Pi to fix an audio glitch, but it sounds great.
phrazelleParticipantI’m on the tail end of mine. Functional, but working out some software issues as well as adding a few other hardware elements like the main power switch you just mentioned and a dimmer on the marquee LED strip. Right now it’s running 3 wall warts to a power strip, but I’m flipping over to an ATX PSU before I’m done. Planning on writing a full instructables around it and will post when the dust settles.
All the buttons are LED and stay on constantly. The abundance of buttons allows for full N64 support, but I (as most others )haven’t got the N64 to run smoothly yet. The front triangle buttons are for exiting an emulator – more for show than anything.
[URL=http://s1261.photobucket.com/user/phrazelle1/media/cabinet/IMG_2771.jpg.html][IMG]http://i1261.photobucket.com/albums/ii584/phrazelle1/cabinet/IMG_2771.jpg[/IMG][/URL]
phrazelleParticipantGPSP is the GBA emulator you want to use. GB and GBC games will run through RetroArch without issue.
phrazelleParticipantI was having similar issues with the HDMI 4 Pi 5″ display from Adafruit. It turned out to be the FPC cable being funky. Switching the cable out ceased the issues. Not saying that’s necessarily your issue, but maybe try playing with the cable connecting it to the Pi.
phrazelleParticipantDid you get this worked out? I’m curious as to what the issue was if you solved it.
phrazelleParticipantGlad you guys like it! I will add Sega and more soon. Sorry for the delay – it’s just been crazy around here.
I’ve received a few questions around theme building, so here is a PDF guide I wrote compiling my process:
http://www.instructables.com/files/orig/FB0/EFNY/I48C86QJ/FB0EFNYI48C86QJ.pdfAnd here is the instructables I put together around how I implemented this:
http://www.instructables.com/id/Piulator-Portable-Game-System-via-Raspberry-Pi/ -
AuthorPosts