Homepage › Forums › RetroPie Project › Everything else related to the RetroPie Project › Anyone using the Pi 2 in a bartop?
Tagged: arcade, bartop, ControlBlock
- This topic has 62 replies, 7 voices, and was last updated 11 years, 1 month ago by
 chillimonster.
-
AuthorPosts
-
04/13/2015 at 19:38 #94754
 khaymanParticipant
/boot/config.txt
Add it in there.
04/13/2015 at 19:39 #94755chillimonsterParticipantIts in the fat32 boot partition.
I usually put mine in my PC and do it that way.
04/13/2015 at 20:25 #94768phrazelleParticipant[quote=94508]I think I’m confused with this protoboard. I will have an extension lead in the back to power the pi and monitor, as you say the controls can be all power by the pi. I guess the speakers can be plugged into an extension lead? So it just leaves powering the led strip.[/quote]
So the LED strips only need a 12v source of power to turn on. I have a 2.1mm barrel jack connected to the power rail on that side of the protoboard. There is a 12v 5a PSU providing power to that jack. So, everything plugged into that rail is getting juice from the 12v 5a PSU. I put header pins on the rail and made quick disconnects for the LED strips as well as the LEDs on the front triangle buttons on my build.
As for the speakers, I have them receiving signal and power from the amp that is attached to that protoboard. That amp is getting its own dedicated 12v 5a PSU running into the barrel jack connected to the board.
Moving forward, I will have both of those areas (the LED power rail and the amp) receiving power from the ATX PSU, but it is working setup as-is.
[quote=94731]Where is this config file I can edit please for disable_audio_dither=1?[/quote]
I was having the static issue and changed this in my config.txt file as well, but that dramatically decreased the overall volume for some reason. If you want to clear the static noise and retain full range of volume, use a USB sound card for the Pi like this one: http://www.adafruit.com/product/1475
It’s not plug-and-play and you will need to do some light configuration to get it to work, but it will fix the issue at hand.
04/13/2015 at 21:11 #94776chillimonsterParticipantAs for the volume, you can always quit emulation station and drop to the command prompt.
Type:
alsamixer
Increase the volume from here. I have mine set at 85 (Default is 50)
Hope this helps
04/14/2015 at 00:06 #94797g0nz0ukParticipantPhrazelle, so are you using a PC ATX PSU? I don’t want to use one of those as they make noise, I wonder how others do it?
04/14/2015 at 17:36 #94857phrazelleParticipantCurrently I have 3 wall-wart PSUs powering the amp, the LEDs and the Pi, plus the power cable from the monitor all running to a power strip inside the cabinet. The idea is to have one power cable running out the back, so I’ve considered using the “main power switch” method (adding a switch to the outside of the cabinet that turns the power strip on and off,) but powering everything through a single PC ATX PSU that provides 12v and 5v would take care of that, as well as make it a lot cleaner inside the case.
Some noise would definitely be present, and if that is a major concern I would suggest running wall warts. You will get less life out of them, but no noise.
04/14/2015 at 22:46 #94892g0nz0ukParticipantHi Phrazelle, you got a pick of this wall-wart psu setup?
Thanks
04/14/2015 at 22:48 #94893g0nz0ukParticipantAlso I see most use plexi glass to cover the monitor, what is used to hide/surround the glass to mask off seeing behind and into the bartop cabinet?
04/14/2015 at 22:54 #94895khaymanParticipantFor mine I used 1/8″ high density fiberboard (Masonite) to create a bezel around the monitor. The rest of it was built out of 3/4″ MDF except the control panel which I wanted something more sturdy so it’s 3/4″ hardwood plywood (wanted where people would be pounding on and pushing to be a little sturdier).
04/14/2015 at 22:58 #94896chillimonsterParticipantI use ‘Frog Tape (For a nice clean edge) to mask off the visible area and spray the rest of the Plexi (on the ones i use Plexi on – on some i do a resessed / routed MDF support)
For power i use a 4 way plug block mounted inside with the cable routed to a single switched & Fused IEC socket (Excuse the pics as they are from two different cabs)
04/14/2015 at 23:03 #94901chillimonsterParticipantThis is the recessed MDF i mentioned.
Its an 18mm panel, but the monitor is recessed to within 5mm of the front of the panel.
Lots of dust and measuring involved. Some people prefer this over the standard Plexi.
Personally i like the floating look the Plexi gives
04/14/2015 at 23:43 #94910phrazelleParticipant[quote=94892]Hi Phrazelle, you got a pick of this wall-wart psu setup?[/quote]
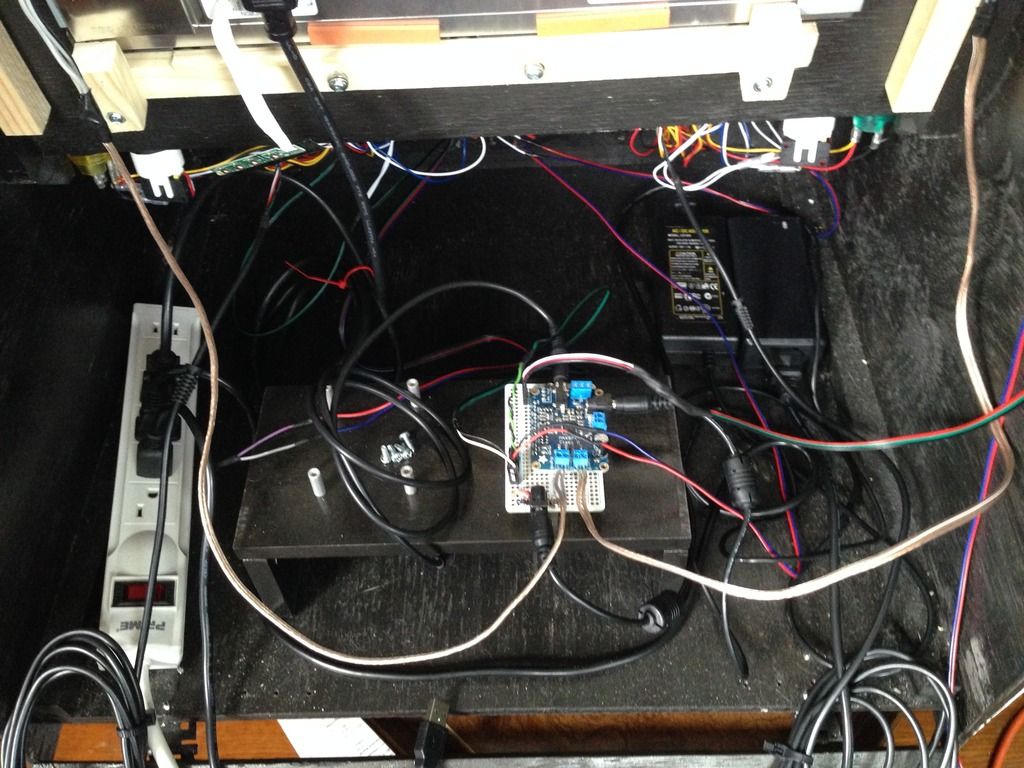
This is still in process, so don’t judge. ;) I need to make new wires for most of the connections, tidy up the spider’s web, get my power situation worked out and build an acrylic enclosure for the boards. You can see the 2, 12v 5a PSUs on the right side and the cable coming from the monitor all going into the power strip. The Pi and its PSU are in my office while I finish the backend skinning.

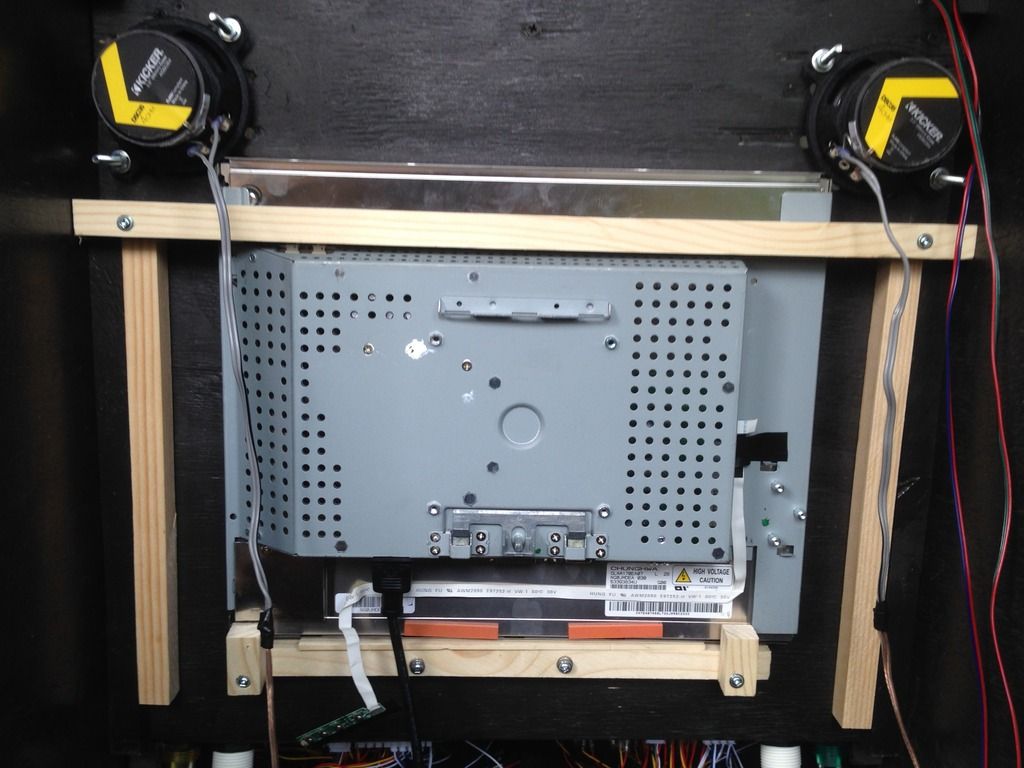
This is how I have my monitor mounted and an image showing the lack of recession on the front of the cabinet. It’s hard to see, but it sits back 3/4″. I want to pull my bezel area off and use a router to make it sit closer to the front of the board. It wasn’t bothering me until recently. I have a piece of acrylic that sits over the entire front, but have to drill out the speaker holes. Where I mounted the speakers is a whole other conversation that I will be addressing on my next build. I like the positioning, but the acrylic covering it is a pain to deal with.
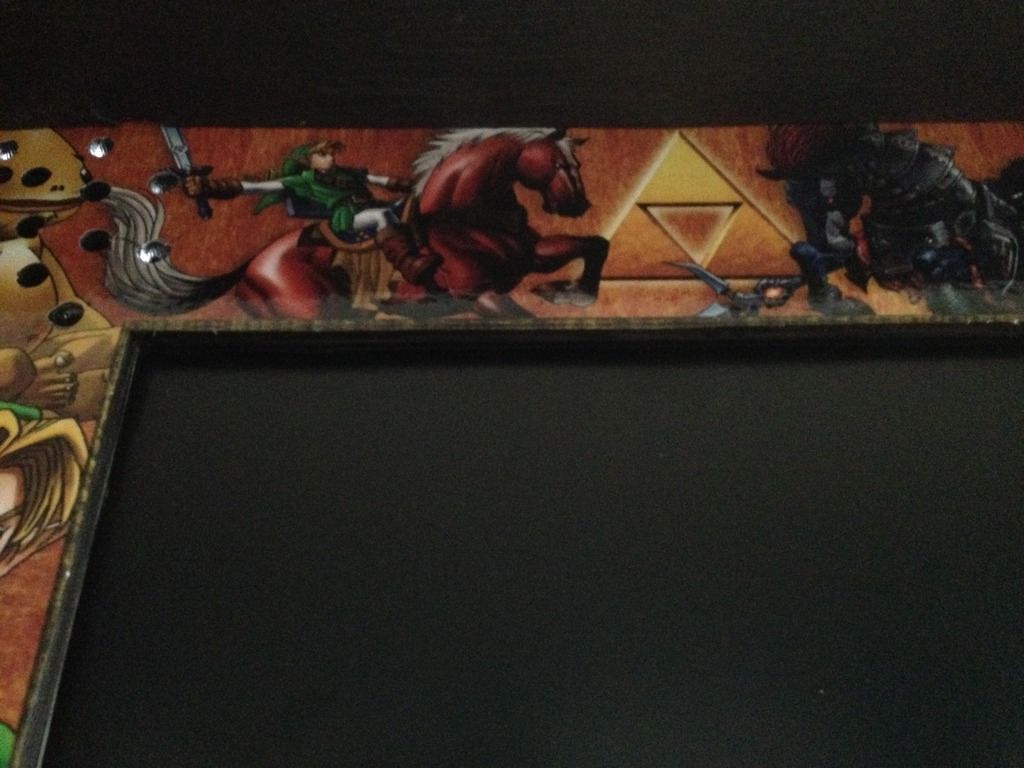
And for kicks, here is a pic of the theme I am building for it! Almost done with it, but it needs some work. Not dead-set on the layout yet.
04/14/2015 at 23:47 #94911g0nz0ukParticipantGreat work there, what is the black pattern you have put on, is it glued on?
Where do you power your led marquee from?
I need an inventory list of you so I know what to buy :)
Professional job mate.
04/14/2015 at 23:52 #94913phrazelleParticipantThanks! This one has been fun, but I’m anxious to finish so I can dominate my next one.
Look back at the pic I posted of the protoboard. The LED strip for the marquee is the red/black wire coming in from the right side. The other wires connected to that power rail are running to the LEDs in the triangle buttons on the front. That whole power rail is powered from the 2.1mm barrel jack wired to it, pulling juice from one of the 12v 5a PSUs.
04/14/2015 at 23:55 #94914phrazelleParticipantOh, and the black is just the wood. I used plywood for cost and weight, spray painted it black and did a few coats of polyurethane.
04/15/2015 at 00:02 #94915chillimonsterParticipant[quote=94911]Great work there, what is the black pattern you have put on, is it glued on?
Where do you power your led marquee from?
I need an inventory list of you so I know what to buy
Professional job mate.
[/quote]If talking about mine, then Thanks :-)
The ‘pattern’ is a 3D Carbon Vinyl Wrap.
The LED for the Marquee are from a 12V (2A) PSU that also powers the amplifier for the speakers.
04/15/2015 at 00:05 #94916phrazelleParticipantThat was pretty pompous of me to assume he was talking about mine! *tugs collar*
04/15/2015 at 00:07 #94918phrazelleParticipant[quote=94915]The LED for the Marquee are from a 12V (2A) PSU that also powers the amplifier for the speakers.[/quote]
Do you have any issues with the amp not getting enough power with your LEDs on the same 2a supply? Mine starts to crackle around 60% volume without it having its own 5a.
04/15/2015 at 00:08 #94919chillimonsterParticipantHey, we’re all in this together, so it could have been either of us – i presumed it was me as he mentioned a pattern.
:-)
04/15/2015 at 00:18 #94920chillimonsterParticipantNever had an issue.
The LEDs for the marquee draw so little current and the audio amp is also low powered even though it puts out more than enough at 14w. (It’s a decased dell as500 sound bar. Superb quality for the size)
04/15/2015 at 09:51 #94959g0nz0ukParticipantAs I’m not not that clued up with electrical wiring the bit I’m missing is how you actually wire the sound and led into the psu, I presume the led strip and sound bar are wired into a electric board first which has a power source to the extension lead?
I think I like the sound of using cut plexiglass for a flush finish and spray black the unused areas to hide the back. I think my monitor can take a wall bracket to hold in the cabinet.
Do you have an easy method to access under the controls?
I know this is a retropie forum so I’m not sure if there is a bartop forum you guys use. Apologies for so many questions.
04/15/2015 at 12:38 #94965chillimonsterParticipantOn mine, bot the sound and the LED strip were wired to female DC plugs
You can use these for ease…
and these connect to the male plug of the power supply.
Allows for easy disconnection of the lights if needed.
For access the the control panel, there are two wooden battens, on on eather side that are screwed onto the sides of the cab.
Its rock solid, but if i need to remove it its just a case of undoing two internal screws (I have this thing about external fixings)
04/15/2015 at 15:59 #94980g0nz0ukParticipantSo are you using these female jacks for your LED and Sound? Got a pick of this connection, just wondered what DC’s you buy for this?
Also on your Tron Arcade which is amazing, where did you by the graphite wallpaper and how did you stick it on?
I want a black arcade that with with illuminated buttons with an operation wolf marquee lol.
04/16/2015 at 14:20 #95135g0nz0ukParticipantChillimonster, where did you get that black/grey side wall paper from?
04/16/2015 at 14:24 #95136chillimonsterParticipantEbay.
Its a 3d Carbon wrap.
Self adhesive and easy to apply (as with all vinyls there is a technique)
04/16/2015 at 15:12 #95137g0nz0ukParticipantwhere did you get it from, thanks so much for the video!
04/16/2015 at 16:22 #95141g0nz0ukParticipantHave you had to solder much too?
05/11/2015 at 23:10 #97277chillimonsterParticipantThanks Ricardo
There are more examples over on my FB page.
http://Www.facebook.com/ChillisArcade
As for the perfect woodwork I use a lot of templates to make sure I can reproduce the same things over and over. If building more than one then the time taken to produce these is well worth it.
And also spending the money on the right tools. I’m not saying waste money but not trying to bodge (been there. Done that. For example the t moulding bit was over £20 but worth every penny!)
I don’t mind helping anyone out if they need a ‘borrow’ of a router and t mould bit and they can get to me to use it.
Or even advice on particular aspects of the building process. I’m no expert but feel I’ve made enough mistakes to be able to help others!
-
AuthorPosts

- The forum ‘Everything else related to the RetroPie Project’ is closed to new topics and replies.