-
Search Results
-
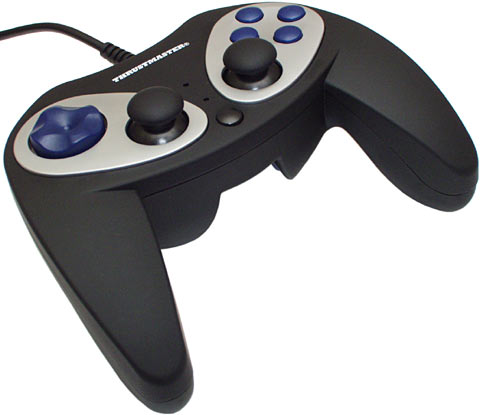
Need some help and I am getting tired, so here goes. I am not sure if anyone has one of these or has tried to use one, but I am having some success with a minor set back.
I am interested in getting NES, SNES, and Sega Genesis working (classic 3 button Genesis controller).
I have the latest 2.3 installed correctly running on a revision B pi. I went through the initial retroarch controller setup with an SNES controller. Here is my layout.
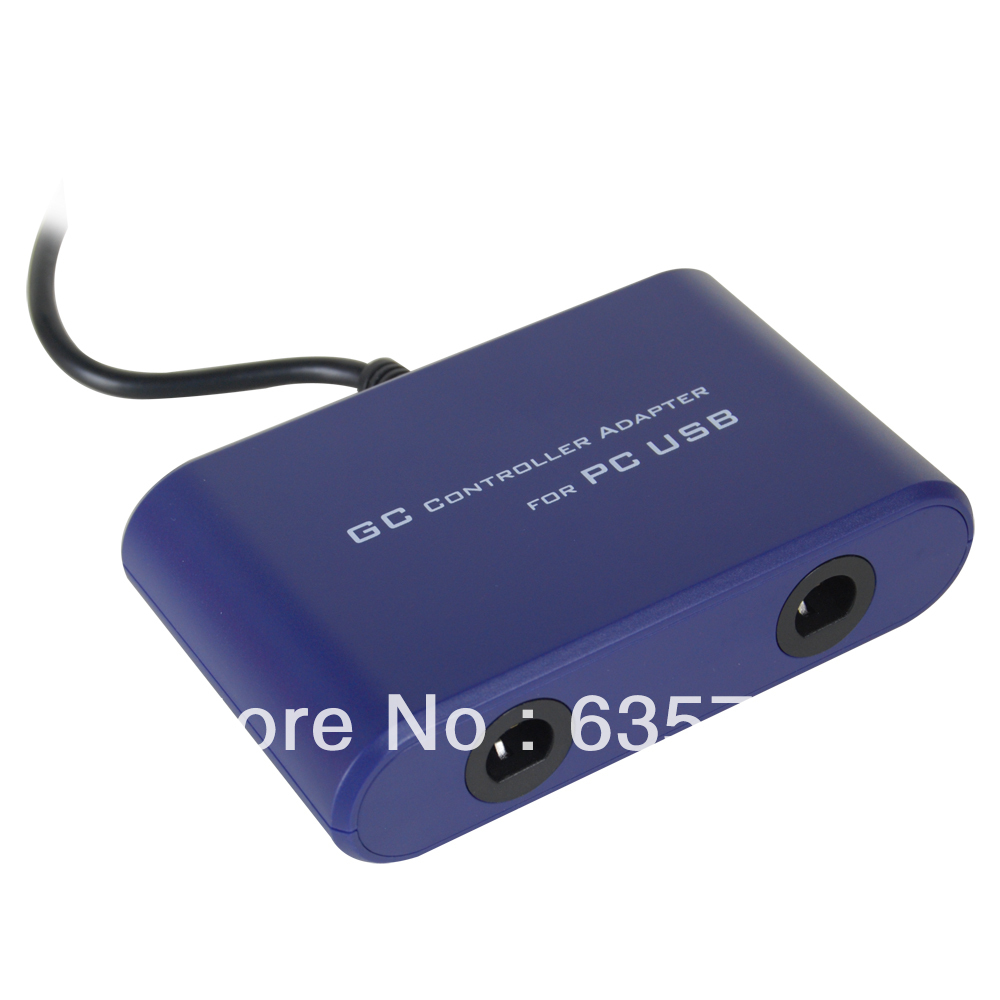
I have a 4 hub (NES, SNES, Sega, & N64 [do not plan on using N64]) that allows me to use all retro original controllers. That hub runs (via gamecube connector) to another hub (allow for 2 4 port hubs to be connected for 2 player games) which then runs to USB. Following me?
Anyways, regardless of which controller I plug into the 4 port hub, they ALL register as a Huijia USB Gambepad. The SNES AND the NES both are using the same mapping buttons, so that works out really well. Since I initially set up retroarch gamepad in the beginning with the SNES, the NES (which has less buttons) also works perfectly.
SNES Mappings:
up 12
down 14
left 15
right 13
a1
b2
start 9
select 7
left up 4
right up 5
y3
x0NES Mappings:
b 2
sel 7
start 9
u 12
d 14
l 15
r 13
a 1Sega is not working right though – I have not mapped out all of the buttons yet because I need to go to sleep, but what I do know is that C is registering as 0 and from what I can tell (playing Alladin) it is not working (C should throw apples I think). I believe A and B and working right – the D-pad and start works perfect.
My question…
Because each of the 3 controllers will ALWAYS register as the same type because of the hub, is there a way to fix the Sega?
If not, I guess I am happy with NES and SNES, and I may try and enclose everything including the pi in some sort of 3D mold when I am all finished.
Any help is appreciated!
I have been through files and folders to try and edit, but again, all the controllers show as the same type.
Topic: Cannot Load Saved Games
New to Retropie here. I setup my first Retropie a weekend ago, and I got it to where everything worked fine and I had no issues with it. My problems came in when I decided to get a Bluetooth dongle and setup my PS3 sixaxis controller.
I originally was able to save all my games and load them with hotkeys by tweaking this into my retroarch.cfg file under the
/opt/retropie/configs/all/location:input_enable_hotkey_btn = "0" input_exit_emulator_btn = "3" input_save_state_btn = "16" input_load_state_btn = "5"I wanted a wireless controller since I hate sitting close to the TV. So I followed this guide to get my ps3 controller to work:
After my ps3 controller was recognized by retropie, I realized that my old configurations for my xbox360 usb controller were making it difficult to navigate around. So I ended up deleting the various “input_player” lines in the bottom of the retroarch.cfg file in WINSCP, alt F4ed, and then ran this, which ran me through the process of setting up my ps3 controller mappings:
sudo chown pi /opt/retropie/configs/all/retroarch.cfg
cd /opt/retropie/emulators/RetroArch/installdir/bin
sudo ./retroarch-joyconfig -j 0 >> /opt/retropie/configs/all/retroarch.cfg
The controller works fines for games and in emulation station. I have no problems with it in terms of functioning as a controller and playing games. My only problem is saving and loading my saved games. When I save a game I seem to get the correct message of “Saved state to slot #0”. But, every time I try load a game I get this message on the bottom of the screen:
“Failed to load state from “/home/pi/RetroPie/(XYZgame/whatever game I’m playing here, and it cuts off screen so i’m not sure if there’s anything else after that)”
I also notice that if I attempt to load the game, then proceed to try to save again, the save slot # moves up.
Also, I don’t see any .srm files being created in my rom folder like I use to. I don’t know what’s going on there. I’m thinking maybe this issue has something to do with permissions but I’m not sure.
Here is my retroarch.cfg:
## Skeleton config file for RetroArch # Save all save files (*.srm) to this directory. This includes related files like .bsv, .rtc, .psrm, etc ... # This will be overridden by explicit command line options. # savefile_directory = /home/pi/RetroPie/savestate # Save all save states (*.state) to this directory. # This will be overridden by explicit command line options. # savestate_directory = /home/pi/RetroPie/savestate # If set to a directory, Content which is temporarily extracted # will be extracted to this directory. # extraction_directory = # Automatically saves a savestate at the end of RetroArch's lifetime. # The path is $SRAM_PATH.auto. # RetroArch will automatically load any savestate with this path on startup if savestate_auto_load is set. # savestate_auto_save = false # savestate_auto_load = false # Load libretro from a dynamic location for dynamically built RetroArch. # This option is mandatory. # Path to a libretro implementation. # libretro_path = "/path/to/libretro.so" # A directory for where to search for libretro core implementations. # libretro_directory = # Sets log level for libretro cores (GET_LOG_INTERFACE). # If a log level issued by a libretro core is below libretro_log_level, it is ignored. # DEBUG logs are always ignored unless verbose mode is activated (--verbose). # DEBUG = 0, INFO = 1, WARN = 2, ERROR = 3. # libretro_log_level = 0 # Enable or disable verbosity level of frontend. # log_verbosity = false # Enable or disable RetroArch performance counters # perfcnt_enable = false # Path to core options config file. # This config file is used to expose core-specific options. # It will be written to by RetroArch. # A default path will be assigned if not set. core_options_path = /opt/retropie/configs/all/retroarch-core-options.cfg # Path to content load history file. # RetroArch keeps track of all content loaded in the menu and from CLI directly for convenient quick loading. # A default path will be assigned if not set. # game_history_path = # Number of entries that will be kept in content history file. # game_history_size = 100 # Sets the "system" directory. # Implementations can query for this directory to load BIOSes, system-specific configs, etc. system_directory = /home/pi/RetroPie/roms/../BIOS # Sets start directory for menu content browser. # rgui_browser_directory = # Content directory. Interacts with RETRO_ENVIRONMENT_GET_CONTENT_DIRECTORY. # Usually set by developers who bundle libretro/RetroArch apps to point to assets. # content_directory = # Assets directory. This location is queried by default when menu interfaces try to look for # loadable assets, etc. # assets_directory = # Sets start directory for menu config browser. # rgui_config_directory = # Show startup screen in menu. # Is automatically set to false when seen for the first time. # This is only updated in config if config_save_on_exit is set to true, however. # rgui_show_start_screen = true # Flushes config to disk on exit. Useful for menu as settings can be modified. # Overwrites the config. #include's and comments are not preserved. config_save_on_exit = false # Load up a specific config file based on the core being used. # core_specific_config = false #### Video # Video driver to use. "gl", "xvideo", "sdl" # video_driver = "gl" # Which OpenGL context implementation to use. # Possible ones for desktop are: glx, x-egl, kms-egl, sdl-gl, wgl. # By default, tries to use first suitable driver. # video_gl_context = # Windowed xscale and yscale # (Real x res: base_size * xscale * aspect_ratio, real y res: base_size * yscale) # video_xscale = 3.0 # video_yscale = 3.0 # Fullscreen resolution. Resolution of 0 uses the resolution of the desktop. # video_fullscreen_x = 0 # video_fullscreen_y = 0 # Start in fullscreen. Can be changed at runtime. # video_fullscreen = false # If fullscreen, prefer using a windowed fullscreen mode. # video_windowed_fullscreen = true # Which monitor to prefer. 0 (default) means no particular monitor is preferred, 1 and up (1 being first monitor), # suggests RetroArch to use that particular monitor. # video_monitor_index = 0 # Forcibly disable composition. Only works in Windows Vista/7 for now. # video_disable_composition = false # Video vsync. # video_vsync = true # Attempts to hard-synchronize CPU and GPU. Can reduce latency at cost of performance. # video_hard_sync = false # Sets how many frames CPU can run ahead of GPU when using video_hard_sync. # Maximum is 3. # video_hard_sync_frames = 0 # Inserts a black frame inbetween frames. # Useful for 120 Hz monitors who want to play 60 Hz material with eliminated ghosting. # video_refresh_rate should still be configured as if it is a 60 Hz monitor (divide refresh rate by 2). # video_black_frame_insertion = false # Use threaded video driver. Using this might improve performance at possible cost of latency and more video stuttering. video_threaded = true # Use a shared context for HW rendered libretro cores. # Avoids having to assume GL state changes inbetween frames. # video_shared_context = false # Smoothens picture with bilinear filtering. Should be disabled if using pixel shaders. video_smooth = false # Forces rendering area to stay equal to content aspect ratio or as defined in video_aspect_ratio. # video_force_aspect = true # Only scales video in integer steps. # The base size depends on system-reported geometry and aspect ratio. # If video_force_aspect is not set, X/Y will be integer scaled independently. # video_scale_integer = false # A floating point value for video aspect ratio (width / height). # If this is not set, aspect ratio is assumed to be automatic. # Behavior then is defined by video_aspect_ratio_auto. video_aspect_ratio = 1.33 # If this is true and video_aspect_ratio is not set, # aspect ratio is decided by libretro implementation. # If this is false, 1:1 PAR will always be assumed if video_aspect_ratio is not set. # video_aspect_ratio_auto = false # Forces cropping of overscanned frames. # Exact behavior of this option is implementation specific. # video_crop_overscan = true # Path to shader. Shader can be either Cg, CGP (Cg preset) or GLSL, GLSLP (GLSL preset) # video_shader = "/path/to/shader.{cg,cgp,glsl,glslp}" # Load video_shader on startup. # Other shaders can still be loaded later in runtime. # video_shader_enable = false # Defines a directory where shaders (Cg, CGP, GLSL) are kept for easy access. video_shader_dir = /opt/retropie/emulators/RetroArch/shader/ # CPU-based video filter. Path to a dynamic library. # video_filter = # Path to a font used for rendering messages. This path must be defined to enable fonts. # Do note that the _full_ path of the font is necessary! # video_font_path = # Size of the font rendered. # video_font_size = 32 # Enable usage of OSD messages. # video_font_enable = true # Offset for where messages will be placed on screen. Values are in range 0.0 to 1.0 for both x and y values. # [0.0, 0.0] maps to the lower left corner of the screen. # video_message_pos_x = 0.05 # video_message_pos_y = 0.05 # Color for message. The value is treated as a hexadecimal value. # It is a regular RGB hex number, i.e. red is "ff0000". # video_message_color = ffffff # Video refresh rate of your monitor. # Used to calculate a suitable audio input rate. # video_refresh_rate = 59.95 # Allows libretro cores to set rotation modes. # Setting this to false will honor, but ignore this request. # This is useful for vertically oriented content where one manually rotates the monitor. # video_allow_rotate = true # Forces a certain rotation of the screen. # The rotation is added to rotations which the libretro core sets (see video_allow_rotate). # The angle is <value> * 90 degrees counter-clockwise. # video_rotation = 0 #### Audio # Enable audio. # audio_enable = true # Audio output samplerate. # audio_out_rate = 48000 # Audio resampler backend. Which audio resampler to use. # Default will use "sinc". # audio_resampler = # Audio driver backend. Depending on configuration possible candidates are: alsa, pulse, oss, jack, rsound, roar, openal, sdl, xaudio. # audio_driver = # Override the default audio device the audio_driver uses. This is driver dependant. E.g. ALSA wants a PCM device, OSS wants a path (e.g. /dev/dsp), Jack wants portnames (e.g. system:playback1,system:playback_2), and so on ... # audio_device = # Audio DSP plugin that processes audio before it's sent to the driver. Path to a dynamic library. # audio_dsp_plugin = # Will sync (block) on audio. Recommended. # audio_sync = true # Desired audio latency in milliseconds. Might not be honored if driver can't provide given latency. # audio_latency = 64 # Enable audio rate control. # audio_rate_control = true # Controls audio rate control delta. Defines how much input rate can be adjusted dynamically. # Input rate = in_rate * (1.0 +/- audio_rate_control_delta) # audio_rate_control_delta = 0.005 # Audio volume. Volume is expressed in dB. # 0 dB is normal volume. No gain will be applied. # Gain can be controlled in runtime with input_volume_up/input_volume_down. # audio_volume = 0.0 #### Overlay # Enable overlay. # input_overlay_enable = false # Path to input overlay # input_overlay = # Overlay opacity # input_overlay_opacity = 1.0 # Overlay scale # input_overlay_scale = 1.0 #### Input # Input driver. Depending on video driver, it might force a different input driver. # input_driver = sdl # Joypad driver. (Valid: linuxraw, sdl, dinput) # input_joypad_driver = # Keyboard layout for input driver if applicable (udev/evdev for now). # Syntax is either just layout (e.g. "no"), or a layout and variant separated with colon ("no:nodeadkeys"). # input_keyboard_layout = # Defines axis threshold. Possible values are [0.0, 1.0] # input_axis_threshold = 0.5 # Enable input auto-detection. Will attempt to autoconfigure # joypads, Plug-and-Play style. input_autodetect_enable = true # Directory for joypad autoconfigs (PC). # If a joypad is plugged in, that joypad will be autoconfigured if a config file # corresponding to that joypad is present in joypad_autoconfig_dir. # Input binds which are made explicit (input_playerN_*_btn/axis) will take priority over autoconfigs. # Autoconfigs can be created with retroarch-joyconfig, manually, or with a frontend. # Requires input_autodetect_enable to be enabled. joypad_autoconfig_dir = /opt/retropie/emulators/RetroArch/configs/ # Enable debug input key reporting on-screen. # input_debug_enable = false # Sets which libretro device is used for a player. # Devices are indentified with a number. # This is normally saved by the menu. # Device IDs are found in libretro.h. # These settings are overridden by explicit command-line arguments which refer to input devices. # None: 0 # Joypad (RetroPad): 1 # Mouse: 2 # Keyboard: 3 # Generic Lightgun: 4 # Joypad w/ Analog (RetroPad + Analog sticks): 5 # Multitap (SNES specific): 257 # Super Scope (SNES specific): 260 # Justifier (SNES specific): 516 # Justifiers (SNES specific): 772 # input_libretro_device_p1 = # input_libretro_device_p2 = # input_libretro_device_p3 = # input_libretro_device_p4 = # input_libretro_device_p5 = # input_libretro_device_p6 = # input_libretro_device_p7 = # input_libretro_device_p8 = # Keyboard input. Will recognize letters ("a" to "z") and the following special keys (where "kp_" # is for keypad keys): # # left, right, up, down, enter, kp_enter, tab, insert, del, end, home, # rshift, shift, ctrl, alt, space, escape, add, subtract, kp_plus, kp_minus, # f1, f2, f3, f4, f5, f6, f7, f8, f9, f10, f11, f12, # num0, num1, num2, num3, num4, num5, num6, num7, num8, num9, pageup, pagedown, # keypad0, keypad1, keypad2, keypad3, keypad4, keypad5, keypad6, keypad7, keypad8, keypad9, # period, capslock, numlock, backspace, multiply, divide, print_screen, scroll_lock, # tilde, backquote, pause, quote, comma, minus, slash, semicolon, equals, leftbracket, # backslash, rightbracket, kp_period, kp_equals, rctrl, ralt # # Keyboard input, Joypad and Joyaxis will all obey the "nul" bind, which disables the bind completely, # rather than relying on a default. input_player1_a = x input_player1_b = z input_player1_y = a input_player1_x = s input_player1_start = enter input_player1_select = rshift input_player1_l = q input_player1_r = w input_player1_left = left input_player1_right = right input_player1_up = up input_player1_down = down # input_player1_l2 = # input_player1_r2 = # input_player1_l3 = # input_player1_r3 = # Two analog sticks (DualShock-esque). # Bound as usual, however, if a real analog axis is bound, # it can be read as a true analog. # Positive X axis is right, Positive Y axis is down. # input_player1_l_x_plus = # input_player1_l_x_minus = # input_player1_l_y_plus = # input_player1_l_y_minus = # input_player1_r_x_plus = # input_player1_r_x_minus = # input_player1_r_y_plus = # input_player1_r_y_minus = # If desired, it is possible to override which joypads are being used for player 1 through 8. # First joypad available is 0. # input_player1_joypad_index = 0 # input_player2_joypad_index = 1 # input_player3_joypad_index = 2 # input_player4_joypad_index = 3 # input_player5_joypad_index = 4 # input_player6_joypad_index = 5 # input_player7_joypad_index = 6 # input_player8_joypad_index = 7 # Joypad buttons. # Figure these out by using RetroArch-Phoenix or retroarch-joyconfig. # You can use joypad hats with hnxx, where n is the hat, and xx is a string representing direction. # E.g. "h0up" # input_player1_a_btn = # input_player1_b_btn = # input_player1_y_btn = # input_player1_x_btn = # input_player1_start_btn = # input_player1_select_btn = # input_player1_l_btn = # input_player1_r_btn = # input_player1_left_btn = # input_player1_right_btn = # input_player1_up_btn = # input_player1_down_btn = # input_player1_l2_btn = # input_player1_r2_btn = # input_player1_l3_btn = # input_player1_r3_btn = # Axis for RetroArch D-Pad. # Needs to be either '+' or '-' in the first character signaling either positive or negative direction of the axis, then the axis number. # Do note that every other input option has the corresponding _btn and _axis binds as well; they are omitted here for clarity. # input_player1_left_axis = # input_player1_right_axis = # input_player1_up_axis = # input_player1_down_axis = # Holding the turbo while pressing another button will let the button enter a turbo mode # where the button state is modulated with a periodic signal. # The modulation stops when the button itself (not turbo button) is released. # input_player1_turbo = # Describes the period and how long of that period a turbo-enabled button should behave. # Numbers are described in frames. # input_turbo_period = 6 # input_turbo_duty_cycle = 3 # This goes all the way to player 8 (*_player2_*, *_player3_*, etc), but omitted for clarity. # All input binds have corresponding binds for keyboard (none), joykeys (_btn) and joyaxes (_axis) as well. # Toggles fullscreen. # input_toggle_fullscreen = f # Saves state. # input_save_state = f2 # Loads state. # input_load_state = f4 # State slots. With slot set to 0, save state name is *.state (or whatever defined on commandline). # When slot is != 0, path will be $path%d, where %d is slot number. # input_state_slot_increase = f7 # input_state_slot_decrease = f6 # Toggles between fast-forwarding and normal speed. # input_toggle_fast_forward = space # Hold for fast-forward. Releasing button disables fast-forward. # input_hold_fast_forward = l # Key to exit RetroArch cleanly. # Killing it in any hard way (SIGKILL, etc) will terminate RetroArch without saving RAM, etc. # On Unix-likes, SIGINT/SIGTERM allows a clean deinitialization. input_exit_emulator = escape # Applies next and previous shader in directory. input_shader_next = m input_shader_prev = n # Hold button down to rewind. Rewinding must be enabled. input_rewind = r # Toggle between recording and not. # input_movie_record_toggle = o # Toggle between paused and non-paused state # input_pause_toggle = p # Frame advance when content is paused # input_frame_advance = k # Reset the content. # input_reset = h # Cheats. # input_cheat_index_plus = y # input_cheat_index_minus = t # input_cheat_toggle = u # Mute/unmute audio # input_audio_mute = f9 # Take screenshot # input_screenshot = f8 # Netplay flip players. # input_netplay_flip_players = i # Hold for slowmotion. # input_slowmotion = e # Enable other hotkeys. # If this hotkey is bound to either keyboard, joybutton or joyaxis, # all other hotkeys will be disabled unless this hotkey is also held at the same time. # This is useful for RETRO_KEYBOARD centric implementations # which query a large area of the keyboard, where it is not desirable # that hotkeys get in the way. # Alternatively, all hotkeys for keyboard could be disabled by the user. input_enable_hotkey = escape # Increases audio volume. # input_volume_up = kp_plus # Decreases audio volume. # input_volume_down = kp_minus # Toggles to next overlay. Wraps around. # input_overlay_next = # Toggles eject for disks. Used for multiple-disk content. # input_disk_eject_toggle = # Cycles through disk images. Use after ejecting. # Complete by toggling eject again. # input_disk_next = # Toggles menu. # input_menu_toggle = f1 # Toggles mouse grab. When mouse is grabbed, RetroArch hides the mouse, # and keeps the mouse pointer inside the window to allow relative mouse input # to work better. # input_grab_mouse_toggle = f11 #### Menu # Menu driver to use. "rgui", "lakka", etc. # menu_driver = "rgui" #### Camera # Override the default camera device the camera driver uses. This is driver dependant. # camera_device = # Override the default privacy permission for cores that want to access camera services. Is "false" by default. # camera_allow = false #### Location # Override the default privacy permission for cores that want to access location services. Is "false" by default. # location_allow = false #### Netplay # When being client over netplay, use keybinds for player 1. # netplay_client_swap_input = false # The nickname being used for playing online. # netplay_nickname = # The amount of delay frames to use for netplay. Increasing this value will increase # performance, but introduce more latency. # netplay_delay_frames = 0 # Netplay mode for the current user. # false is Server, true is Client. # netplay_mode = false # Enable or disable spectator mode for the player during netplay. # netplay_spectator_mode_enable = false # The IP Address of the host to connect to. # netplay_ip_address = # The port of the host IP Address. Can be either a TCP or an UDP port. # netplay_ip_port = 55435 #### Misc # Enable rewinding. This will take a performance hit when playing, so it is disabled by default. rewind_enable = false # Rewinding buffer size in megabytes. Bigger rewinding buffer means you can rewind longer. # The buffer should be approx. 20MB per minute of buffer time. rewind_buffer_size = 10 # Rewind granularity. When rewinding defined number of frames, you can rewind several frames at a time, increasing the rewinding speed. rewind_granularity = 2 # Pause gameplay when window focus is lost. # pause_nonactive = true # Autosaves the non-volatile SRAM at a regular interval. This is disabled by default unless set otherwise. # The interval is measured in seconds. A value of 0 disables autosave. # autosave_interval = # Path to XML cheat database (as used by bSNES). # cheat_database_path = # Path to XML cheat config, a file which keeps track of which # cheat settings are used for individual games. # If the file does not exist, it will be created. # cheat_settings_path = # Directory to dump screenshots to. # screenshot_directory = # Records video after CPU video filter. # video_post_filter_record = false # Records output of GPU shaded material if available. # video_gpu_record = false # Screenshots output of GPU shaded material if available. video_gpu_screenshot = true # Block SRAM from being overwritten when loading save states. # Might potentially lead to buggy games. # block_sram_overwrite = false # When saving a savestate, save state index is automatically increased before # it is saved. # Also, when loading content, the index will be set to the highest existing index. # There is no upper bound on the index. # savestate_auto_index = false # Slowmotion ratio. When slowmotion, content will slow down by factor. # slowmotion_ratio = 3.0 # The maximum rate at which content will be run when using fast forward. (E.g. 5.0 for 60 fps content => 300 fps cap). # RetroArch will go to sleep to ensure that the maximum rate will not be exceeded. # Do not rely on this cap to be perfectly accurate. # A negative ratio equals no FPS cap. # fastforward_ratio = -1.0 # Enable stdin/network command interface. # network_cmd_enable = false # network_cmd_port = 55355 # stdin_cmd_enable = false input_player1_joypad_index = "0" input_player1_b_btn = "13" input_player1_y_btn = "12" input_player1_select_btn = "0" input_player1_start_btn = "3" input_player1_up_btn = "4" input_player1_down_btn = "6" input_player1_left_btn = "7" input_player1_right_btn = "5" input_player1_a_btn = "14" input_player1_x_btn = "15" input_player1_l_btn = "10" input_player1_r_btn = "11" input_player1_l2_btn = "8" input_player1_r2_btn = "9" input_player1_l3_btn = "1" input_player1_r3_btn = "2" input_player1_l_x_plus_axis = "+0" input_player1_l_x_minus_axis = "-0" input_player1_l_y_plus_axis = "+1" input_player1_l_y_minus_axis = "-1" input_player1_r_x_plus_axis = "+2" input_player1_r_x_minus_axis = "-2" input_player1_r_y_plus_axis = "+3" input_player1_r_y_minus_axis = "-3" savefile_directory = /home/pi/RetroPie/ savestate_directory = /home/pi/RetroPie/ input_enable_hotkey_btn = "0" input_exit_emulator_btn = "3" input_enable_hotkey_btn = "0" input_save_state_btn = "16" input_enable_hotkey_btn = "0" input_load_state_btn = "5"Topic: XinMo Dual Latency
Hi people, i’ve installed RetroPie (a fork pointing to emulators with support to XinMo Dual – https://github.com/vandersonmota/RetroPie-Setup)
But i’ve notice latency (i guess < 0.5s) even at the Emulation Station menu. Anyone suffered from that, if so, how can you fix it?
Thanks.
Topic: Second player input Xbox 360
I cant make the second player work.
I’m using two 360 xbox controller both linked with the wireless reciever. When i’m playing a game just 1 controller works and this controller is controlling both players.
this is my retroarch.cfg
thanks in advance.
PS: Also, i cant exit a game or save states using only the controller…
## Skeleton config file for RetroArch
# Save all save files (*.srm) to this directory. This includes related files like .bsv, .rtc, .psrm, etc …
# This will be overridden by explicit command line options.
# savefile_directory =# Save all save states (*.state) to this directory.
# This will be overridden by explicit command line options.
# savestate_directory =# If set to a directory, Content which is temporarily extracted
# will be extracted to this directory.
# extraction_directory =# Automatically saves a savestate at the end of RetroArch’s lifetime.
# The path is $SRAM_PATH.auto.
# RetroArch will automatically load any savestate with this path on startup if savestate_auto_load is set.
# savestate_auto_save = false
# savestate_auto_load = true# Load libretro from a dynamic location for dynamically built RetroArch.
# This option is mandatory.# Path to a libretro implementation.
# libretro_path = “/path/to/libretro.so”# A directory for where to search for libretro core implementations.
# libretro_directory =# Sets log level for libretro cores (GET_LOG_INTERFACE).
# If a log level issued by a libretro core is below libretro_log_level, it is ignored.
# DEBUG logs are always ignored unless verbose mode is activated (–verbose).
# DEBUG = 0, INFO = 1, WARN = 2, ERROR = 3.
# libretro_log_level = 0# Enable or disable verbosity level of frontend.
# log_verbosity = false# Enable or disable RetroArch performance counters
# perfcnt_enable = false# Path to core options config file.
# This config file is used to expose core-specific options.
# It will be written to by RetroArch.
# A default path will be assigned if not set.
core_options_path = /opt/retropie/configs/all/retroarch-core-options.cfg# Path to content load history file.
# RetroArch keeps track of all content loaded in the menu and from CLI directly for convenient quick loading.
# A default path will be assigned if not set.
# game_history_path =# Number of entries that will be kept in content history file.
# game_history_size = 100# Sets the “system” directory.
# Implementations can query for this directory to load BIOSes, system-specific configs, etc.
system_directory = /home/pi/RetroPie/roms/../BIOS# Sets start directory for menu content browser.
# rgui_browser_directory =# Content directory. Interacts with RETRO_ENVIRONMENT_GET_CONTENT_DIRECTORY.
# Usually set by developers who bundle libretro/RetroArch apps to point to assets.
# content_directory =# Assets directory. This location is queried by default when menu interfaces try to look for
# loadable assets, etc.
# assets_directory =# Sets start directory for menu config browser.
# rgui_config_directory =# Show startup screen in menu.
# Is automatically set to false when seen for the first time.
# This is only updated in config if config_save_on_exit is set to true, however.
# rgui_show_start_screen = true# Flushes config to disk on exit. Useful for menu as settings can be modified.
# Overwrites the config. #include’s and comments are not preserved.
config_save_on_exit = false# Load up a specific config file based on the core being used.
# core_specific_config = false#### Video
# Video driver to use. “gl”, “xvideo”, “sdl”
# video_driver = “gl”# Which OpenGL context implementation to use.
# Possible ones for desktop are: glx, x-egl, kms-egl, sdl-gl, wgl.
# By default, tries to use first suitable driver.
# video_gl_context =# Windowed xscale and yscale
# (Real x res: base_size * xscale * aspect_ratio, real y res: base_size * yscale)
# video_xscale = 3.0
# video_yscale = 3.0# Fullscreen resolution. Resolution of 0 uses the resolution of the desktop.
# video_fullscreen_x = 0
# video_fullscreen_y = 0# Start in fullscreen. Can be changed at runtime.
# video_fullscreen = false# If fullscreen, prefer using a windowed fullscreen mode.
# video_windowed_fullscreen = true# Which monitor to prefer. 0 (default) means no particular monitor is preferred, 1 and up (1 being first monitor),
# suggests RetroArch to use that particular monitor.
# video_monitor_index = 0# Forcibly disable composition. Only works in Windows Vista/7 for now.
# video_disable_composition = false# Video vsync.
# video_vsync = true# Attempts to hard-synchronize CPU and GPU. Can reduce latency at cost of performance.
# video_hard_sync = false# Sets how many frames CPU can run ahead of GPU when using video_hard_sync.
# Maximum is 3.
# video_hard_sync_frames = 0# Inserts a black frame inbetween frames.
# Useful for 120 Hz monitors who want to play 60 Hz material with eliminated ghosting.
# video_refresh_rate should still be configured as if it is a 60 Hz monitor (divide refresh rate by 2).
# video_black_frame_insertion = false# Use threaded video driver. Using this might improve performance at possible cost of latency and more video stuttering.
video_threaded = true# Use a shared context for HW rendered libretro cores.
# Avoids having to assume GL state changes inbetween frames.
# video_shared_context = false# Smoothens picture with bilinear filtering. Should be disabled if using pixel shaders.
video_smooth = false# Forces rendering area to stay equal to content aspect ratio or as defined in video_aspect_ratio.
# video_force_aspect = true# Only scales video in integer steps.
# The base size depends on system-reported geometry and aspect ratio.
# If video_force_aspect is not set, X/Y will be integer scaled independently.
# video_scale_integer = false# A floating point value for video aspect ratio (width / height).
# If this is not set, aspect ratio is assumed to be automatic.
# Behavior then is defined by video_aspect_ratio_auto.
video_aspect_ratio = 1.33# If this is true and video_aspect_ratio is not set,
# aspect ratio is decided by libretro implementation.
# If this is false, 1:1 PAR will always be assumed if video_aspect_ratio is not set.
# video_aspect_ratio_auto = false# Forces cropping of overscanned frames.
# Exact behavior of this option is implementation specific.
# video_crop_overscan = true# Path to shader. Shader can be either Cg, CGP (Cg preset) or GLSL, GLSLP (GLSL preset)
# video_shader = “/path/to/shader.{cg,cgp,glsl,glslp}”# Load video_shader on startup.
# Other shaders can still be loaded later in runtime.
# video_shader_enable = false# Defines a directory where shaders (Cg, CGP, GLSL) are kept for easy access.
video_shader_dir = /opt/retropie/emulators/RetroArch/shader/# CPU-based video filter. Path to a dynamic library.
# video_filter =# Path to a font used for rendering messages. This path must be defined to enable fonts.
# Do note that the _full_ path of the font is necessary!
# video_font_path =# Size of the font rendered.
# video_font_size = 32# Enable usage of OSD messages.
# video_font_enable = true# Offset for where messages will be placed on screen. Values are in range 0.0 to 1.0 for both x and y values.
# [0.0, 0.0] maps to the lower left corner of the screen.
# video_message_pos_x = 0.05
# video_message_pos_y = 0.05# Color for message. The value is treated as a hexadecimal value.
# It is a regular RGB hex number, i.e. red is “ff0000”.
# video_message_color = ffffff# Video refresh rate of your monitor.
# Used to calculate a suitable audio input rate.
# video_refresh_rate = 59.95# Allows libretro cores to set rotation modes.
# Setting this to false will honor, but ignore this request.
# This is useful for vertically oriented content where one manually rotates the monitor.
# video_allow_rotate = true# Forces a certain rotation of the screen.
# The rotation is added to rotations which the libretro core sets (see video_allow_rotate).
# The angle is <value> * 90 degrees counter-clockwise.
# video_rotation = 0#### Audio
# Enable audio.
# audio_enable = true# Audio output samplerate.
# audio_out_rate = 48000# Audio resampler backend. Which audio resampler to use.
# Default will use “sinc”.
# audio_resampler =# Audio driver backend. Depending on configuration possible candidates are: alsa, pulse, oss, jack, rsound, roar, openal, sdl, xaudio.
# audio_driver =# Override the default audio device the audio_driver uses. This is driver dependant. E.g. ALSA wants a PCM device, OSS wants a path (e.g. /dev/dsp), Jack wants portnames (e.g. system:playback1,system:playback_2), and so on …
# audio_device =# Audio DSP plugin that processes audio before it’s sent to the driver. Path to a dynamic library.
# audio_dsp_plugin =# Will sync (block) on audio. Recommended.
# audio_sync = true# Desired audio latency in milliseconds. Might not be honored if driver can’t provide given latency.
# audio_latency = 64# Enable audio rate control.
# audio_rate_control = true# Controls audio rate control delta. Defines how much input rate can be adjusted dynamically.
# Input rate = in_rate * (1.0 +/- audio_rate_control_delta)
# audio_rate_control_delta = 0.005# Audio volume. Volume is expressed in dB.
# 0 dB is normal volume. No gain will be applied.
# Gain can be controlled in runtime with input_volume_up/input_volume_down.
# audio_volume = 0.0#### Overlay
# Enable overlay.
# input_overlay_enable = false# Path to input overlay
# input_overlay =# Overlay opacity
# input_overlay_opacity = 1.0# Overlay scale
# input_overlay_scale = 1.0#### Input
# Input driver. Depending on video driver, it might force a different input driver.
# input_driver = sdl# Joypad driver. (Valid: linuxraw, sdl, dinput)
# input_joypad_driver =# Keyboard layout for input driver if applicable (udev/evdev for now).
# Syntax is either just layout (e.g. “no”), or a layout and variant separated with colon (“no:nodeadkeys”).
# input_keyboard_layout =# Defines axis threshold. Possible values are [0.0, 1.0]
# input_axis_threshold = 0.5# Enable input auto-detection. Will attempt to autoconfigure
# joypads, Plug-and-Play style.
input_autodetect_enable = true# Directory for joypad autoconfigs (PC).
# If a joypad is plugged in, that joypad will be autoconfigured if a config file
# corresponding to that joypad is present in joypad_autoconfig_dir.
# Input binds which are made explicit (input_playerN_*_btn/axis) will take priority over autoconfigs.
# Autoconfigs can be created with retroarch-joyconfig, manually, or with a frontend.
# Requires input_autodetect_enable to be enabled.
joypad_autoconfig_dir = /opt/retropie/emulators/RetroArch/configs/# Enable debug input key reporting on-screen.
# input_debug_enable = false# Sets which libretro device is used for a player.
# Devices are indentified with a number.
# This is normally saved by the menu.
# Device IDs are found in libretro.h.
# These settings are overridden by explicit command-line arguments which refer to input devices.
# None: 0
# Joypad (RetroPad): 1
# Mouse: 2
# Keyboard: 3
# Generic Lightgun: 4
# Joypad w/ Analog (RetroPad + Analog sticks): 5
# Multitap (SNES specific): 257
# Super Scope (SNES specific): 260
# Justifier (SNES specific): 516
# Justifiers (SNES specific): 772# input_libretro_device_p1 =
# input_libretro_device_p2 =
# input_libretro_device_p3 =
# input_libretro_device_p4 =
# input_libretro_device_p5 =
# input_libretro_device_p6 =
# input_libretro_device_p7 =
# input_libretro_device_p8 =# Keyboard input. Will recognize letters (“a” to “z”) and the following special keys (where “kp_”
# is for keypad keys):
#
# left, right, up, down, enter, kp_enter, tab, insert, del, end, home,
# rshift, shift, ctrl, alt, space, escape, add, subtract, kp_plus, kp_minus,
# f1, f2, f3, f4, f5, f6, f7, f8, f9, f10, f11, f12,
# num0, num1, num2, num3, num4, num5, num6, num7, num8, num9, pageup, pagedown,
# keypad0, keypad1, keypad2, keypad3, keypad4, keypad5, keypad6, keypad7, keypad8, keypad9,
# period, capslock, numlock, backspace, multiply, divide, print_screen, scroll_lock,
# tilde, backquote, pause, quote, comma, minus, slash, semicolon, equals, leftbracket,
# backslash, rightbracket, kp_period, kp_equals, rctrl, ralt
#
# Keyboard input, Joypad and Joyaxis will all obey the “nul” bind, which disables the bind completely,
# rather than relying on a default.
input_player1_a = x
input_player1_b = z
input_player1_y = a
input_player1_x = s
input_player1_start = enter
input_player1_select = rshift
input_player1_l = q
input_player1_r = w
input_player1_left = left
input_player1_right = right
input_player1_up = up
input_player1_down = down
# input_player1_l2 =
# input_player1_r2 =
# input_player1_l3 =
# input_player1_r3 =# Two analog sticks (DualShock-esque).
# Bound as usual, however, if a real analog axis is bound,
# it can be read as a true analog.
# Positive X axis is right, Positive Y axis is down.
# input_player1_l_x_plus =
# input_player1_l_x_minus =
# input_player1_l_y_plus =
# input_player1_l_y_minus =
# input_player1_r_x_plus =
# input_player1_r_x_minus =
# input_player1_r_y_plus =
# input_player1_r_y_minus =# If desired, it is possible to override which joypads are being used for player 1 through 8.
# First joypad available is 0.
# input_player1_joypad_index = 0
# input_player2_joypad_index = 1
# input_player3_joypad_index = 2
# input_player4_joypad_index = 3
# input_player5_joypad_index = 4
# input_player6_joypad_index = 5
# input_player7_joypad_index = 6
# input_player8_joypad_index = 7# Joypad buttons.
# Figure these out by using RetroArch-Phoenix or retroarch-joyconfig.
# You can use joypad hats with hnxx, where n is the hat, and xx is a string representing direction.
# E.g. “h0up”
# input_player1_a_btn =
# input_player1_b_btn =
# input_player1_y_btn =
# input_player1_x_btn =
# input_player1_start_btn =
# input_player1_select_btn =
# input_player1_l_btn =
# input_player1_r_btn =
# input_player1_left_btn =
# input_player1_right_btn =
# input_player1_up_btn =
# input_player1_down_btn =
# input_player1_l2_btn =
# input_player1_r2_btn =
# input_player1_l3_btn =
# input_player1_r3_btn =# Axis for RetroArch D-Pad.
# Needs to be either ‘+’ or ‘-‘ in the first character signaling either positive or negative direction of the axis, then the axis number.
# Do note that every other input option has the corresponding _btn and _axis binds as well; they are omitted here for clarity.
# input_player1_left_axis =
# input_player1_right_axis =
# input_player1_up_axis =
# input_player1_down_axis =# Holding the turbo while pressing another button will let the button enter a turbo mode
# where the button state is modulated with a periodic signal.
# The modulation stops when the button itself (not turbo button) is released.
# input_player1_turbo =# Describes the period and how long of that period a turbo-enabled button should behave.
# Numbers are described in frames.
# input_turbo_period = 6
# input_turbo_duty_cycle = 3# This goes all the way to player 8 (*_player2_*, *_player3_*, etc), but omitted for clarity.
# All input binds have corresponding binds for keyboard (none), joykeys (_btn) and joyaxes (_axis) as well.# Toggles fullscreen.
# input_toggle_fullscreen = f# Saves state.
# input_save_state = f2
# Loads state.
# input_load_state = f4# State slots. With slot set to 0, save state name is *.state (or whatever defined on commandline).
# When slot is != 0, path will be $path%d, where %d is slot number.
# input_state_slot_increase = f7
# input_state_slot_decrease = f6# Toggles between fast-forwarding and normal speed.
# input_toggle_fast_forward = space# Hold for fast-forward. Releasing button disables fast-forward.
# input_hold_fast_forward = l# Key to exit RetroArch cleanly.
# Killing it in any hard way (SIGKILL, etc) will terminate RetroArch without saving RAM, etc.
# On Unix-likes, SIGINT/SIGTERM allows a clean deinitialization.
input_exit_emulator = escape# Applies next and previous shader in directory.
input_shader_next = m
input_shader_prev = n# Hold button down to rewind. Rewinding must be enabled.
input_rewind = r# Toggle between recording and not.
# input_movie_record_toggle = o# Toggle between paused and non-paused state
# input_pause_toggle = p# Frame advance when content is paused
# input_frame_advance = k# Reset the content.
# input_reset = h# Cheats.
# input_cheat_index_plus = y
# input_cheat_index_minus = t
# input_cheat_toggle = u# Mute/unmute audio
# input_audio_mute = f9# Take screenshot
# input_screenshot = f8# Netplay flip players.
# input_netplay_flip_players = i# Hold for slowmotion.
# input_slowmotion = e# Enable other hotkeys.
# If this hotkey is bound to either keyboard, joybutton or joyaxis,
# all other hotkeys will be disabled unless this hotkey is also held at the same time.
# This is useful for RETRO_KEYBOARD centric implementations
# which query a large area of the keyboard, where it is not desirable
# that hotkeys get in the way.# Alternatively, all hotkeys for keyboard could be disabled by the user.
input_enable_hotkey = escape# Increases audio volume.
# input_volume_up = kp_plus
# Decreases audio volume.
# input_volume_down = kp_minus# Toggles to next overlay. Wraps around.
# input_overlay_next =# Toggles eject for disks. Used for multiple-disk content.
# input_disk_eject_toggle =# Cycles through disk images. Use after ejecting.
# Complete by toggling eject again.
# input_disk_next =# Toggles menu.
# input_menu_toggle = f1# Toggles mouse grab. When mouse is grabbed, RetroArch hides the mouse,
# and keeps the mouse pointer inside the window to allow relative mouse input
# to work better.
# input_grab_mouse_toggle = f11#### Menu
# Menu driver to use. “rgui”, “lakka”, etc.
# menu_driver = “rgui”#### Camera
# Override the default camera device the camera driver uses. This is driver dependant.
# camera_device =# Override the default privacy permission for cores that want to access camera services. Is “false” by default.
# camera_allow = false#### Location
# Override the default privacy permission for cores that want to access location services. Is “false” by default.
# location_allow = false#### Netplay
# When being client over netplay, use keybinds for player 1.
# netplay_client_swap_input = false# The nickname being used for playing online.
# netplay_nickname =# The amount of delay frames to use for netplay. Increasing this value will increase
# performance, but introduce more latency.
# netplay_delay_frames = 0# Netplay mode for the current user.
# false is Server, true is Client.
# netplay_mode = false# Enable or disable spectator mode for the player during netplay.
# netplay_spectator_mode_enable = false# The IP Address of the host to connect to.
# netplay_ip_address =# The port of the host IP Address. Can be either a TCP or an UDP port.
# netplay_ip_port = 55435#### Misc
# Enable rewinding. This will take a performance hit when playing, so it is disabled by default.
rewind_enable = false# Rewinding buffer size in megabytes. Bigger rewinding buffer means you can rewind longer.
# The buffer should be approx. 20MB per minute of buffer time.
rewind_buffer_size = 10# Rewind granularity. When rewinding defined number of frames, you can rewind several frames at a time, increasing the rewinding speed.
rewind_granularity = 2# Pause gameplay when window focus is lost.
# pause_nonactive = true# Autosaves the non-volatile SRAM at a regular interval. This is disabled by default unless set otherwise.
# The interval is measured in seconds. A value of 0 disables autosave.
# autosave_interval =# Path to XML cheat database (as used by bSNES).
# cheat_database_path =# Path to XML cheat config, a file which keeps track of which
# cheat settings are used for individual games.
# If the file does not exist, it will be created.
# cheat_settings_path =# Directory to dump screenshots to.
# screenshot_directory =# Records video after CPU video filter.
# video_post_filter_record = false# Records output of GPU shaded material if available.
# video_gpu_record = false# Screenshots output of GPU shaded material if available.
video_gpu_screenshot = true# Block SRAM from being overwritten when loading save states.
# Might potentially lead to buggy games.
# block_sram_overwrite = false# When saving a savestate, save state index is automatically increased before
# it is saved.
# Also, when loading content, the index will be set to the highest existing index.
# There is no upper bound on the index.
# savestate_auto_index = false# Slowmotion ratio. When slowmotion, content will slow down by factor.
# slowmotion_ratio = 3.0# The maximum rate at which content will be run when using fast forward. (E.g. 5.0 for 60 fps content => 300 fps cap).
# RetroArch will go to sleep to ensure that the maximum rate will not be exceeded.
# Do not rely on this cap to be perfectly accurate.
# A negative ratio equals no FPS cap.
# fastforward_ratio = -1.0# Enable stdin/network command interface.
# network_cmd_enable = false
# network_cmd_port = 55355
# stdin_cmd_enable = falseinput_player1_joypad_index = “0”
input_player1_b_btn = “1”
input_player1_y_btn = “3”
input_player1_select_btn = “6”
input_player1_start_btn = “7”
input_player1_up_btn = “13”
input_player1_down_btn = “14”
input_player1_left_btn = “11”
input_player1_right_btn = “12”
input_player1_a_btn = “0”
input_player1_x_btn = “2”
input_player1_l_btn = “4”
input_player1_r_btn = “5”
input_player1_l2_axis = “+2”
input_player1_r2_axis = “+5”
input_player1_l3_btn = “9”
input_player1_r3_btn = “10”
input_player1_l_x_plus_axis = “+0”
input_player1_l_x_minus_axis = “-0”
input_player1_l_y_plus_axis = “+1”
input_player1_l_y_minus_axis = “-1”
input_player1_r_x_plus_axis = “+3”
input_player1_r_x_minus_axis = “-3”
input_player1_r_y_plus_axis = “+4”
input_player1_r_y_minus_axis = “-4”input_player2_joypad_index = “1”
input_player2_b_btn = “1”
input_player2_y_btn = “3”
input_player2_select_btn = “6”
input_player2_start_btn = “7”
input_player2_up_btn = “13”
input_player2_down_btn = “14”
input_player2_left_btn = “11”
input_player2_right_btn = “12”
input_player2_a_btn = “0”
input_player2_x_btn = “2”
input_player2_l_btn = “4”
input_player2_r_btn = “5”
input_player2_l2_axis = “+2”
input_player2_r2_axis = “+5”
input_player2_l3_btn = “9”
input_player2_r3_btn = “10”
input_player2_l_x_plus_axis = “+0”
input_player2_l_x_minus_axis = “-0”
input_player2_l_y_plus_axis = “+1”
input_player2_l_y_minus_axis = “-1”
input_player2_r_x_plus_axis = “+3”
input_player2_r_x_minus_axis = “-3”
input_player2_r_y_plus_axis = “+4”
input_player2_r_y_minus_axis = “-4”input_enable_hotkey_btn = “8”
input_exit_emulator_btn = “9”Hi all,
I’ve got two dual x-arcade joysticks and a RetroPie 2.3 setup. That means four players!
Except…RetroPie is seeing the second X-Arcade as the same item as the first. I’ve gone in a reprogrammed X-Arcade #2 with new keys. I can use that dual joystick to type on my mac and each button and joystick direction is typing the right keyletters. But, when I try to use it with RetroPie the system registers both as the same with the default settings.Any way I can tell retropie that they are two different controllers?
Any idea why the re-programming I’ve done doesn’t work in the RetroPie? Any way to fix that?Any help greatly appreciated.
thanks,
Scottbtw…my settings in retroarch.cfg:
# Keyboard input, Joypad and Joyaxis will all obey the "nul" bind, which disables the bind completely, # rather than relying on a default. input_player1_a = z input_player1_b = shift input_player1_y = ctrl input_player1_x = alt input_player1_start = num5 input_player1_select = c input_player1_l = space input_player1_r = x input_player1_left = keypad4 input_player1_right = keypad6 input_player1_up = keypad8 input_player1_down = keypad2 input_player2_a = e input_player2_b = w input_player2_y = a input_player2_x = s input_player2_start = num6 input_player2_select = rightbracket input_player2_l = q input_player2_r = leftbracket input_player2_left = d input_player2_right = g input_player2_up = r input_player2_down = f input_player3_a = num0 input_player3_b = num1 input_player3_y = num2 input_player3_x = num3 input_player3_start = num4 input_player3_select = num7 input_player3_l = num8 input_player3_r = num9 input_player3_left = b input_player3_right = h input_player3_up = i input_player3_down = jTopic: Problems getting started
Hi @ all
I just downloaded the latest Retropie SD Image. After writing it to my SD card an booting Im troubled by following problems:
1. While booting, the display on my TV is OK. But in Emulationsation the Image appears to be cropped out. eg: in the lower left corner the symbol for the START Button (for Options) is cut in half, one can only see the right half of it.
2. Right from the start I have listed some Systems: Apple 2, IBM, Ports
There are no ROMs for those systems on my PI, after adding ROMs for other systems, I “keep” Apple2, IBM, etc. … How can I disable this odd behaviour? (I dont want to see empty systems)3. I wanted to edit some Options of Emulationstation… but in the .emulationstation directory is no trace of the es_systems config file. How can that be?? (keep in mind, that emulationstation is working and showing up different systems!)
4. The SNES Emulation is really choppy! Even in the DEMO screen from Mario Kart I have lagging Audio and poor framerate. I have read that I can change the emulator used, but that would happen in the es_systems config which is missing (see above). Also it seems that the Buttons of my controller arent mapped, because i cant click away the demo screen.
5. I havent even tried to run n64 or NeoGeo emulators… would they also be so choppy?
—-
I am using a Pi B Rev. 2 (512MB / 256 MB Split) running at “HIGH” Overclocking settings (950MHz). I have a small heatsink attached and no case over the processor.
The PI is connected over hdmi to my TV, the controller used is a “Logitech Dual Action”
With the standard wheezy the PI runs smooth, even streaming 1080p30 from limelight is no proplem in this setup
Topic: Game launch/stop callbacks
## tl;dr
Are there callbacks or triggers that I can use for when a game is launched on RetroPie and for when a user returns to EmulationStation from a game?## My setup
* [RetroPie-Setup](https://github.com/retropie/RetroPie-Setup)
* rasberry pi b+
* x-arcade dual joystick (x 2)## Why I need the callback
On game launch, I want to trigger some RGB buttons to change color according to the game’s specific controller set up. I would also like to trigger a button map to show the game’s mapping (on a second screen).## Is this a EmulationStation job?
Is this actually something that should be programmed into EmulationStation and not RetroPie?thank you,
ScottI put a similar question in the EmulationStation Issues on github:
https://github.com/Aloshi/EmulationStation/issues/302Hello,
Im trying to setup my two controllers

And this is really easy just typed in the following commandssudo chown pi /opt/retropie/configs/all/retroarch.cfg cd /opt/retropie/emulators/RetroArch/installdir/bin sudo ./retroarch-joyconfig -j 1 >> /opt/retropie/configs/all/retroarch.cfgHit enter en type in the buttons I want to bind to what the console is asking me, but then when I go into a game (sega genesis in my case) up on the D-pad is the start button and Y and B will be up and down. Is there something im doing wrong?
First–huge Thank You to all the contributors on this forum! Score one for voluntary human interaction.
I had great difficulty getting the XBox 360 wireless controllers to work; nothing went well. Not a total Linux n00b but not expert either.
First: the “retroarch.cfg” file is your best friend. If all else fails, manually editing this file to achieve correct controller mappings will solve controller problems.
Second: /opt/retropie/emulators/RetroArch/installdir/bin/retroarch-joyconfig is your other friend; it quickly maps joystick inputs to the parameters for the retroarch.cfg files. It just takes a bit of doing to get it to work; my issue was it didn’t see my controller until I had them registered properly–see below.
Third: if joyconfig doesn’t see your controller, not to worry. Go here:
https://github.com/retropie/RetroPie-Setup/wiki/Setting-up-the-XBox360-controller
And use method #3. Method #1 gave me inconsistent results; the controller would jump around between js0, js1, and js3. Joyconfig couldn’t see it half the time. And it made SNES games jumpy or slow. Method #3 consistently registers the controller. It also solved my other perplexing problem–even when method #1 properly registered the controller, and the controller worked in EmulationStation, the games couldn’t see the controller.Fourth: Get “jstest”–as in “sudo apt-get install joystick”. Once installed, find your controller with “jstest /dev/input/jsX” where “X” is 0 to 3. When you hit the right one, you’ll have zero values for the analog sticks and “off” for the buttons. Wiggle them around, press buttons, witness the magic of an XBox 360 controller talking to Linux on a 20-dollar computer*.
Now you’ve got the XBox controller reliably and stably registered with that shell script/demon trick (method #3). You’ve got the tool to tell you where it is and what its buttons do (jstest).
Use retroarch-joyconfig to create a mapping file:
“./retroarch-joyconfig -o p1.cfg -p 1 -j 0”Copy the text that’s generated to the end of your “/opt/retropie/configs/all/retroarch.cfg” file.
Don’t assume that just because it’s mapped it’ll work in all emulators; it won’t. You now have to map that general controller to specific console’s expectations.
Individual emulator’s retroarch.cfg files are located in /opt/retropie/configs/NameOfEmulator directories. The main one under ‘all’ is overridden by the individual emulators.
If you have issues with mis-mapped keys in a game, make note of which buttons invoke which activities; for some reason I had the hat button left mapped to the fire key in NES games. Open the /opt/retropie/configs/nes/retroarch.cfg file; note which action is mapped to the number “2” (see below). Change its mapping from “2” to “11”–the right trigger.
And so forth.
XBox button/stick numerical mappings derived from jstest:
0–D-pad Up
1–D-pad Down
2–D-pad Left
3–D-pad Right
4–A
5–B
6–X
7–Y
8–Left shoulder
9–Right shoulder
10–Left trigger
11–Right trigger
12–back
13–start
14–xbox button
15–Left stick depressed
16–Right stick depressed* I simply can’t believe how amazing the Raspberry Pi is. I didn’t have a laptop this powerful until around 2001.
Topic: Best USB arcade board
Hi guys, i’m using a Xin-Mo dual arcade adapter, and i’m noticing a slight input lag. Are there better ones in the market?
What do you recommend?
Thanks!
Topic: Gamepad input lag
Hi there,
I’m really frustrated concerning about my input gamepad lag. I’m experimenting a lot of latency and delay while playing and I don’t know what to do. My gamepad is an USB clone of SNES gamepad.
Currently I’m using Retropie 2.3 with the following settings to avoid input lag:
config.txt:
hdmi_group=1 hdmi_mode=4 arm_freq=1100 core_freq=600 sdram_freq=750 over_voltage=6 over_voltage_sdram=6 avoid_safe_mode=1 gpu_mem=256 overscan=1all/retroarch.cfg:
video_driver = "gl"
video_hard_sync = true
video_hard_sync_frames = 3
My questions are:
· Should I get other gamepad? Maybe Bluetooth Sony DualShock 3?
· Some specific configuration of config.txt or retroarch.cfg that I’m missing?
· Are there some applications to test the input lag?Thanks in advance! :)
Hello,
I successfully performed the whole install and configured 2 dual shock controllers with bluetooth.
The problem I have is that if no USB controller is plugged at startup, I get an error message (“no gamepad detected”).
I don’t want to keep an USB controller plugged because it catches the first controller slot (e.g. slot 0) and this messes up my gamepad configuration in retroarch. (I want to use only my BT controllers)
So here’s my question: is it possible to skip gamepad detection at startup of emulation station?
Thanks in advance! And keep up this brilliant work!
Thierry
I have just installed RetroPie 2.3 and all is working swimmingly except the scraper.
I have tried using goodtools naming conventions as well as just the games name and neither of these work. I have attempted all settings within the scrape window on the full collection as well as the individual roms and nothing seems to work.
Does anyone have any suggestions about what could be wrong? I’m using a Raspberry Pi B+ with a fresh install of RetroPie 2.3 and only about 3 mega drive roms as a sample.
I have attempted searching this forum as well as the net without any luck so hoping someone at the very least has had the same issue. Many Thanks.
Good Evening,
I am running into an issue getting the x-arcade dual joystick to work with retropie. I have it working correctly with Atari. But only on the left side and it doesn’t seem to be programmed totatally correctly.
These are the steps I went through:
Used [this lifehacker article](http://lifehacker.com/how-to-turn-your-raspberry-pi-into-a-retro-game-console-498561192) as my plan of attack.
started with ExFat formatted sd-card
1. Downloaded RetroPie Project SD-card Image V2.3
2. Used RPi-sd card builder v1.2 to extract image to the SD Card
3. followed lifehacker’s step 2 instructions forsudo raspi-configexactly
4. went to step 3/sudo ./retropie_setup.sh,- installed the binaries first
- reboot
- updated setup script
- reboot
- 328 setup->Xarcade2Jstick: enabled
5. emulation station, tried a couple games, didn’t work
6.sudo ./retropie_setup.sh
* retroarch controller setup
7. emulation station, tried a couple games, atari worked mostly, mame did not, nes sorta – with weird button placementCan you please tell me what I might have done wrong?
Is it possible to just drop in .cfg files somewhere?
Should I expect to have to create different .cfg files for my xarcade dual stick to work with each emulator?thank you for any help!
ScottHello folks. I am new to this forum, and I would like to introduce myself first, before I ask for any help here. I just downloaded an EmulationStation 2 image and installed it on my little Raspberry. I am new to Raspberry, but in the past I used a lot of emulation of the GP2X. But that is almost 8 years ago, and I think time is right to test some embedded emulators. Aside from that I am a computer science student, and Arch Linux is on my desktop computer. Therefore many Linux commands are already known for me.
When I first started the emulation station, I was visually impressed, because it just looked beautiful, and even my gamepad was recognized perfectly fine and I could use it in the menus. No keyboard needed at all. So I got some games on the system and tried to play a game, and my impression faded away. The controller setup is a mess. Here is a setup of controllers that I would like to for megadrive emulation:
[img]http://i.imgur.com/26tGSXp.jpg[/img]
It’s an playstation 2 controller (with adapter) and a WingMan Cordless Rumblepad. Since they both are generally very different, they need to be configured differently.
The WingMan controller is generally pretty perfect for Sega emulation, because it has C and Z which can be mapped to C and Z of the genesis controller. But I don’t know how to do that with this system. First of all, it is not helpful when someone else decided to map everything to a “360 compatible gamepad” and I have to guess how that mapping might look like, so that I can undo that mapping. And second, I am still confused by all these different configuration files and locations that I am able to use.
[code]
ls /opt/retropie/emulators/RetroArch/configs/
GreenAsiaInc.USBJoystick.cfg (adapter for DualShock2)
LogitechWingManCordlessGamepad.cfg
[…]
ls /opt/retropie/configs/all
dgenrc
retroarch.cfg
retroarch.cfg.bak
retroarch-core-options.cfg
ls /opt/retropie/configs/megadrive/
retroarch.cfg
[/code]another big problem is, that I can’t test my buttons easily. The best test I could find so far is the game gauntlet 4, that has an integrated gamepad test for 4 players, but it does not cover the xyz buttons.
dgenrc seems to be the file I need to use, but I am not shure if it isn’t completely ignored
Btw, I don not have a 360 controller, nor do I want one, I have enough gamepads.
This is the simplest way to get it working, and it is also very stable, anyway this is the version 1.00 of this tutorial, it will be improved over time.
First things first, you will need this, but it’s kinda obvious :P
– RetroPie v2.3 clean image
– An USB bluetooth dongle
– A DualShock4 controller
– An active internet connection1.- Update the repositories:
sudo apt-get update2.- Install the following packages to prepare the Raspberry to handle bluetooth and to meet the required ds4drv dependencies:
sudo apt-get install --no-install-recommends joystick checkinstall bluez-utils bluez-compat bluez-hcidump libusb-dev libbluetooth-dev
sudo apt-get install python-dev python-setuptools3.- We will be using the development version of ds4drv, that was the one that work the best for me:
git clone https://github.com/chrippa/ds4drv.git
cd ds4drv
sudo python setup.py install4.- Now we need to allow a normal user to create a new joystick:
wget https://raw.githubusercontent.com/chrippa/ds4drv/master/udev/50-ds4drv.rules
sudo mv 50-ds4drv.rules /etc/udev/rules.d/
sudo udevadm control --reload-rules
sudo udevadm trigger5.- At this point we can test the ds4drv connection with the DS4 controller:
ds4drv --led 000008You will see something like this:
pi@raspberrypi ~/ds4drv $ ds4drv --led 000008
[info][controller 1] Created devices /dev/input/js0 (joystick) /dev/input/event0 (evdev)
[info][bluetooth] Scanning for devices
Now you have to press and hold the share and PS buttons on the DualShock 4 at the same time until the light bar starts blinking. It will connect, and the led will turn on in soft blue.
Now press Ctrl + C to stop the test.
6.- Now we need to add the ds4drv to the programs at boot, so:
sudo nano /etc/rc.localAnd just after “# By default this script does nothing.” we add:
/usr/local/bin/ds4drv --led 000008 &To get something like this:
# By default this script does nothing.

/usr/local/bin/ds4drv --led 000008 &

# Print the IP address
_IP=$(hostname -I) || true
if [ "$_IP" ]; then
  printf "My IP address is %s\n" "$_IP"
Save the file with “Ctrl + X”.
7.- That’s it, you can now restart the Raspberry, in the “Emulation Station Loading…” screen or in the “Welcome” screen, we have to press and hold the share and PS buttons on the DualShock 4. It should connect with the led bar turned on in soft blue. Press and hold any button and you will see this:
To do:
– I have to see if running ds4drv in daemon mode is the best option.
– More tests.Edited:
Step 6: Changed /etc/init.d to /etc/rc.local. (Thanks @exonerated)Topic: Controller Help
I am not Linux expert and I am coming along and have completed many different types of activities thus far in the Pi environments. However I am having a difficult time understanding how to configure the controller for emulators. For the emulation station itself I am good and it detects and lets me use my xbox 360 wirelss controller through all the menus.
The issue is when I go to launch any emulator game. only keyboard and mouse work then.
I find a bunch of different tutorials stating to do quite a deal of many different things in which I have tried all of them.
https://github.com/retropie/RetroPie-Setup/wiki/Control-Issues
With this tutorial when I try the retroarch-joyconfig -o I get something about command doesn’t existhttps://github.com/retropie/RetroPie-Setup/wiki/Setting-up-the-XBox360-controller
With this tutorial I am able to run the driver install and add the multiple instances even though the file isn’t where it says it is. But this did nothing to make my controller work in any emulator.
I tried this one as well but again the command wont run.Now with WinSCP I have started to understand the file structure a little better and /opt/retropie/configs/ is where the meat and potatoes seem to be. Since my /all .cfg file seems to be working for the emulation station I copied it into one of the emulators to try that, it didn’t work either.
Also I have gotten to the whole blue screen and tried to do a full source update that stops too when it cant hit certain git libraries or something like that.
either way I feel pretty confused and lost, maybe I am sort of starting to get it but I just want to know the following straight up and clear.
1) How do I make sure all emulators are up to date
2) How do I set it up to allow up to 4 xbox wireless controllers
3) How do I configure all and individually each emulator controllers
4) What is the proper keyboard key to leave a game with esc?Sorry if I sound lazy but I have spent several afternoons on this and the documentation seems lacking and not up to date or something, it could be just me or to many things you must understand prior, but again I have figured a lot out so far on other projects.
Oh I am using berryboot Ver 2.0 and have openelec and raspbian for my other boots and the default of retropie downloaded and I went into that blue shell and tried to do the full source install but it exited after the intelivision emulator install. A lot of things seemed to fail during that install.
From what I can tell this is a pretty kewl project just cant really get it updated and controllers working.
Thanks for your time
