
This is another short example of a demo application that makes use of the V-USB library together with an Arduino. I show, how an USB keyboard functionality can be implemented.
The motivation: The V-USB library provides a quite simple possibility to realize USB devices with arbitrary USB descriptors. This is useful, for example, if the device that you want to connect to can only handle certain types of USB devices. The V-USB library allows you to implement exactly the device descriptor that can be understood by the other device.
This exemplary project is a summary from various sources. I do not want to repeat all the detailed explanations from these sources in the following, but rather show how to build a working example. For a deeper understanding I give a list of usefull links that should help for an understanding at the end of this post.
This example makes use of the Arduino 1.0 IDE and the fifth alpha release of the V-USB library. To setup the USB keyboard, we need the following parts:
- 1 Arduino board. I have a Duemilanove, but I assume that any other board (even any other ATMEGA controller?) would also do.
- For the USB interface:
- 1x USB “B” female socket
- 1x 2K2 (i.e., “2.2 kilo Ohms”) resistor, 1/4W
- 2x 68R (i.e., “68 Ohms”) resistor, 1/4W
- 2x 3.6V Zener diode, 1/4W
For the button:
- 1x switch/push button etc.
- 1x 10K resistor
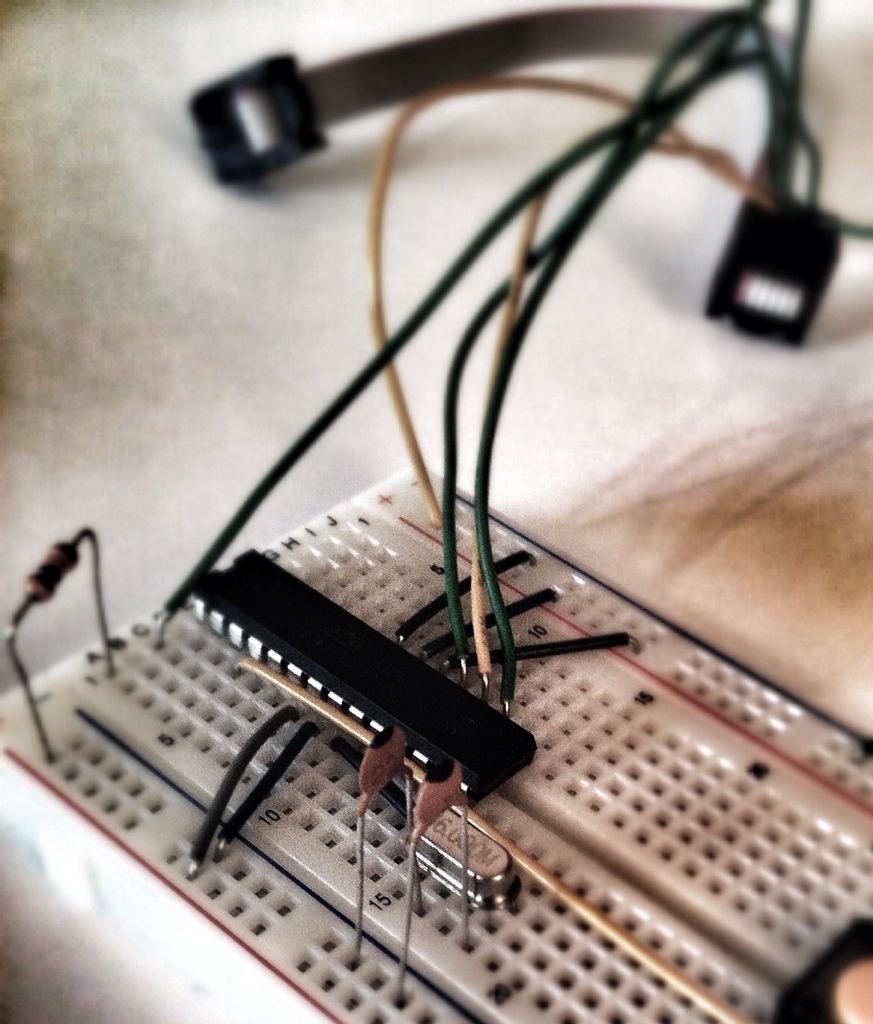
For the assembling, we need a breadboard and some jumper wires. I used these schematic for setting up the button circuit:


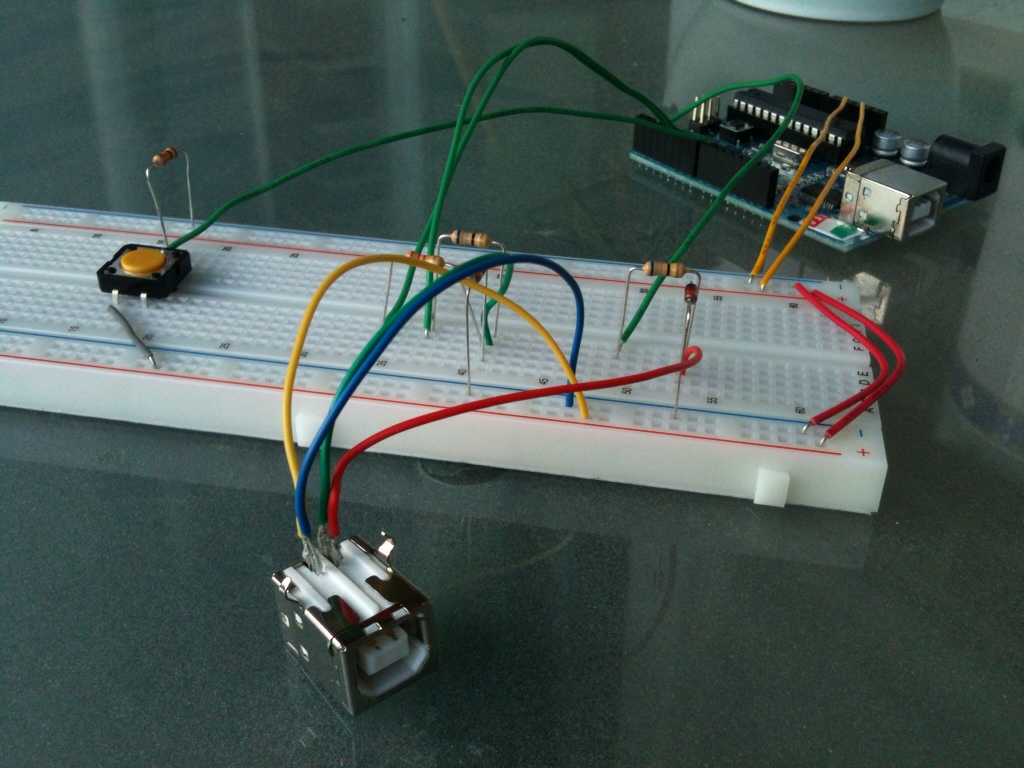
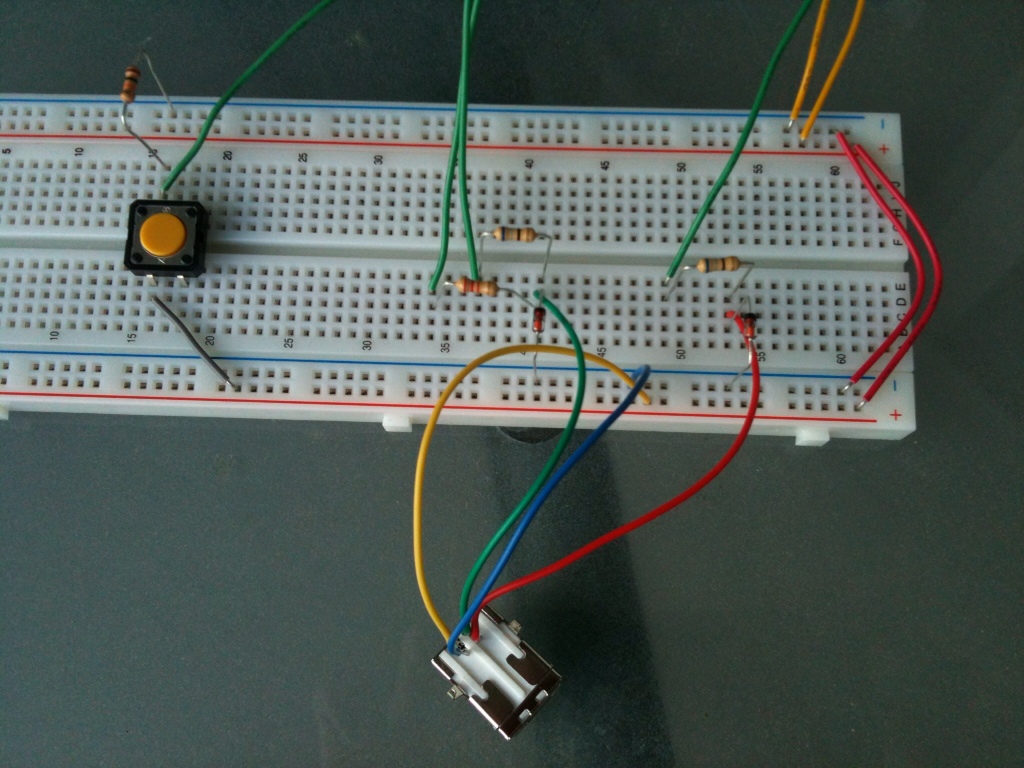
To give you an idea about how everything could look after assembling, here is my circuit:
More details about this small USB keyboard project can be found in the book “Practical Arduino“. If you feel that you lack some more basic understanding of the Arduino and microelectronics, the short book “Getting started with Arduino” provides a really nice introduction to these topics. Detailed tutorials about the V-USB library can also be found in the blog of Joonas Pihlajamaa.

I think this is the lib
https://code.google.com/archive/p/vusb-for-arduino/downloads
For some reason 1/2W did not work. 1/4w works flawlessly.
Hello, i tried to launch same example but without success. Whenever it runs “UsbKeyboard.sendKeyStroke” command, it hangs there. Any ideas? Thank you.
Please give me a link to the Arduino V-USB library.
Thank you! Works great on a Mac. Having issues on Windows. But I’m not surprised. If I figure out anything I’ll post the solution I find.
Hello Pablo, i tried 470R instead of 2k2. but problem continue. it’s appearing “unknown USBdevice”. Also shown this in detailed description seciton. –> USBDEVICE_DESCRIPTOR_FAILURE. Could you advice the solution to me?
Did you solve the win 10 problem? could you help me please.
In windows 10 its the driver descripter something
Hello geeks! :-P
I did a succesful project on the vusb library and m quite impressed!!
I was thinking that is there a way that i can read keyboard strokes (with the vusb library )like capslock, shift, cntrl keys n detect whether they are press down or up…then it would be of great help to me…
Plz help.
Thanx to all in advance!
you are using delay method but you disabled timer..
Works! I downloaded and used the 1.0 Arduino IDE. No more errors when I compil.
Hello, I try to launch this example but without success. I get some errors like that “…librariesUsbKeyboard/usbdrv.h:479:26: error: variable ‘usbDescriptorDevice’….” on the 1.6.4 Arduino IDE. Any idea? thank you.
please anyone send me librarys to do this project in the required,(ready to be copied into the library folder)
The problem might be with AMD motherbords. The intell work fine. I have tested it on 8 computers – only one (AMD based) is not worked…
Hello People
I had this problem, ” this is a unknown device ” , i solve it with a simple solution,
the resistor 2k2 ohm , i’m replaced it with a 1k8 resistor , but it not Works again, i’ve replaced with a 1k ohm , it Works, but failled again in a few seconds, i had a new replacement, the 1k ohm resistor, was replaced with a 470 ohm and it Works perfect !!!
The installation icon, in the taskbar shows installing a usb keyboard….
I rigged up the circuit as shown and uploaded the code onto my Arduino Uno. Bt when I connect it it to my windows systwm it shous ‘USB device not found’. I checked my circuit many times for faults, but I couldnt find any! Please help me with the problem
I rigged up the circuit as shown and uploaded the code onto my Arduino Uno. Bt when I connect it it to my windows systwm it shous ‘USB device not found’. I checked my circuit many times for faults, but I couldnt find any! Please help me with the problem…
This can be the answer. It does looks confusing though. Need to consult a technical guy as well.
Spectra
I keep seeing the device show in Windows Device Manager with the error “USB Device descriptor request failed”. I’ve checked the circuit about a 100 times but it looks good. I am using 0.5W zener diodes instead of 0.25W… could that be it? Various sites say it should be OK, but I’m grasping here.
I have the same problem, Windows 7 Home Starter don´t recognize the USB-B female socket, appears this message “unknow device”.
Libraries not installed correctly
I made a circuit on a universal pcb board and it’s not working, but i’ not sure in which direction should i insert zener diodes and i’m not sure about pins on my USB socket, because it’s got pins on it’s back, not on bottom
Can I use 3V zenner instead 3V6 zenner?
It work on Arduino 1.0.5 verygood. But It not with 1.5.2 beta
I do not know – I have not tried it. Maybe someone else?
will it work on arduino 1.0.5 ?
Brilliant, got it working- it seems like rejects it every once in a while, but that may be loose connections from the breadboard as i move it between computers to test.
thanks for making such a detailed writeup. the examples that come with the library are pretty cryptic.
I’m trying this on an attiny using high-low techs arduino isp method.
i’ve seen it done on tinys before, but using avr dude. i want to stick to the arduino IDE.
when i try to upload no the attiny 2313 i get “timsk0 was not decleared in this scope”
i’m guessing the ide wont upload it because the library contains functions unavailable to attinys.
so they dont get decleared.
do you have any idea how to circumvent this?
could you explain what defines the Vusb pins? they are not decleared in the sketch.
Thanks again
I tried to verify this code with a UNO, it gives an error,”UsbKeyboard.h:132: error: ‘USB_CFG_DPLUS_BIT’ was not declared in this scope” and more…any ideas on what I am doing wrong.
Thanks!
Unfortunately, I do not have this example in VB6. If you know a good tutorial about VB6 and ATMega programming, feel free to post it here!
Hello, most interesting. Do you have the example for Visual Basic 6? I would like to use VB6 instead of C as it more powerful and more widely popular.
Are you using 0.25W zeners or 0.5W?
Not sure whether this is crucial, but in my case (0.5W) Linux works, Windows – don’t.
(Also, these are different PCs, I shall try on several different ones.)
The problem might be with Windows, in my case: everything works perfect under Linux, but Windows complains about “unknown device”.
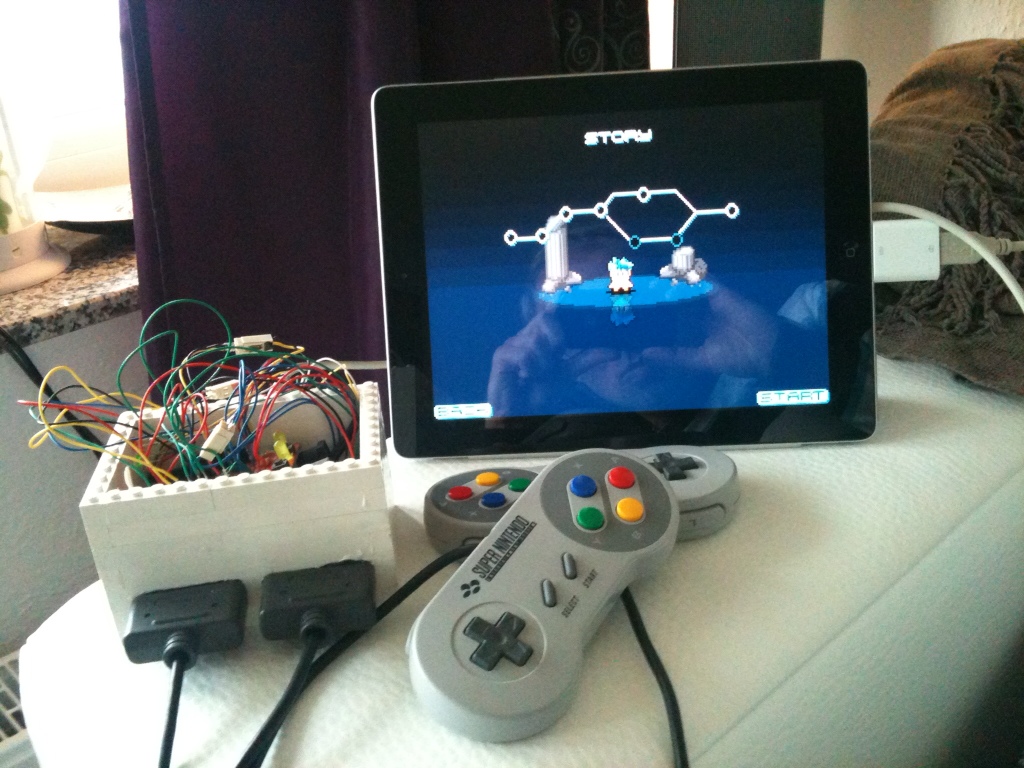
This would be possible with the Arduino Uno or newer. Older versions of the Arduino just provide serial communication capabilities with the USB connector (as far as I know). A very quick search for “Arduino Uno joystick” gave, for example, http://hunt.net.nz/users/darran/weblog/a3599/. This approach works as long as your target device works well with arbitrary aggregations of USB devices (usually every PC), because the Uno, Leonardo and other newer Arduino-like boards provide USB serial communication and USB keyboard/mouse/joystick at the same time. An example, where this does NOT work is, for example, the iPad with iOS. Here, a “USB-keyboard” only device needs to be implemented. For this reason I designed the Pancake board (http://petrockblog.wordpress.com/2012/07/01/pancake-board-arduino-compatible-minimum-configuration-breadboard-for-atmega168328-with-usb-connector/), which has a USB connector that can be used in an arbitrary way. The downside is that one needs an ISP to transfer programs on the micro. Besides the Pancake board there are of course many other boards with a comparable capability out there …
would be possible to use the serial arduino’s own, to make the joystick?
Thank you! I just corrected the code.
Hi, in fuction delayMs, one error with the for…
Thanks a lot :-)
Nice post! And also thanks for providing a link to my USB tutorial. :) I also read your Ponoko article, very topical since I’ve been thinking of trying them out, too!
Hi,
at first make sure that you are using component with the exact specification as given above.
Then check, if all connections are correct. I rememeber, when I set this up first, that I did not connect D5 with D- (with a resitor in between), but with D+.
If you are very, very sure that the hardware setup is correct, open the “Console” (Linux/Mac) or “Device Manager” (Windows) or “USBProber” (Mac) etc. to see, which (USB) device exactly is recognized by your system.
Try to connect the USB cable first to your own device and then to the PC or USB hub. I am not sure why, but in my case this was an issue once.
Good luck and don’t give up!
Hello, I am trying to do this project but I am getting an error message with the drivers, it does not recognize it as a HID it says that is an unknown device, Can you help me, please?