-
×
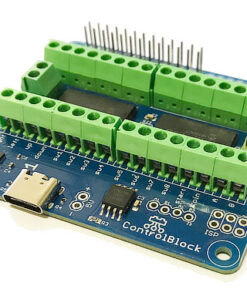 ControlBlock
2 × $ 31.85
ControlBlock
2 × $ 31.85 -
×
 ExtensionBlock
1 × $ 12.52
ExtensionBlock
1 × $ 12.52
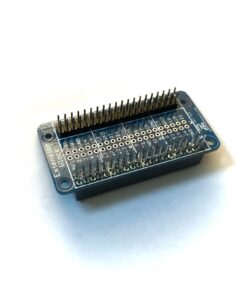 ExtensionBlock
 -
Search Results
-
Hello,
New retropie image, have moved my roms to USB and added Xbox wireless controller.
Other games appear like mega drive but no Amiga games
Also no longer have scumvv or macingtosh.
What have I done wrong? I have made sure my paths are correct?
Many thanks
J
Hello!
I have Pi2 with retropie 2.6 in it. It is awesome software but controller configuration logic and effort is straight from hell…
I have tried hours and hours to configure usb snes and xbox360 wireless controllers. So far I understood that the logic goes like this:
configure a controller, its keymaps are stored in file to opt/retropie/configs/all/retroarch-joypads. Here file contains keymaps, for example xbox360 controller button Y is “1” but SNES controllers Y is “2”. This is smart because ABXY buttons are in different order with these controllers.
After controller specific keymaps are done, its time to tell emulators what are “global” keymaps. This is stored in opt/retropie/configs/all/retroarch.cfg. Here it can read (for example):
input_player1_a_btn = 2
This means retroarch uses that button which is assigned as 2 depending on controller. in this case is snes controller is used, its Y (lefmost button) BUT with xbox360 controller its X (leftmost button).
This is smart!…If it would work! Because it isn’t working. No matter what you change in controller specific mappings (in opt/retropie/configs/all/retroarch-joypads) it does absolutely nothing. And it does not make any sense. Only thing that works is changing keymaps in opt/retropie/configs/all/retroarch.cfg but this changes it with every controller! In other words, only one controller (xbox360 or SNES) is working properly, no both.
And to make things worse, xbox360 controller keymaps are weird and corruped with nintendo64 emulator. Changing keymap does absolutely nothing…
What the heck is happening here? What I am missing?
After posts here and at Reddit, I thought I’d share a method for mapping your game controller to use in Kodi without the need to recompile.
Build Linux Joystick Mapper binaryDownload the source from the following link:
http://sourceforge.net/projects/linuxjoymap/
Copy the joymap-0.2 folder to the home directory of your pi and build the binary with the following commands:
cd joymap-0.2
make
This will create a binary called loadmap.
Get Joystick Information
Joystick selection by number (jsX) is broken in Linux Joystick Mapper so the vendor and product identifier must be used. This info can be found by running the command:
cat /proc/bus/input/devices
The output for my PS3 controller was:I: Bus=0003 Vendor=054c Product=0268 Version=0111 N: Name="Sony PLAYSTATION(R)3 Controller" P: Phys=usb-bcm2708_usb-1.3.2/input0 S: Sysfs=/devices/platform/bcm2708_usb/usb1/1-1/1-1.3/1-1.3.2/1-1.3.2:1.0/0003:054C:0268.0001/input/input2 U: Uniq= H: Handlers=js0 event2 B: PROP=0 B: EV=1b B: KEY=7 0 0 0 0 0 0 0 0 0 0 0 0 ffff 0 0 0 0 0 0 0 0 0 B: ABS=7fffff00 27 B: MSC=10The information required is in the first line. For the PS3 controller, the vendor code is 054c and the product code is 0268.
Create the Mapper File
Documentation for creating a mapper file can be found in /doc/config.pdf.
To map a joystick button to a key press, a line needs to added for each mapping as below:
button vendor=0xXXXX product=0xYYYY src=joy_button_num target=kbd button="key_press"
where
XXXX is the vendor code
YYYY is the product code
joy_button_num is the joystick button number as defined in jstest
“key_press” is the key press to mapThe values for key presses can be found in the keys.txt in the source code folder.
The default keyboard controls for Kodi can be found at the link below:
http://kodi.wiki/view/Keyboard_controls
To keep things tidy, I created a new folder, joymap, in the home directory. I copied the loadmap binary built earlier to the joymap folder. I then created a text file, kodi.map, with the following contents:
# PS3 controller mapper file for Kodi

# Navigation
# D-pad to navigate; X to select and circle to go to previous menu
button vendor=0x054c product=0x0268 src=4 target=kbd button="up"
button vendor=0x054c product=0x0268 src=5 target=kbd button="right"
button vendor=0x054c product=0x0268 src=6 target=kbd button="down"
button vendor=0x054c product=0x0268 src=7 target=kbd button="left"

button vendor=0x054c product=0x0268 src=14 target=kbd button="enter"
button vendor=0x054c product=0x0268 src=13 target=kbd button="esc"

# Triangle to bring up conextual menu
button vendor=0x054c product=0x0268 src=12 target=kbd button="c"

# Play Media
# R1 to play/pause and L1 to stop
button vendor=0x054c product=0x0268 src=11 target=kbd button="space"
button vendor=0x054c product=0x0268 src=10 target=kbd button="x"

# Exit Kodi by pressing Select and Start
button vendor=0x054c product=0x0268 src=0 target=kbd button="leftctrl"
button vendor=0x054c product=0x0268 src=3 target=kbd button="end"
Please note this mapping may not be complete for your needs. Also I have not found a way to map analogue sticks to key presses.
Execute Mapper with Kodi
To load the mapper file with Kodi, I edited kodi.sh in the /roms/ports folder as follows:
#!/bin/bash
sudo /home/pi/joymap/loadmap /home/pi/joymap/kodi.map &
/opt/retropie/supplementary/runcommand/runcommand.sh 0 "kodi-standalone" "kodi"
sudo killall loadmap
sleep 1
Permissions on /dev/uinput are required to run the mapper program. I tried the instructions below to set the permissions to pi but they did not work so I ran the mapper program as sudo to get round this.
https://tkcheng.wordpress.com/2013/11/11/changing-uinput-device-permission/
The killall command (run as sudo) will stop the mapper program before returning to ES.
The sleep command is to prevent a ES error which I guess was occurring because of a conflict of joystick control between the mapper program and ES.
When you launch Kodi, you will get failed to grab device/failed to lock device messages. You can ignore these – Kodi and your mapping will work fine.
General info
Pi Model: B
RetroPie Version Used: 3.0
Built From: SD Image
USB Devices connected: Original SNES controller (converted to USB with Raphnet.net NES/SNES kit)
Config details: http://kvalvag.net/info/config-details.zipIssue:
I’ve got some controllers converted from an earlier project using Raphnet.net NES, SNES, DB9 (Atari/SMS/Genesis) chip. http://www.raphnet-tech.com/products/nes2usb/index.php
(My chip has firmware 1.4)I know the controllers work as they should (tested in windows) and they do work in Emulation station. They also register when I use the RetroArch config tool, but the configuration file is not saved in /opt/retropie/configs/all/retroarch-joypads folder even though the scripts states that the file has been created.
I’m thinking its related to the naming of the chip, but I’m not sure. The controller identifies as: raphnet.net (S)NES/Atari_USB and I’m not sure if the “.” or “/” might be a problem in the file name.
Thus I’m sure my controller works, I just don’t have any idea how or where to write the config file (and what to name it) to make the controllers work in retroarch.
I have sent Raphnet an email about the problem but not received an answer.
I have also tested my setup with another USB controller and that works as expected.Additional information:
When testing the controller with Jstest command, every button registeres as follows:Axes
UP: 0 (-32767)
Down: 0 ( 32767)
Left: 1 (-32767)
Right: 1 ( 32767)Buttons
Start 3
Select 2
A 4
B 0
X 5
Y 1
L 6
R 7Bonus question: I’ve also got some spare kits from Retro USB (http://www.retrousb.com/product_info.php?cPath=21&products_id=44) has anyone got experience using these with RetroPie?
If you need any more information, I will be happy to provide it.
Thank you.
-CikeyTopic: USB flash drive issue MAME
Hello
Im running Retropie, and for easy ROM access I use a USB flash drive as path/directory to all my games.
I recently bought a USB sound card / audio adapter from Adafruit to get decent sound, and everything works great, except for MAME games. The MAME ROMs are detected in Retropie menu, but they won’t launch. When I try, I just get back to menu. All other emulators Ive tried work. When I unplug the USB sound card and reboot, MAME ROMs load perfect again. So, I guess MAME in particular does not like the sound card. Can this be fixed somehow? I still want to have ROMs loaded from an external USB flash drive.
Topic: More on first installation

Hello!
I recently discovered the RetroPie project, and I have some questions about the [u]first installation guide[/u].- What’s the minimum/suggested memory card size I need?
- Is the [u]Official Raspberry Pi WiFi Dongle[/u] supported?
- Why a 5V 2A power supply is required in place of the standard 5V 1A?
Hello
For easy ROM access I use a USB flash drive as path/directory to all my games.
I recently bought a USB sound card from ADA to get decent sound, and everything works great, exept for lauching MAME games. The ROMs are detected in Retropie menu, but they dont launch. When I try, I just get back to menu. All other emulators Ive tried still work. When I unplug the USB sound card and reboot, MAME ROMs load perfect again. So, I guess MAME in particular does not like the sound card. Can this be fixed somehow? I still want to have ROMs loaded from an external USB flash drive.
Using retropie 3.0, with some various updates.
Trying to use Kodi with a teensy 2.0 joystick.
It’s 1 analog stick, with a bunch of buttons, and programming them to work as a keyboard isn’t really an option.
I read there are commands to enable joystick and enable sdl when compiling, to keep jst working, but I don’t know how to do that, and i haven’t seen anyone confirm whether or not it works.I can only seem to find videos on how to get an xbox360 gamepad to work, but nothing about generic usb joystick/gamepads. If anyone has any info that could help me get my teensy 2.0 arduino joystick to work in kodi, without emulating keypresses, please let me know. OR if a script can be made to convert gamepad presses to virtual keyboard keypresses, a script that closes when kodi closes. That could work too i think.
Thank you
-DjinnyTopic: incorect boot orrder
I have connect a HD over USB on my Pi. Works good so on. But it look as have RetroPi a incorrect boot order. It mounts the HD before it check it with e2fsck. e2fsck can not check mounted devices and break the boot with a error. I can continue the boot with ckt-D but theed is suboptimal.Anyone a idea?
Error:
cat /var/log/fsck/checkfs
Log of fsck -C -R -A -a
Sat Sep 19 23:16:10 2015

fsck from util-linux 2.20.1
/dev/sda1 is mounted.
e2fsck: Cannot continue, aborting.

dosfsck 3.0.13, 30 Jun 2012, FAT32, LFN
/dev/mmcblk0p1: 71 files, 9946/29117 clusters
fsck died with exit status 8

Sat Sep 19 23:16:10 2015
----------------
check output:
sudo e2fsck /dev/sda1
e2fsck 1.42.5 (29-Jul-2012)
RPi_Data: sauber, 5651/15269888 Dateien, 21275541/61049344 Blöcke
fstab:
cat /etc/fstab
proc            /proc           proc    defaults          0       0
/dev/mmcblk0p1  /boot           vfat    defaults          0       2
/dev/mmcblk0p2  /               ext4    defaults,noatime  0       1
UUID=45885bbb-3164-4d6d-9a0e-809b428475c2  /home/pi/hd  ext4  defaults  0  2
# a swapfile is not a swap partition, so no using swapon|off from here on, use  dphys-swapfile swap[on|off]  for that
and for all that not see wath i do:
ls -l /home/pi/RetroPie
insgesamt 12
drwxr-xr-x  4 pi pi 4096 Sep 19 20:26 BIOS
drwxr-xr-x  2 pi pi 4096 Aug 10 05:04 retropiemenu
lrwxrwxrwx  1 pi pi   10 Sep 19 19:59 roms -> ../hd/roms
drwxr-xr-x 46 pi pi 4096 Aug 10 05:04 roms-old
df -h Dateisystem Größe Benutzt Verf. Verw% Eingehängt auf /dev/root 30G 3,2G 26G 11% / devtmpfs 301M 0 301M 0% /dev tmpfs 61M 420K 61M 1% /run tmpfs 5,0M 0 5,0M 0% /run/lock /dev/sda1 230G 78G 140G 36% /home/pi/hd tmpfs 122M 0 122M 0% /run/shm /dev/mmcblk0p1 57M 20M 38M 35% /bootHi.
I have two controllers. A wireless Xbox 360 Controller, which is connected via the official reveiver and a regular USB,2-axis 8-button gamepad (a USB-SNES Gamepad to be more specific).
I want my Xbox 360 controller always to be Player 1. The problem is that, as the Raspberry Pi detects the USB-SNES-Controller first, it makes the USB,2-axis 8-button gamepad as Player 1.
In Retroarch it’s easy to solve the problem. You can just switch those controller to make player 1 as player 2 and vice versa.
Even in the Emulationstation I get it to work, that my Xbox 360 Controller is the main controller.But not in Mupen64Plus. I tried to change it in the mupen64plus.cfg and switched the both controllers and but it just don’t work. It always detects the USB,2-axis 8-button gamepad as player 1. And even my changes are overwritten, when I restart the Pi.
So I’m asking, is there a way to solve this in the mupen64plus config or do I have to change it system wide? The last solution would cleary be the better one, but how to do it? :(
Could someone please help me?
Thank you!