Tutorial: PowerBlock with OSMC
Aug
Introduction
This is a post as part of a tutorial series about getting to start with the PowerBlock with various images for the Raspberry Pi. In this tutorial we will learn how to use the PowerBlock with OSMC, a free and open source media center.
Preparation
If you have not already done it, we need to download the OSMC image first. You get the image on the official OSMC download site. When you have downloaded the image you need to load it on your SD card. You can follow the Raspberry Pi Software guide for that, if you are unsure how to do that.
Installing the PowerBlock Hardware
Make sure that the Raspberry Pi is switched off before you do any hardware work on it. Attach the PowerBlock with its 2×6 female header to the GPIO pins of the Raspberry Pi as shown on the following image:

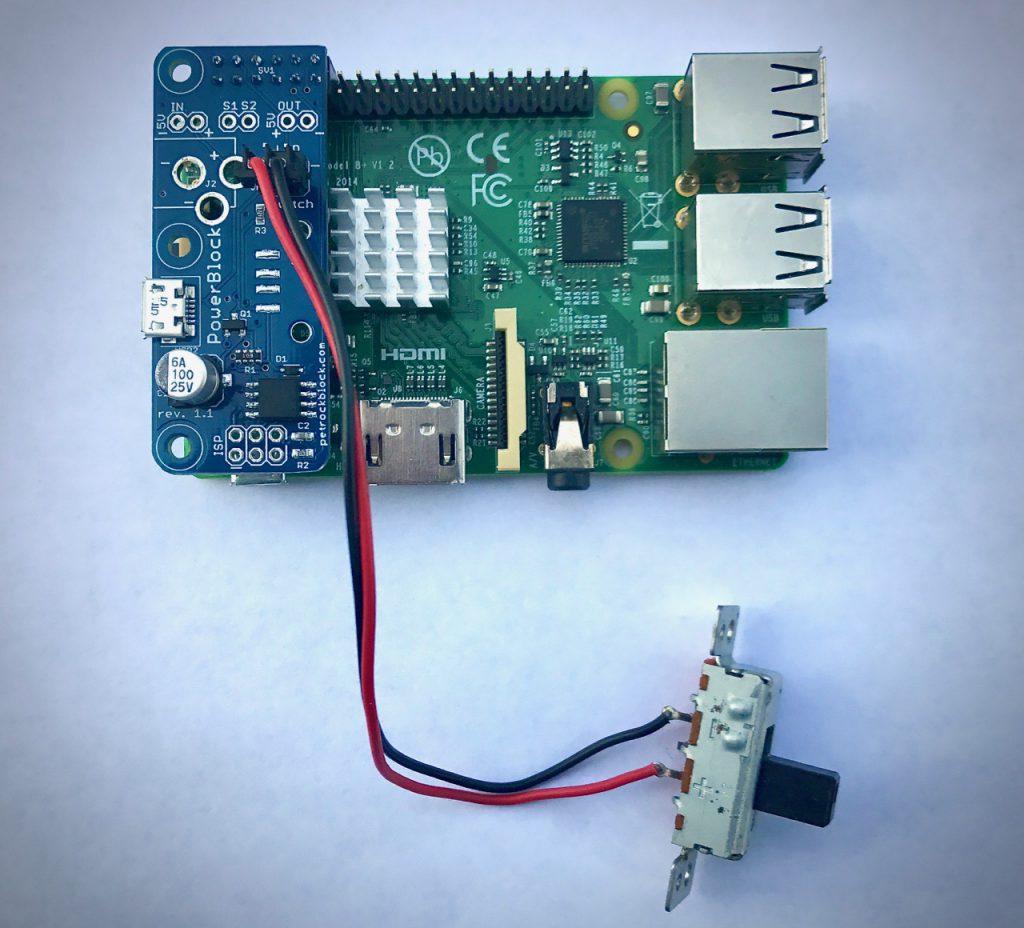
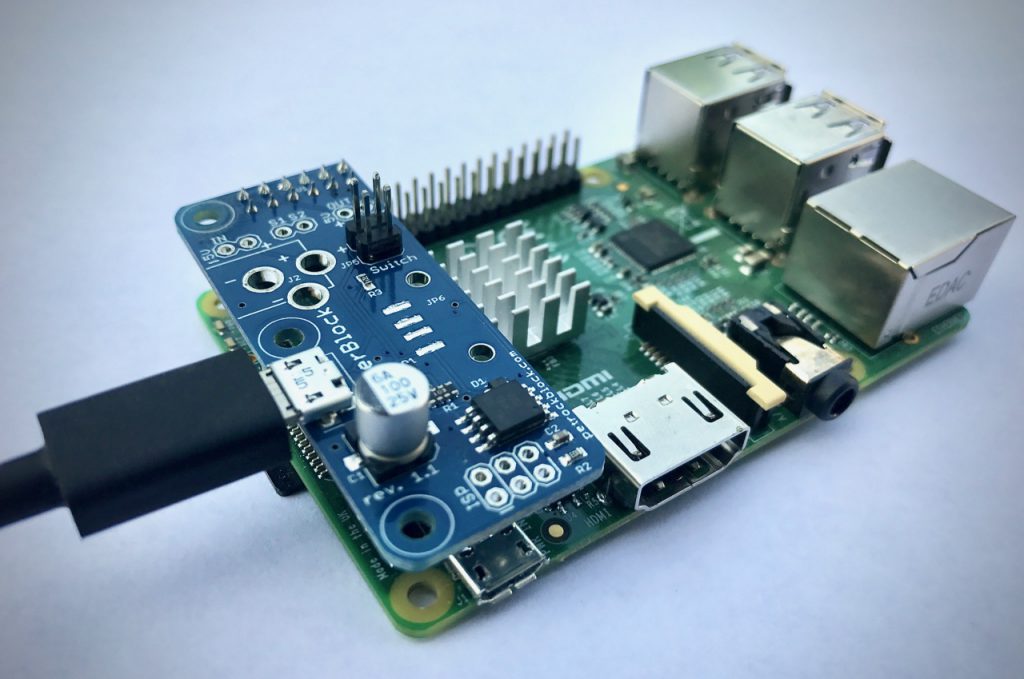
Attach your power switch to the two pins that are marked with “Switch”. Again, the above image shows that exemplarily.
Attach the micro USB connector of your power supply to the micro USB connector of the PowerBlock.
Initial Setup of OSMC
When you start OSMC for the first time, you will see that OSMC runs through some initialisation steps that lead to a startup assistant afterwards. During that assistant make sure that SSH is enabled! When the assistant is finished you need to get the IP address of the OSMC instance from within Menu “Settings” – “System Information” in OSMC. Then you can connect to OSMC from another PC via SSH. The username and password are both “osmc”.
Installing the PowerBlock Service
We install the PowerBlock driver from the console via SSH. In order to install the PowerBlock driver and service we can follow the quick installation instructions as given on the driver Github site. To install the driver and the service you just need to call this one command:
wget -O - https://raw.githubusercontent.com/petrockblog/PowerBlock/master/install.sh | sudo bash
That command will download the installation script of the PowerBlock service and start the script. It will compile and install the driver as well as install and start the service.
When the script is finished, you get a success or failure message in the console. In case of a success, you can also see that the optional status LED stopped to flash and, instead, is permanently switched on.
Conclusion
As you can see, getting started with the PowerBlock involves very few steps. We hope you enjoy your PowerBlock and wish you good luck with your project!