Forum Replies Created
-
AuthorPosts
-
 patlParticipant
You are welcome ;-)
patlParticipantHi Floob,
I also actually use only the barrel filter with CURVATURE_X.
This problem wirh the shader subdirectories is noticed more by chance. :-)patlParticipantIs it working there with glslp files or only with glsl files ?
patlParticipantThe shader files itself (all *.glsl) are working via RGUI and also via retroarch.cfg.
But the glslp files are only working via RGUI, not via retroarch. They are just not loaded.
If you then load manually the same glslp file via RGUI, they are working again.
Why?… i don’t know ;-)patlParticipantHmmm …. ;-)
Thanks for the explanation.
My project is almost finished, the last major part is still the arcade games.
But I know now that it does not seem are the settings that I do not have to search anymore.Thank you.
patlParticipantIn the retroarch.cfg I cannot find any settings especially for MAME
And in the core options there are only 3 or 4 for me unimportant things.
Later I can test if the
scip_gameinfo 1
setting works in the retroarch.cfg or retrorach-core-options.cfg , but I don’t think so.
The rompath setting certainly do not.In every other MAME version (on PC or non libretro) you can setup alot of things …rompath, nvram, skip_gameinfo, scanlines and so on.
Most you can setup in RGUI but not all.
Especially important for me are the romtpath and skip_gameinfo Option.patlParticipantThanks,
The Problem with the game fantjour is only an example.
The main problem is that I’m not able to find a solution to setup MAME because of the lacking mame.ini / cfg
(Not the retroarch.cfg).
In mame.ini there are lots of things you can setup.
The non libretro imame4all have an mame.cfg in the emulator folder.The problem with the inputsetting isn’t so big, it easy to setup via retroarch.cfg and the joypad cfg’s.
But its good to know that it told to the developerspatlParticipantThanks Floob
[Edit]
It starts with the file konamigx.zip in the same folder as the rom fantjour.zip.
But this does not solve the problem with the mame.cfg or name.ini.
Normale you can setup rompaths for MAME, where MAME looks for the files that necessary to run the rom, eg. the bios files.
I don’t like to have the bios files are shown in Emulationstation.
And you can setup view things like the „skip_gameinfo 1“ …In various instructions for eg. mame-mame4all described the mame.cfg is in /opt/retropie/emulators/mame4all-pi/mame.cfg and there are the paths settings. But
lr-mame2003, lr-mame2010 and even with lr-imame4all lacks mame.cfg and I can not make any paths or other settings for MAME.Another problem, if I as mk.zip Create tab and change the input setting, the setting will not be saved and the next time a game is reset.
The problem also occurs in a completely fresh retropie image, in which I have not done any configurations only a keyboard and a few ROMs have copied.
patlParticipantI recently tested your amazing filters.
As you have already written, it is a bit too slow in 1080p.
Only at a resolution of 1360×768 (most HD Ready devices) it’s really smooth, especially for SNES.
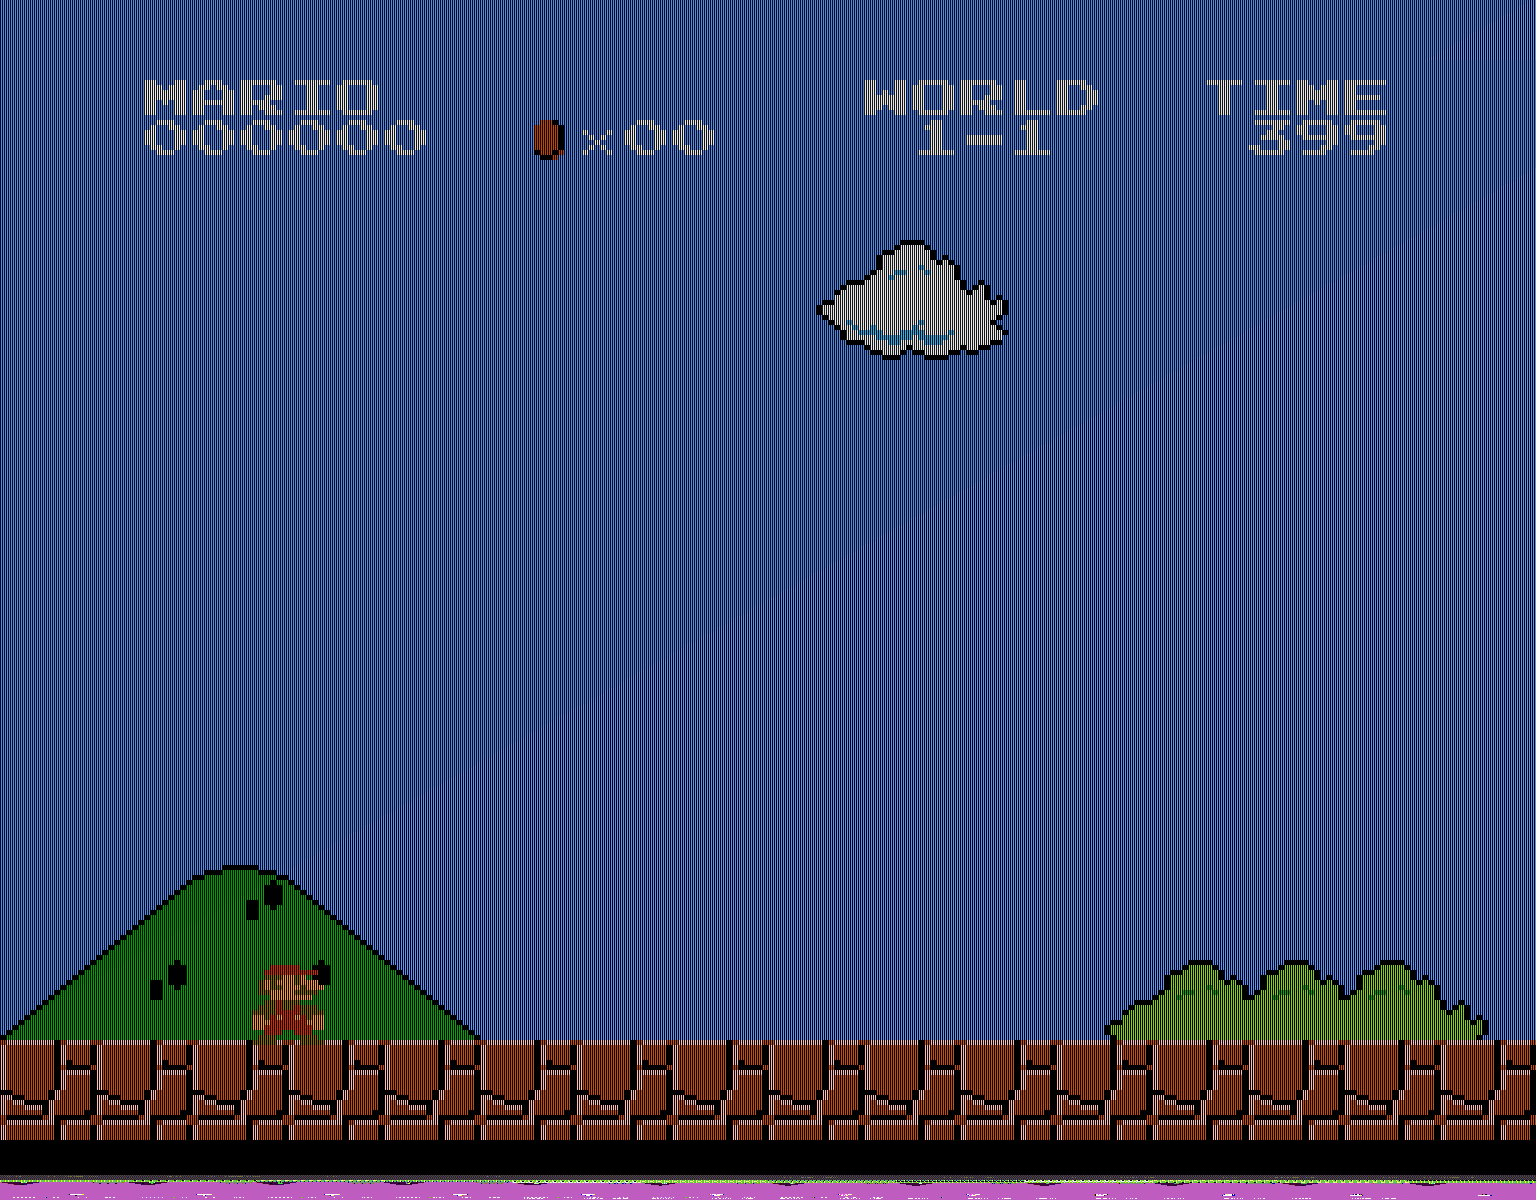
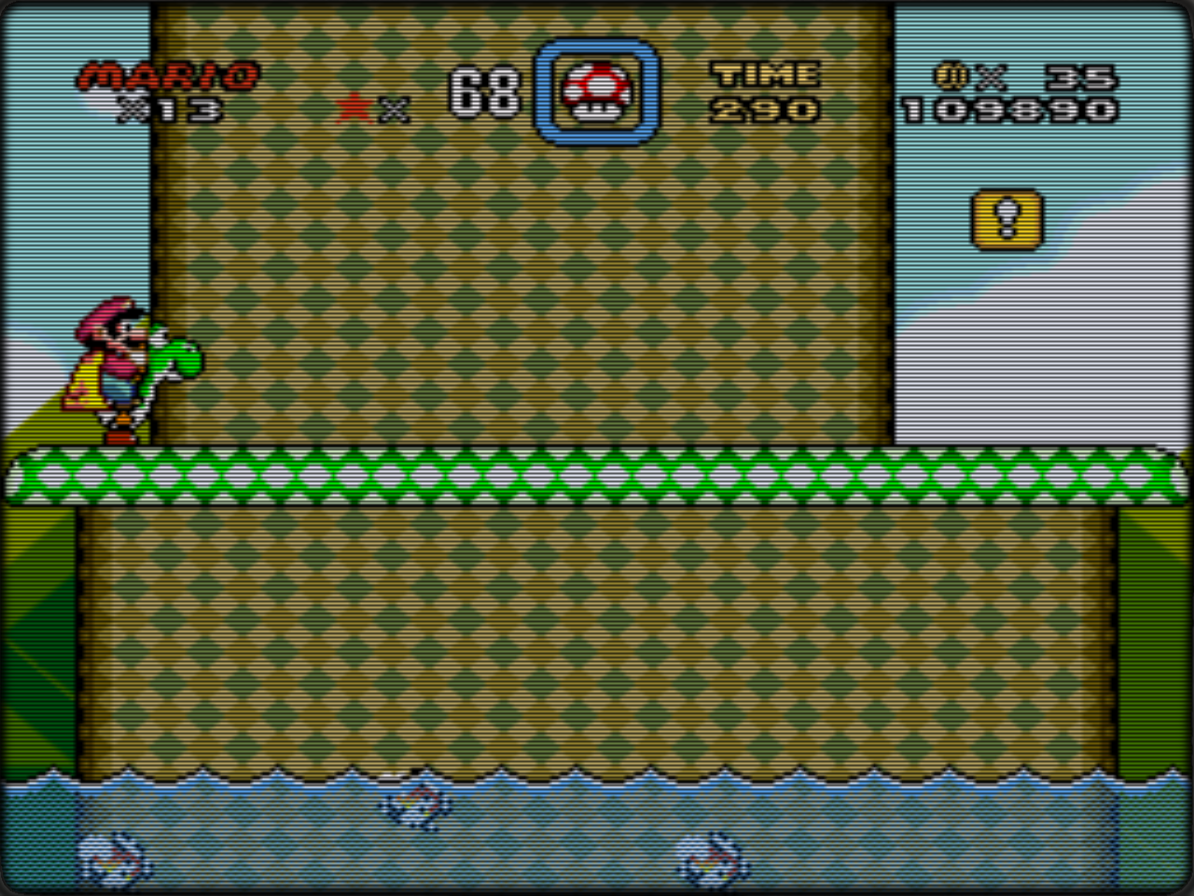
But there is the problem with the colors of the scanlines if the display is curved.
It is somewhat difficult to describe, so I made a screenshot.
I’ve Played around with the filter something, to amplifies the effect.
(but I can not really modify it)
The effect occurs even at 1080p, due to the higher resolution, you can see it but barely.
If the screen is not curved, the effect does not occur.
Maybe you can calculate the scanlines in a different way.
And it would be good if you could adjust the brightness of the scan lines.[attachment file=”RetroArch-1127-112659.png”]
patlParticipantI knew not this thread so far.
Since it is more about getting the native aspect ratio of the system resolution.
And there is written the games use different resolutions.(8:7)
The course you can use also this Aspect ratios and resolutions, but I think it looks nicer with a 4:3 aspect ratio because the CRT TV’s picture is also 4:3 stretched.
That’s why I make only 4:3 overlays for me and those who likes it ;-)
@kitchuk.
Thank you,
As I said, I havn’t testet it. If the Y Resolution is really 200, patrickm is right of course. 200 x 4 would result in too much black borders.
200 x5 should work with the Scanlines_5x_1080p_Borderless.cfg without TV border and only a little black border
or with the MasterSystem TV Border Overlay but then about 40 Y Lines would be cut off.
And it could be that you have to play a bit with the custom_viewport_y in the retroarch.cfg so that the scanlines fit the pixels and the image is in middle of the screen.patlParticipantHi Floob,
First I want to have a nearly 4:3 aspect ratio.
Your calculation is indeed the native aspect ratio but this would be rounded 4:3.75
So the image would look stretched in height.
The next point is the scanline overlay image.
So that each scanline fits each emulated Y pixel line, each scanline must be a multiple of the emulated Y pixel.
Theoretically e.g. 239 x4 or x5 = 956 or 1195 Y lines on the scanline overlay image.
BUT:
I testet a view things with the resolution and found out that the MegaDrive and SNES libretto cores are buggy within the render resolution of the system. I made some scanline overlay with 1.274×956 for SNES but the scanlines doesn’t fit all pixels over the whole screen…
The same with MegaDrive. The native render resolution in retroarch for MegaDrive is 320×240 x4 = 1280×960, but the scanlines doesn’t fit…
Only if I use a native Y resolution of 224, the scanlines fit the pixels.
So I use 1194×896 for SNES, MegaDrive and NeoGeo (1194 because of the 4:3 aspect ratio)For PC-Engine the retroarch core uses a 320×232 !?! resolution.
x4 = 1236×928
I’ve made an extra overlay for this system.I also cleaned up the filepaths and names a bit.
And I noticed that the shaders I used for the better brightness causes slowdowns anyway. Especially with PSX it’s very laggy. Without shaders it’s flawless.
So I deactivated the shader again and reworked the overlays a bit.
The result is not so much brighter but I think it’s ok for now.I uploaded the new files to my dropbox:
–> 1080p_4-3.zip–> config.zip
–> palettes.zip
Download and unzip the files and copy
– The whole folder „1080p_4-3“ to —> /opt/retropie/emulators/retroarch/overlays/1080p_4-3– All folders of the config.zip (atarilynx, fba, gamegear…) to —> /opt/retropie/configs/
!! Be carefully if you edited your systemconfigs with your
personal settings.
Then you can simply copy the necessary settings of my configs into your
system configs !!– Copy the whole folder „palettes“ to /home/pi/RetroPie/BIOS/
If you want to use the overlays without the TV border just edit all retroarch.cfg’s
overwrite e.g. the line :
input_overlay = /opt/retropie/emulators/retroarch/overlays/1080p_4-3/NeoGeo-SNES-MegaDrive_1080p.cfgwith
input_overlay = /opt/retropie/emulators/retroarch/overlays/1080p_4-3/Scanlines_4x_1080p_Borderless.cfg
except for MasterSystem, here you must overwrite the line with:
input_overlay = /opt/retropie/emulators/retroarch/overlays/1080p_4-3/Scanlines_5x_1080p_Borderless.cfg
For FBA I must rework a little due to different resolutions I explained earlier. Currently I just use the Neo Geo settings.
There comes an update soon.
@kitchuk
I haven’t testet both.
CaveStory… I don’t know ;-)
Doom I think it has a VGA resolution of 320×340, so the overlay for NES-PSX should work.patlParticipantI haven’t testet it yet.
Wiki says:
“X (Horizontal) Resolution: variable, maximum of 565 (programmable to 282, 377 or 565 pixels, or as 5.3693175 MHz, 7.15909 MHz, and 10.738635 MHz pixel dot clock)[19] Taking into consideration overscan limitations of CRT televisions at the time, the horizontal resolutions were realistically limited to something a bit less than what the system was actually capable of. Consequently, most game developers limited their games to either 256, 352, or 512 pixels in display width for each of the three modes.[20]Y (Vertical) Resolution: variable, maximum of 242 (programmable in increments of 1 scanline). It is possible to achieve an interlaced “mode” with a maximum vertical resolution of 484 scanlines by alternating between the two different vertical resolution modes used by the system. However, it is unknown, at this time, if this interlaced resolution is compliant with (and hence displayed correctly on) NTSC televisions.
The majority of TurboGrafx-16 games use 256×239,[19] though some games, such as Sherlock Holmes Consulting Detective did use 512×224″So Floob should be right and the SNES Overlay should work.
I will test overlays tomorrow or the next days ;-)patlParticipantI answer now on the first version of your first posts before it changed changed:
I am well aware how to get to 1120 lines,
But the fact remains that the emulators shows native resolution 239 lines in most games and an integerscale 5x 239 are 1195 lines.
Only when the game is outputs 224 lines 5×224 are 1120 lines, but mostly not.
That’s why too much is cutted with your settings.
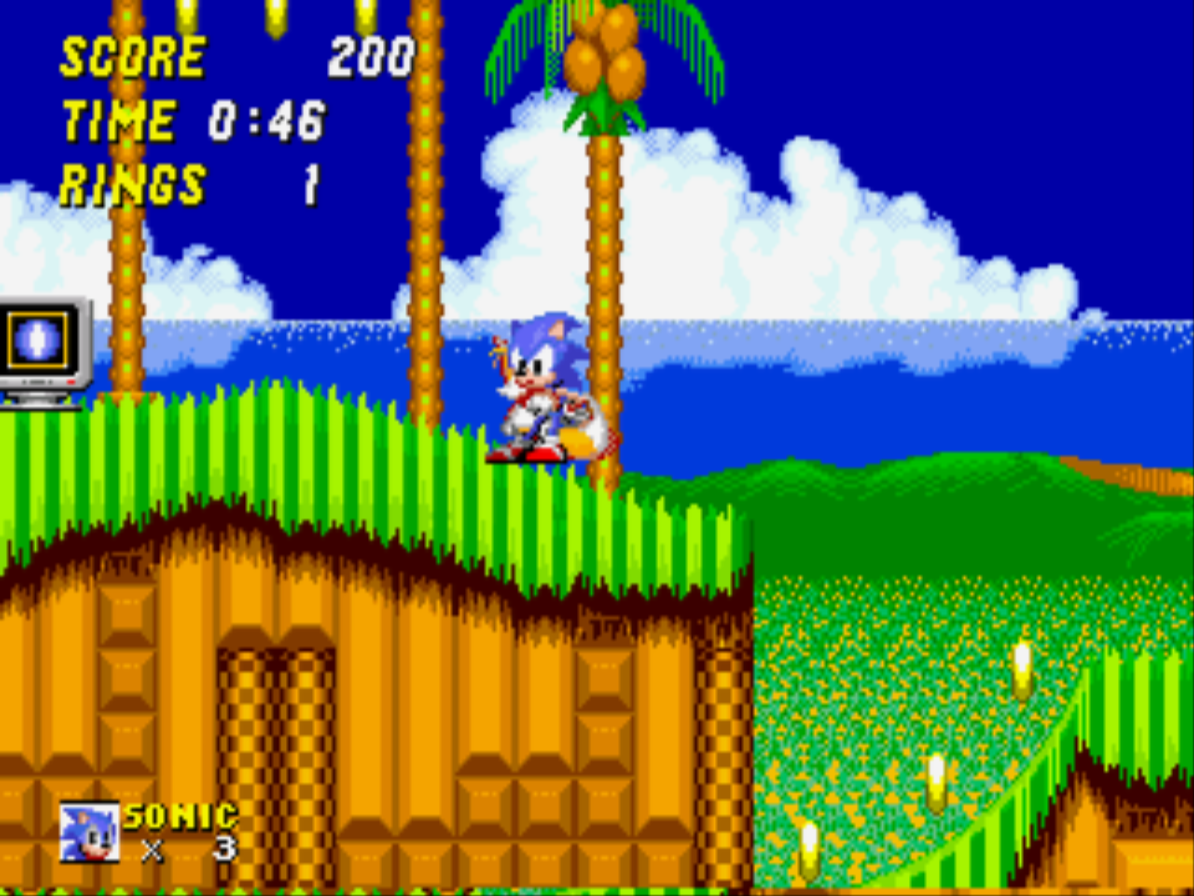
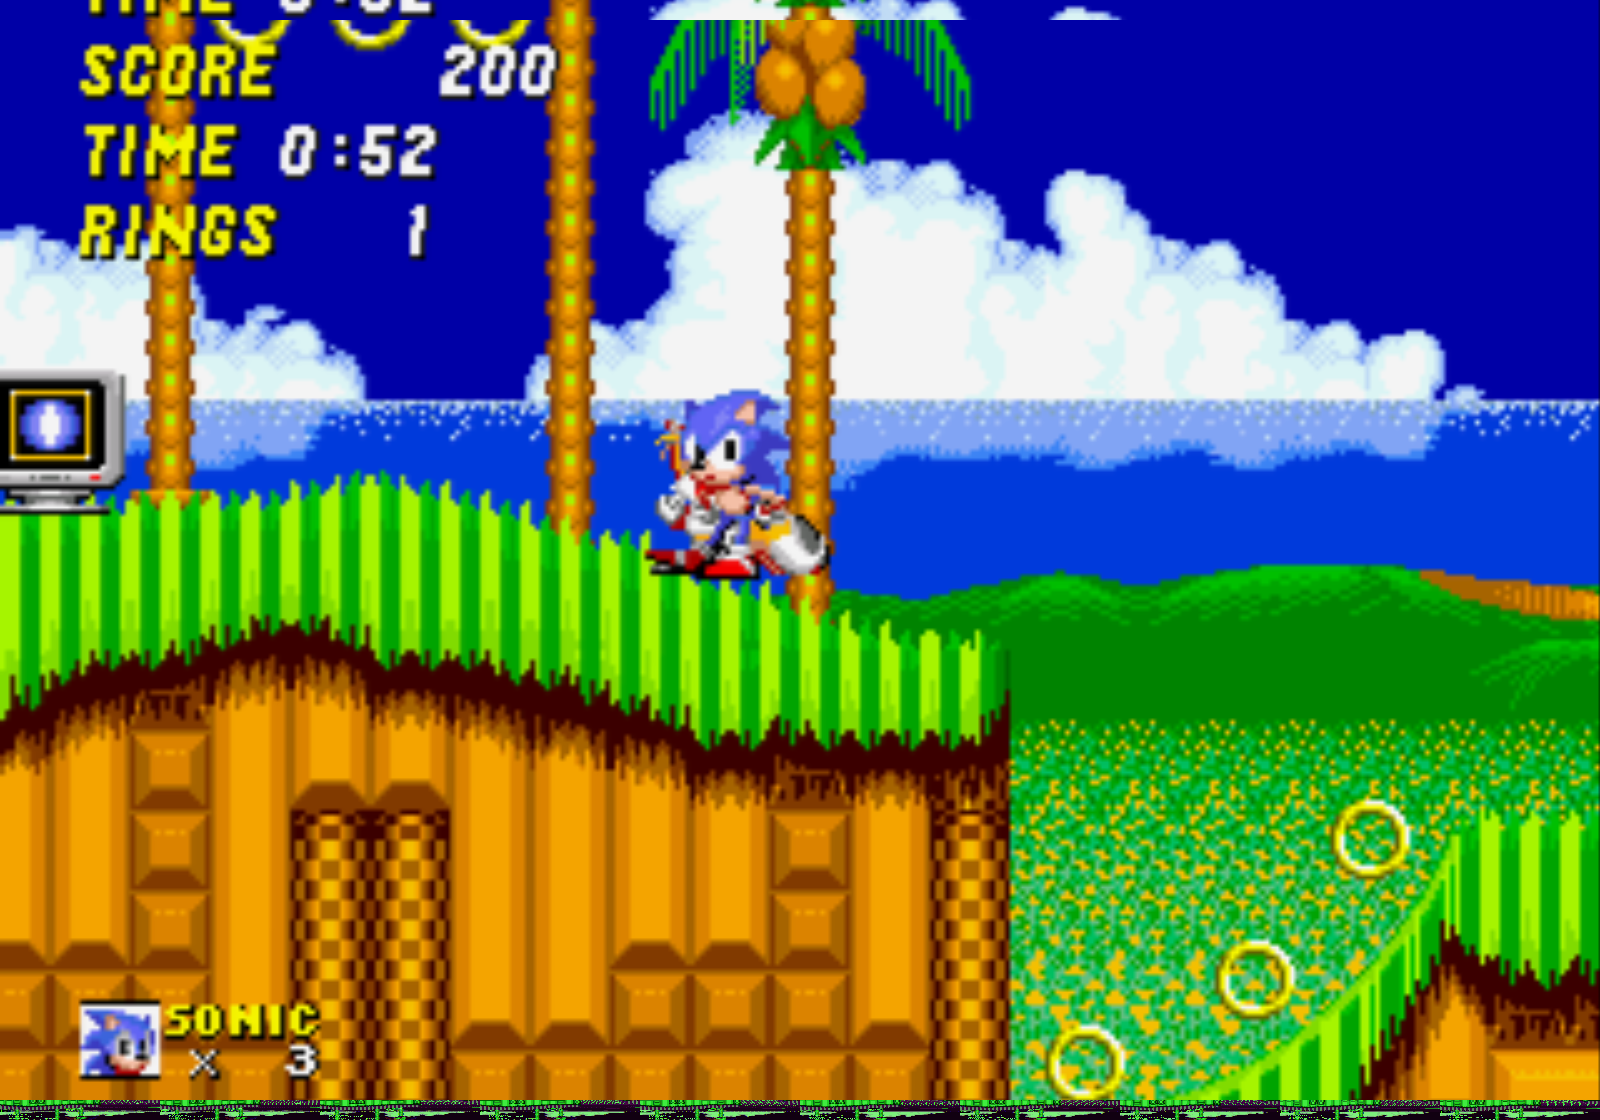
The best example you have shown yourself with Final Fantasy.I do not know how the picture on a NTSC CRT TV looks because in Germany (mostly) TV’s were only PAL device indeed.
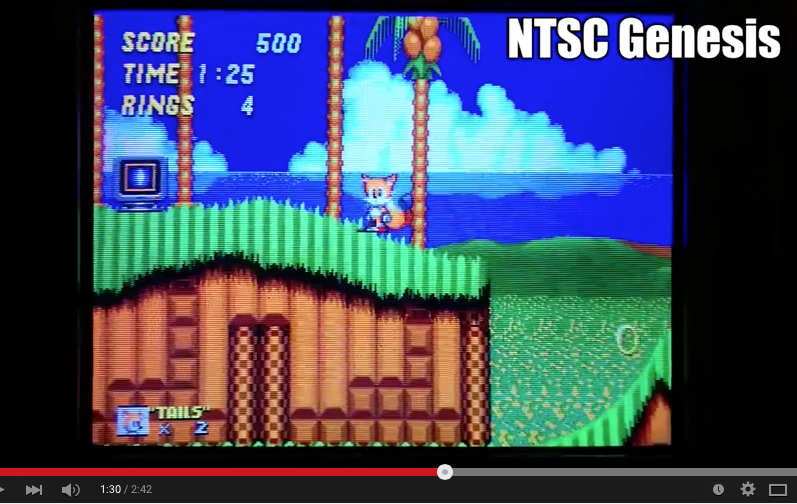
But it’s a little illogical when you say that is it normal that a programmed game in Japan is the graphic of a frame not shown because it does not appear on your CRT. In Japan NTSC TV’s were also used.I found an example of NTSC on Youtube. Unfortunately, only one on the Genesis / Mega Drive
Go to 1:30
–> http://Https://www.youtube.com/watch?v=2NYS2UHgXvwBut the principle is the same. You recommend the 1600×1120 resolution
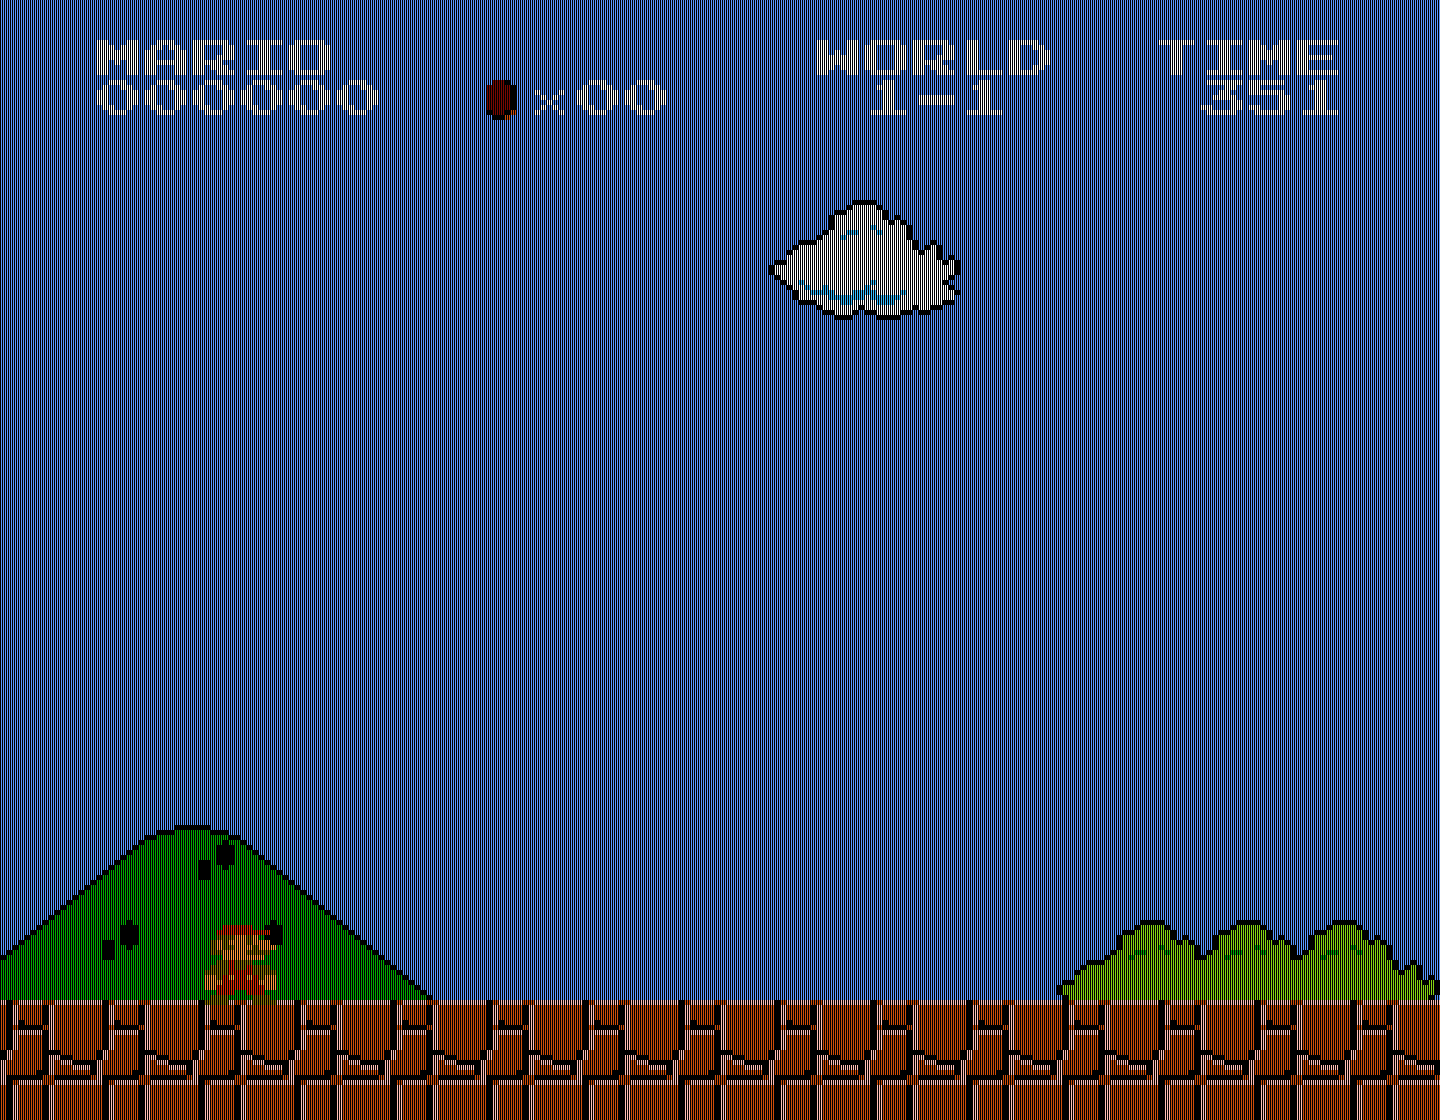
Here is a picture with my settings:

Here is a picture with your settings:
They show the same differences as Floobs examples.
The error above and below the image with your settings you would not seen on the display but some image lines each, which can be seen on the TV in NTSC on a Youtube video.
Since the image looks like with my settings.
And the aspect ratio is almost exactly 1:33
Maybe so much cropped is only with your TV?
But it was certainly not as designed.However, I also only just noticed that even the SNES different games (NTSC)
sometimes use different resolutions.
e.g.
Super Mario World 256×224
Final Fantasy 5 256×239
Donkey Kong Country 256×239
Most of the games that I have tested 256×239 in use.
Although some few games shows 256×239 but have yet still black borders.
e.g. Final Fantasy III
So that the image section again becomes smaller on something can be seen.Of course I read your posts, just like you mean. However, do not you want to understand my statements about aspect ratio.
And with your aspect ratio 6: 5 you lie just wrong, also because your resolution 1526×1120 is not an integerscale 6:5 in most games, but about 6:4,7.When 4: 3 will be the right size to standard with a resolution of 256×239:
With 6: 5 is a bit too wide.
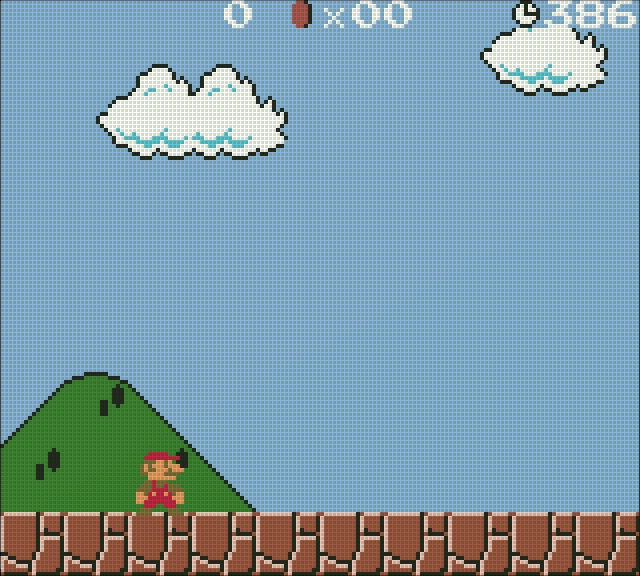
With your 6: 4.7 is also too wide.Mario was a bad example of me because the game has just Y 224 lines, sorry.
You have written that the image could so look better on the LCD TV than before the CRT.
Therefore, there is nothing worse than warping pixel. Ok for me, your opinion.
But the parts of the image are missing, is obviously also ok for you … because it just looks well on your CRT so.
I, at least, think it looks best when it’s the way it was designed.
And your TV is certainly seen as a reference for image quality.
Why should designers design a frame that no one can see ??For me your opinion is ok, but I do not think it’s alright your assertions to pose as the only correct.
You act as if all the programmers of the old games could not programmed properly, as with your settings too much CPU performance is consumed in vain, because you can not see some parts of the image.
And the programmers of all emulatiors also do not seem to be able to program as they also show too much with default settings (Aspect Ratio: Core Settings).
Just you and your logical calculation show how it really is right …Maybe you try it by yourself:
Test your Final Fantasy (5?), Turn on Integer Scale, but set it to 1×1.
The resolution will be 256×239.
Then do the same with Super Mario World. The resolution will be 256×224
Try it with other games and you’ll notice the use of most games 256×239.And Floob is right, which picture looks best at the end is in the eye of the beholder. Even if you do think different.
patlParticipantI think it’s not directly a problem with the emulator resolution but with resolution change of the (HDMI) DVI input of the display when you start end exit an game.
05/30/2015 at 12:43 in reply to: The negative effect of bilinear filter/smoothing on scanlines: a comparison #98685patlParticipantYou’re right. I think because of the bilinear filter and the higher resolution of the emulated image. Therefore, more Y pixels of the emulated images (4,7) mix with each pixel of the actual resolution.
If the contrast between 2 pixels is very high, for example, text, you can see it more clearly.
With my method you can see it not so much because I use a smaller emulated resolution (4x) and each pixel of the scanlines has a different opacity.05/29/2015 at 22:53 in reply to: The negative effect of bilinear filter/smoothing on scanlines: a comparison #98659patlParticipantMaybe you can write your exact settings that you used during each test?
Also , the overlay would be interesting to recreate the problem .patlParticipantYes , this can really be the problem . I have tested it again with a completely fresh Retropie installation and it worked perfectly.
But I made the entry without ”input_overlay = /opt/retropie/emulators/retroarch/overlays/wii/scanlines.cfg
patlParticipanthmm .. Let me think … I think I really had a problem with the overlay’s, but I do not remember exactly which.
But I think that’s the reason why I have compiled and noted the differences between the Retroarch Binary builds.I created a own Retropie Image using the new binary and since then used this.
For me, the standard overlay function anyway without problems ….
I’ll try it tomorrow with the original Retroarch Binary.patlParticipantI don’t think so, because the handheld grid looks absolutely clear and nice at my display. Exact as in the Mario Bros. image I postet above.
But I also have the same issue as patrickm has, as I wrote in his thread.Do you have the same problem with GameGear?
It’s 100% the same grid pattern as the GBC, only another Border.
And is the problem only with Mario Bros. or also with other GBC games?
Maybe someone else can test the handheld overlays and write something … ?patlParticipantLink–> Best way for PSX Multidisc games
Here I made a guide that works really fine for me.
And you have nothing to do with save files or renaming files or so…patlParticipantI had the same problem.
I don’t know anymore exactly but if I setup the hotkey for keyboard AND for gamepad in the retroarch.cfg, it works for me:
input_enable_hotkey = alt
input_enable_hotkey_btn = 2I also can push the hotkeybutton on gamepad and e.g. the key for save on the keyboard.
patlParticipantI think the problem is the file path information in your retroarch.cfg
This entry in the config works for me:
input_overlay = /opt/retropie/emulators/retroarch/overlays/wii/scanlines.cfgYou cannot only write :
input_overlay = wii/canlines.cfg
or so.edit:
I see there is also an entry in the config:
overlay_directory
But this don’t work for me if I only set a path here and select the
image via input_overlay.
Only a full File path as described above works for me.05/28/2015 at 19:34 in reply to: Weird diagonal line through middle of screen with aperture grill overlay #98606patlParticipantI tested it and have the same issue:
But it’s not an issue with overlays at all or the technic behind.
I testet it on PC with an 1080p display and all looks fine as it should:
I could imagine:
– It’s a problem with the Retroarch build. If you compile the Retroarch binarys on RPi several things differs from the original Retroarch which is contained in the Retropie image 3.0.2 Beta although the version Number is the same.– It’s a problem with the HDMI output of the RPi
patlParticipantAlso Super Mario Bros. Deluxe on GBC looks ok:
(Open the image in a new window)My HDMI Settings in the /boot/config.txt are:
disable_overscan=1
hdmi_group=1 (=HDMI)
hdmi_mode=16 (=1080p60)patlParticipant@Floob
hmmm… difficult to say..
with an 720p TV ( also with 768 Y-lines ) it cannot be that the scanline look as it should because of the resizing of the overlay image as the HDMI output is set to 720p or if HDMI is set to 1080p, then the TV shelf would resize the image.
Anyway, the scaliness could not look an fact as they should.
The Youtube Video looks good.
Stupid Question, but are you sure your TV is a 720p?
Or maybe the HDMI Output is set to 1080i on the RaspberryPi?
@zonitz
In my last comment I explained what I forgotten but for the green colors.
But at my TV a cannot find any diagonal lines in the image.
The image above looks exactly so as it look on my TV and the image is only a screenshot through Retroarch.
I would imagine that it comes through the resolution of the TV or the resolution settings of the Pi?
Or it’s a similar problem that patrickm have with his vertikal scaliness overlay?patlParticipantAfter a while and the comments on Youtube on Floobs’s video, I have realized that the whole image was i bit too dark.
The easiest way os to increase the brightness on the TV.
I have made it so but I use this TV only for Retropie. If someone uses the the TV also for other things like watching movies or so you have to change the brightness always.I found some shaders in the shader folder that increase the brightness of the image within retroarch. It’s a bit difficult because some contrast is lost. Therefore i use another filter so I find the contrast is a better again.
And the best ist, the filters have nearly none speed effects with the default settings ;-)In addition i found some failures with the resolution of some emulators.
Nothing very much but sometimes the scanlines haven’t match exactly the pixellines.Guide:
– I updated the ZIP files with the emulator configs and scanline overlay images+overlay configs, download these files:Scanline Overlay Images:
—> 16-9.zipEmulator Configs:
—> config.zipJust copy the files and folders a I explained in the first comment.
The overlay for NeoGeo are no longer needed. Now it#s the same as MD and SNES.
SO you can delete the old files.
The files for all handheld are still the same.– Here is the glslp file for setup the shaders:
—> Brighter-with_Contrast.glslpDownload and copy it to /opt/retropie/emulators/retroarch/shader/
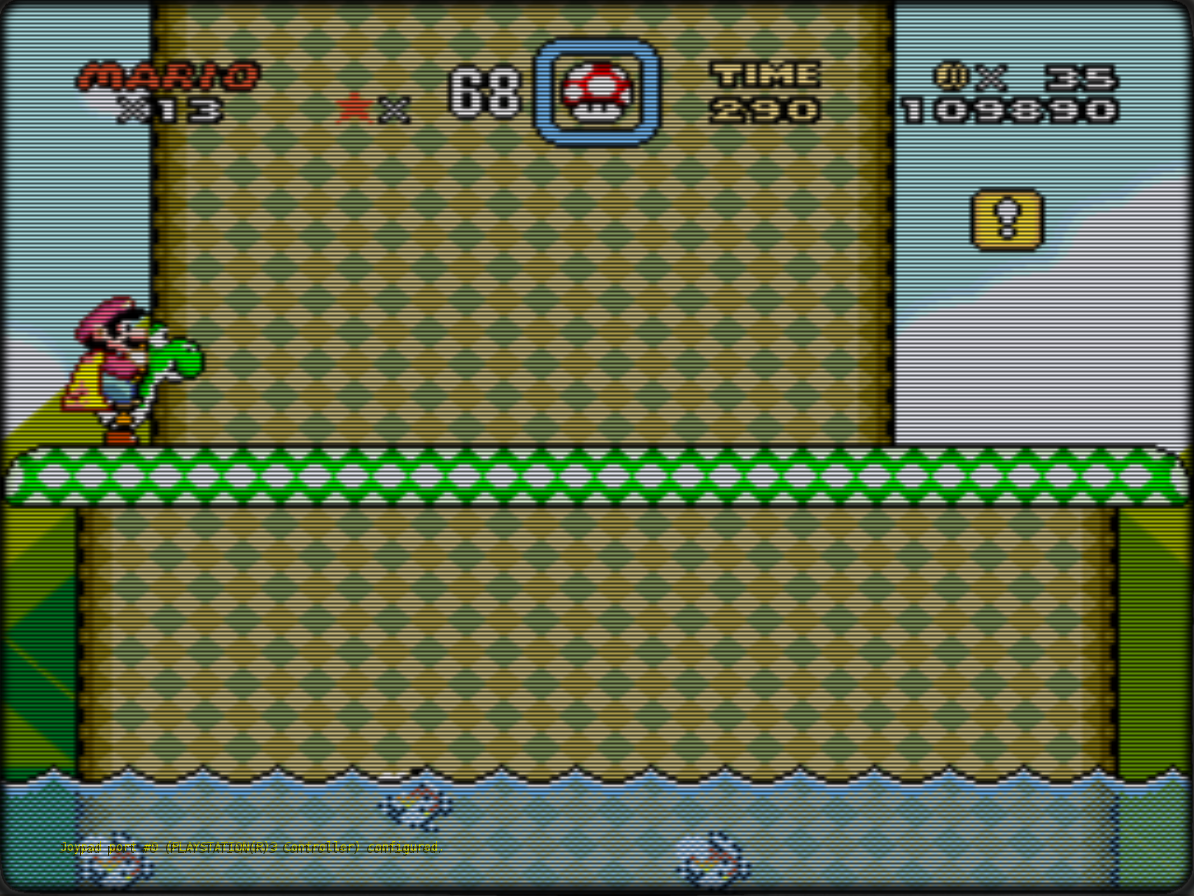
Here is a original image without any shader or overlay only :
Here is the same image with the old settings:
And here is the image with the new settings:
Best way open the images in a new window to enlarge
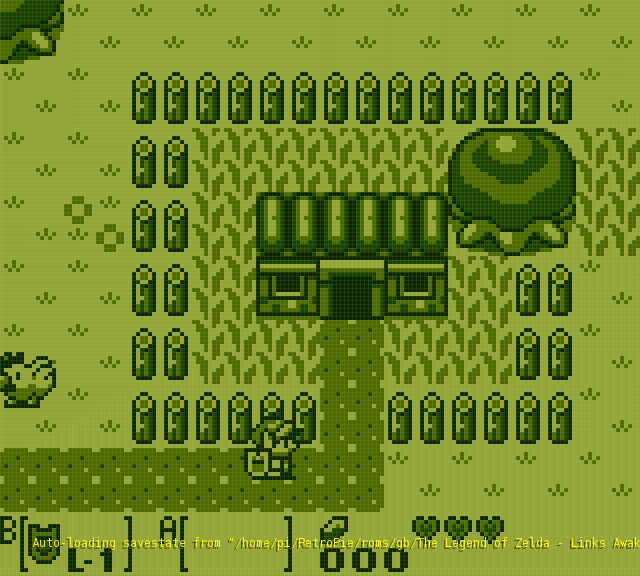
Another mistake was a little config with the Gameboy core.
My palette ist working but custom colors must enabled:
Edit the file:
/opt/retropie/configs/gb/retroarch-core-options.cfg
and edit the line gambatte_gb_colorization to
gambatte_gb_colorization = “custom”
Or
Open RGUI, go to
RGUI -> Options -> Core Options -> GB Colorization
and set it to custom. If you leave RGUI and go back to game the setting will be automatically saved in the same file as above.
Now the Gameboy should be green:
I also updated the links for the files in the first comment.
Thanks and have fun :-)
patlParticipantThank you :)
I’ll have a look on it tomorrow (in germany it’s now to late ;-) )
Concerning, as i think about it, i believe you have to setup the an entry in the core setup…And I made a little mistake in the SNES/Genesis config.
Also I adjusted the scanlines overlays and the brightness of the emulated image a bit,
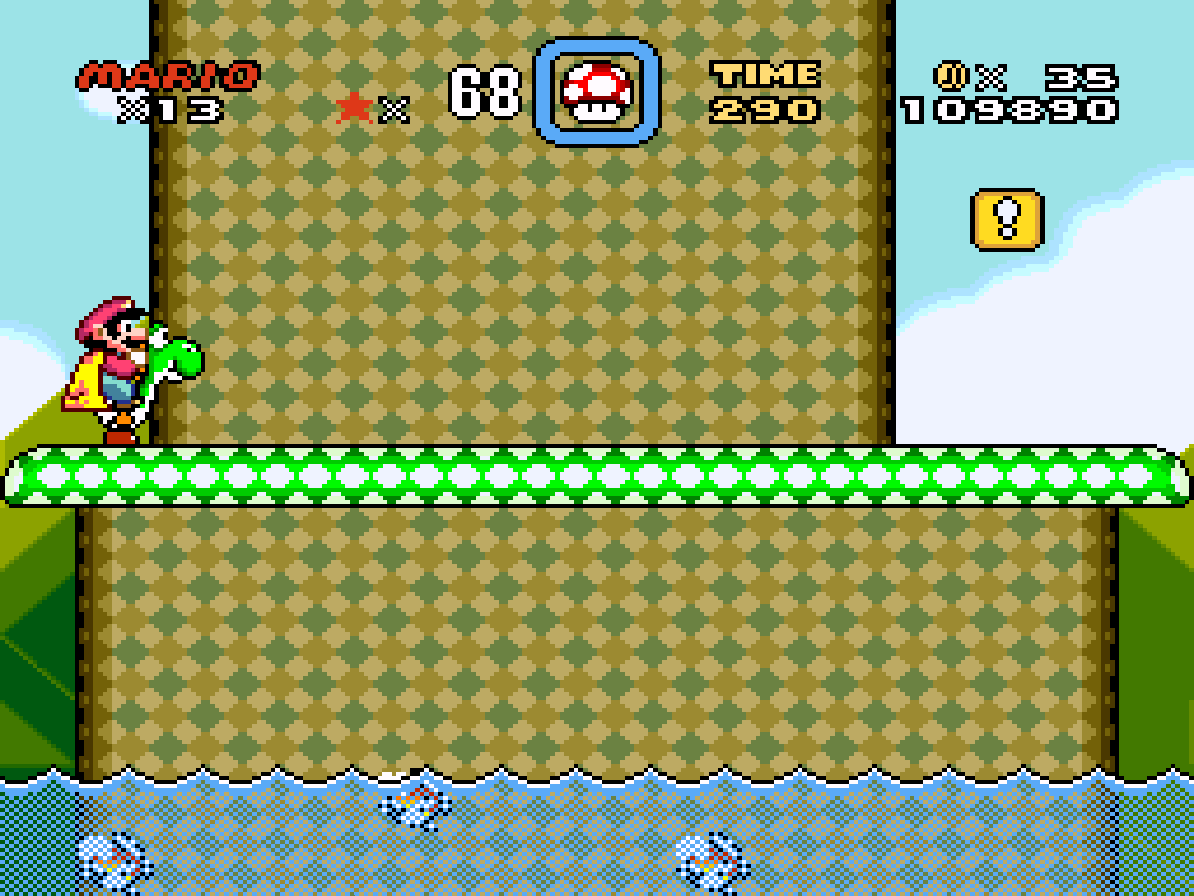
I’ll post it …. tomorrow ;-)patlParticipantYes, I also think that looks really nice.
Also, because even with your hack the image is still minimal soft an not 100% sharp ;-)
The problem is that the image (depending on the game) a little stuttering.
The best way to realize it, is in Super Mario World 2 on SNES.
– In generally, if you run just around the area look on blocks or something.
When you set off the shader, the game runs much smoother.
– In the beginning, while the island turns.
– In the first level, in the first cave with the rolling stone.If you change the core to Pocket SNES, it is slightly better but still clearly visible.
With an overlay image and Pocket, SNES Mario World 2 always as fast as if no shader is in use.I have overclocked my Pi2 to official max in the config.
patlParticipantFloob
A really nice video;-)
Well you said the configuration is for retropie 3.
I forgot to write. Under 2.6 and below it is indeed technically work, but needs to be set up differently.For what “overlay0_descs = 0” in the overlay config I do not right now.
I have the config simply copied from another overlay and adapted to the filename. To my knowledge you can thus define for touchscreen displays overlay buttons.
Here it is described in detail:–> https://github.com/libretro/RetroArch/wiki/Overlay-image-configuration
patlParticipantHere you can download the scanline overlay images without the TV borders:
This scanlineimage works for all systems if the custom_viewport_height is a 4x Y-scalefactor of the original resolution.
With my configs it works out of the box for all except Mastersystem, because with it I use 5x Y-scalefactor.
So for MasterSystem you need this file:
–> TV_16-9_MasterSystem.pngTo use them with my configs, you have to copy the file Scanlines_4x_Y-Scale.png to the folder
/opt/retropie/emulators/retroarch/overlays/16-9/
and rename the file to e.g. TV_16-9_SNES-MD.png
Repeat this for each system you want the scaliness.For Mastersystem just copy the file TV_16-9_MasterSystem.png to
/opt/retropie/emulators/retroarch/overlays/16-9/patlParticipantHallo, because I’m now at work, I’ll post the scanlines without the TV borders later.
@Floob, I answer more detailed also later,
But it’s a really good video :-)patlParticipantOf course there are for almost everything (even for image settings) standards that have been established by any organizations or manufacturers.
However, these standards give it just because certain people have decided how it should look (for as many people as “good”) and so other manufacturers can follow.
Take, for example USB. USB was and is certainly not the only and best standard, but it is a standard to which other manufacturers can follow.
Because this standard is not perfect but it is always evolving every few years is the standard changed or extended.
And a standard such as low-resolution images are displayed on a much higher screen also does not exist, at least I know of no such standard.And even if there were such a standard would be in this certainly not described the great parts of the image are missing.
I not known any system that the image calculated as 6:5 so that automatically missing several picture lines with picture content.
It would also be pretty stupid of the programmers that fight for every bit of computing power to calculate as many lines, you can not see at the end anyway …
So you cut too much from the image.
What is overscan, why and how this is defined and what this has to do with resolution, you can read on Wiki.In order to respond to your example with your grandma and the lines in the image.
(I wanted to really no longer respond to your posts, but that’s pretty much the first post of you in which you will objectively remain in this discussion. In my review I’ve imitated the way you express yourself, … and as you can see You do not like it ;-))
So I understand Your statement that a picture in which some stroke are very clear to see, but spoil the image in any case, is better for all people, as the same picture, in which these lines but can not be seen ..?Of course the picture in which you can’t see these Lines looks better.
Especially for your grandmother. And for your grandmother, it is the personal impression why the picture looks better because she can see the picture but can not see the disturbing lines.
It’s a personal impression.patlParticipant[quote=98342]thanks for this info, any guidance on setting up/converting these to 720p?
thanks
[/quote]
@InsecureSpike
The border itself can easily downsized to fit 720p.
But the scanlines have to adjusted.
At a display resolution 720p Your Y scale factor could be max 3x.
So every emulated Y line must be 3 lines of your 720p display.
First I tried with these settings and the best was:
1. Line 100% opacity
2. Line around 10-20% opacity
3. Line Around 60-80% opacityThe rest guide is the same. If you want and i have a litte time a will make some scanlineimages in 720p
patlParticipantI wrote this text in german and translated it with google translator, because I have better things to do than time to invest in such nonsense.
Because of this some of this text maybe make no sense.
Please remember that:Image quality you can not just summarize only in numbers at these low resolution of that system.
Image quality is a matter of personal taste.The favorite game of my wife was and Aladin is on the SNES. She played it earlier on the real hardware really long time, and even to a few years ago, to about the time was replaced as CRT through LCD.
When I had shown her the first time an emulated Aladin on an LCD monitor, she had played it for a few minutes, but then the gamepad aside. When I asked her why, she told me that her image is too square and they do not like that.Only when the Pi2 had come out, which is fast enough to all to emulate for me major systems (I know retroarch is also available for the PC, which has long been fast enough, but I had always too much other problems), I’ve only now with scan lines and the actual image “quality” deals.
When I took the picture then set softer and scanlines have inserted, told me my wife suddenly the picture now looks much better and wanted to play Aladdin again.
This situation and such statements, tell me much more about image quality than what you tell here as pseudo-facts, which in reality is only your opinion.You tell people what looks best in your opinion and what settings needed to achieve this, is also completely okay, but if you say now that your settings are the only right to have good image quality, you lie just wrong!
That you do not know too much about resolution, you have shown, because you do not even knew why your first Scanlines the image only darkened. Why that was the case, I have explained to you in the thread as if you wanted me and all people realize the first time that can not be good only your picture settings handsome and all settings.
I could go on to list examples which show that you have as you pretend less idea.Funnily enough, you had but just after this debate and my explanations revised your overlays.
Just yesterday. I have posted my settings for a softer image, you’re talking about it just bad and ask again assertions that are simply contrived only to the hair, but änderst suddenly your overlays … hahaI myself am a moderator in a slightly larger forum. We did not even sporadically people like you.
What distinguishes such Persons:
– He knows quite a bit.
– It helps a lot because first he writes a lot about a subject.
– People believe him, because they do not know better and just simply looking for information from a forum or Google.
– He thinks what he says is law because he thinks anything else is wrong.
– He tries his mind with more or less logical explanation to all the people who impose a different opinion, but it itself is completely closed to logical explanation.
– He feels left out when someone else writes something and says, which is not his opinion.
– His style is then very aggressive when he can no longer completely logically argue against it, because although it has quite a lot of knowledge, but still far less than he pretends.
– He must always have the last word because he thinks this means he was suddenly right.
– The best method is not to respond to his comments, because he will argue further and will never deviate from his opinion.
– Tackle it is the task forum moderator or administrator, depending on how could the Forum should be developed.Do you recognize yourself? I for one recognize you in it.
In my opinion, seeing your settings a total of just not good and you should not give people such bad advice.
That was a sentence in the style as you write it.But all this is me not care, because you get your settings so doing as you like and I mean settings as I want.
And all the others also make it just as they would like.I’ll also respond to any of your statements more immediate.
If I am sometimes quite disagree as you I’ll create a separate thread where I explain my approach.I think the project really Retropie class. Although there are still some unnecessary problems, but there exist due to the emulation station or by Retroarch itself, it’s the best and easiest way to let the Pi2 old games to life again, when I was so far to solve almost all the problems I usually always had.
However, it’s just too stupid in the small number of registered and active users here to argue with an individual that is so resistant to advice as you.The only reason why I this forum anything write is because I myself have really invested time in order to have one in my opinion the best possible image settings and I want my findings with other parts.
Unlike you, but I’m aware that my settings not please everyone.patlParticipantIt’s best to manually edit the configs for each system to set up the key
e.g. /opt/retropie/configs/snes/retroarch.cfg.
..
input_hold_fast_forward_btn = 9
input_exit_emulator_btn = 0
input_rewind_btn = 8
input_pause_toggle_btn = 3
input_reset_btn = 12
#include “/opt/retropie/configs/all/retroarch.cfg”These entries will be preferred than the entries in /opt/retropie/configs/all/retroarch.cfg
Or you can set in RGUI the option “save on exit” to true.
I think this option can be found in settings -> Generall Settings
.. I don’t know the Path of these option exactly now.
But I do not recommend this because the whole config would be overwritten with the actual retroarch settings. -
AuthorPosts