Homepage › Forums › RetroPie Project › Video Output on RetroPie › How to get scanlines and vastly improve picture quality: the best method
- This topic has 118 replies, 21 voices, and was last updated 10 years, 11 months ago by
 dragonjab.
-
AuthorPosts
-
04/06/2015 at 20:38 #94002
 patrickmParticipant
Here are step by step instructions for getting fully adjustable scanlines and improving the picture quality of the retropie and making it a little more authentic. A more in-depth explanation follows.
Note: you must be using integer scale in order to eliminate scaling artifacts and get optimal results with scanlines. For instructions, see
here.
How to get scanlines via an overlay:
1. download the scanline overlays I created, below. (the ones included with retropie won’t work). Note: the attached images appear to not be working, use the links below to download the overlays directly instead.
https://www.dropbox.com/s/3e9x8bpu2u0iyug/scanlines1920x1080.png?dl=0
https://www.dropbox.com/s/88bj4jqgeqzx1c6/scanlines1920x1080-5x.png?dl=0Be sure to right click and select “view original” before downloading.
2. If using 5x integer scale, use the 5x overlay. Otherwise use the other one not marked 5x.
3. create a txt file and enter the following (for example):overlays = 1 overlay0_overlay = scanlines1920x1080.png overlay0_full_screen = true overlay0_descs = 04. save the file as the same filename as the scanline overlay (for example), but with the “.cfg” extension instead of “.txt”:
5. place both files in /opt/retropie/emulators/overlays/effects/scanlines, overwriting any files if necessary.
6. launch Retroarch
7. go to RGUI -> settings -> overlay settings
8. select overlay preset
9. navigate to /opt/retropie/emulators/retroarch/overlays/effects/scanlines
10. select the scanline overlay
11. hit apply
12. adjust scanline darkness by adjusting “overlay opacity”In-depth explanation:
Based on things I’ve recently learned, I’m now no longer recommending that people use shaders with the raspberry pi, except for a few exceptions. For the new method, continue reading.My reasoning is as follows:
The CRT-shader authors have intended for these shaders to be displayed at a resolution of 1080p. If you use a lower resolution, you will not get the effect intended by the author, and it will instead degrade the picture quality. The shaders will not look right at 720p. Furthermore, if on a 1080 display and you set the retroarch render resolution to 960×720, then this will be upscaled to 1080p, which will cause scaling artifacts (which means the scanlines will never look quite right).
However, the Raspberry Pi (even model 2) isn’t quite powerful enough to run any CRT shaders at 1080p. The result is that the framerate suffers and there is input lag.
However, there is still hope! We can still at least get scanlines on the raspberry pi, which will greatly improve the overall picture quality and make it more authentic.
One might be tempted to use “scanline.glsl”, but it only really looks “right” at 1080p, and causes the frame rate to drop at that resolution.
THE BEST METHOD:
Use the scanline overlay I’ve provided (scanlines1920x1080.png). It works at a resolution of 1920×1080 at any scale up to 5x (5x causes scaling problems, but this isn’t an overlay problem but instead a RA problem, I believe). The scanlines are fully adjustable all the way to full black.Make a .cfg file in /opt/retropie/emulators/retroarch/overlays/effects/scanlines with the following text:
overlays = 1 overlay0_overlay = scanlines1920x1080.png overlay0_full_screen = true overlay0_descs = 0Name the file “scanlines1920x1080.cfg”
Put the scanline overlay, attached below, in the same folder.
In Retroarch, go to settings -> overlay settings -> and select the .cfg file.
You can adjust the darkness within RGUI by adjusting “opacity.” 1.0 is full black; 0.7 would by 70%, for example. I think they look best at 100% black, but you can configure it to your preference :). I provided an example screenshot (“example1 or example2, it got duplicated) with scanlines at 50%.
There is one shader that I might recommend, and that is the “dotmask” shader in the “CRT” folder. This is lightweight enough to run on the pi at 1080p, and it adds a very light aperture grill effect which combines nicely with the scanlines from the overlay. To change shaders go to options -> shader options, change passes to 1 and select the shader under shader_0. Then hit apply.
Another method is to use “interlacing.glsl,” located in the “misc” folder. This looks identical to using the overlay, but you can’t adjust the scanlines within retroarch, and you have to use even scale factors. If you want to edit the scanline brightness you have to edit the .cg file and convert it to .glsl using a script. For those that don’t want to figure this out, I attached an edited interlacing.glsl with scanlines at 50%. But this is just for the sake of comparison – I would use the scanline overlay instead.
To get perfect scaling (and perfect scanlines), turn integer scale ON (video settings), and set a custom aspect ratio by going to options -> video options -> custom ratio. You may need to turn crop overscan ON or OFF depending on the core being used; crop overscan behaves differently for each core.
In addition, one should make sure retroarch is rendering at your monitor’s native resolution, by default, retropie has is configured to render at 640×480, causing scaling issues. Change this by holding “x” when a game launches to bring up a menu of options.
Ignore the pictures below except for the ones titled “example.” The other shots are of shaders, which have a detrimental effect on performance on the pi.
Btw, anyone know how to edit attachments? :)
04/06/2015 at 21:26 #94007FloobMemberThat looks good, I’ll try them out.
Here is the shader you recommend (I need to sort my TV colour out):
http://youtu.be/_oGZhLsbTGsHere is my config file based on your suggestions
/opt/retropie/configs/megadrive/retroarch.cfg#include "/opt/retropie/configs/all/retroarch.cfg" # All settings made here will override the global settings for the current emulator core input_remapping_directory = /opt/retropie/configs/megadrive/ video_shader = /opt/retropie/emulators/retroarch/shader/crt/crt-hyllian-glow/crt-hyllian.glsl video_shader_enable = "true" video_smooth = "false" video_crop_overscan = "false" video_scale_integer = "true" aspect_ratio_index = "21"04/06/2015 at 21:42 #94013patrickmParticipant[quote=94007]That looks good, I’ll try them out.
Here is the shader you recommend (I need to sort my TV colour out):
[/quote]
I think you’ll be pleased :) If the scanlines are too dark for your taste then I would try caligari next.
You can often find TV settings on CNET by googling “(model number) picture calibration settings” or something similar. If you can’t find any settings, then I would do the following:
As far as adjusting color is concerned, the easiest thing to do is to adjust the color temperature and/or gamma.
If you have a “color detail adjustment” option or something similar, choose the Rec 709 standard. If there’s a “gamma detail adjustment” choose 2.2.
If there is a “color temperature” adjustment, set it to Warm2 or whatever the warmest setting is.
To adjust color more finely than that, look up settings on CNET or download free software from the internet. There are sites where you can download free DVDs for this purpose.
To adjust brightness, put on a dark movie like Batman Begins or something and go to a very dark scene and pause. Set brightness to the lowest level at which all detail is still visible. Now find something with a very bright scene – clouds, snow, and the folds on white curtains or dress shirts work well. You want to set contrast at the highest point at which all the detail is still visible.
If you have a backlight setting you can adjust this without affecting brightness/contrast, just set it to whatever looks good.
This might be obvious but you should also turn on your TV’s game mode and also disable all of the so called “enhancements” such as motion smooth, vivid color, noise reduction, etc.
Hope this helps :)
04/06/2015 at 22:36 #94021starplatinum81ParticipantWhat i found really interesting from author of this post is that I also found crt caligari and crt hyllian lq best crt shaders for pi.
Therefore i think they are a little demanding for the systems now, so i switched for scale2x shader. This is a shader i suggest, not heavy and add a little more resolution feeling to games, without blurry them. Give it a try04/06/2015 at 23:14 #94027patrickmParticipant[quote=94021]What i found really interesting from author of this post is that I also found crt caligari and crt hyllian lq best crt shaders for pi.
Therefore i think they are a little demanding for the systems now, so i switched for scale2x shader. This is a shader i suggest, not heavy and add a little more resolution feeling to games, without blurry them. Give it a try[/quote]Actually, I wasn’t referring to crt hyllian lq, although that one is pretty decent.
You should check out the shader in /shader/crt/hyllian-glow/hyllian.glsl or something like that. There is another shader called “hyllian.glsl” in the main shader directory that causes significant slowdown/stutter, but the one in the /shader/crt/hyllian-glow/ directory looks almost identical and runs perfectly smooth! It’s confusing because both shaders have the same name, but are located in different places and are actually different shaders.
If I had to rank the shaders, my “top 5” would be:
1. crt-hyllian-glow
2. crt-caligari
3. crt-hyllian-lq
4. sharp-bilinear-scanlines w/bilinear filter
5. ntsc-pass-4 w/bilinear filterI should mention that I’m running this on a Raspberry Pi 2, but I assumed that this wouldn’t make a difference since it has the same GPU as the Pi 1. I’ve chosen the “Pi 2” overclock setting and set GPU memory to 256mb.
Personally, I would avoid that scale2x shader as it doesn’t correct scaling on the x axis which means you get inconsistently-shaped pixels, nor does it produce scanlines.
04/07/2015 at 00:39 #94037InsecureSpikeParticipantmany thanks to “Patrick” for this post, as I’ve found this real interesting, as I’m afraid to say I still understand very little about shaders, but I think I’m going to read up a lot more now, as from what I gather they can effect things a great deal
thanksoh just a quick question, are shaders set for each individual emulator or universal, one for all?
04/07/2015 at 01:17 #94040drvenkmanParticipant[quote=94037]many thanks to “Patrick” for this post, as I’ve found this real
oh just a quick question, are shaders set for each individual emulator or universal, one for all?
[/quote]I also would like to know the answer to this.
On a probably-related note, in Floob’s reply, what is the purpose of the line:
input_remapping_directory = /opt/retropie/configs/megadrive/
in the provided configuration file?
04/07/2015 at 03:26 #94046patrickmParticipant[quote=94040]
<div class=”d4p-bbt-quote-title”>InsecureSpike wrote:</div>
many thanks to “Patrick” for this post, as I’ve found this real
oh just a quick question, are shaders set for each individual emulator or universal, one for all?I also would like to know the answer to this.
On a probably-related note, in Floob’s reply, what is the purpose of the line:
input_remapping_directory = /opt/retropie/configs/megadrive/
in the provided configuration file?
[/quote]you can make the video settings universal by holding down “x” or “m” as a game launches from emulationstation to bring up a menu. This gives you a menu of options like “choose default emulator” “choose video resolution” “choose Retroarch output resolution,” etc.
For the shader settings, by default, if you load a shader in RA and then exit normally it will save your shader settings and these will be applied next time you launch RA. You can set a shader through the RGUI or by editing the config file in text editor.
You can also manually edit the config in /opt/retropie/configs/all/retroarch.cfg to make the settings universal. If you want to make different settings for each system, then edit the file called “retroarch.cfg” located in the folder for that particular system in /opt/retropie/configs/.
The easiest way is to just load the shader through the RGUI and then exit RA normally (by default, start + select on the gamepad).
As far as the line you were asking about, I’m pretty sure that is related to controller input and not video settings.
04/07/2015 at 15:44 #94087FloobMemberGeneral overview of setting shaders here:
04/07/2015 at 18:25 #94105InsecureSpikeParticipantfloob, thats awesome! thanks lots!!
04/08/2015 at 07:49 #94151patrickmParticipantI just tested the recommended settings using the hyllian glow shader with Cave Story and it runs at a perfect 60 fps and looks incredible. :) The fantastic pixel art in this game really benefits from a good CRT shader.
04/13/2015 at 20:14 #94767AnonymousInactiveThis is great, thanks for your explanations, I never managed to run shaders without slowdowns, but with integer scale it runs flawlessly!
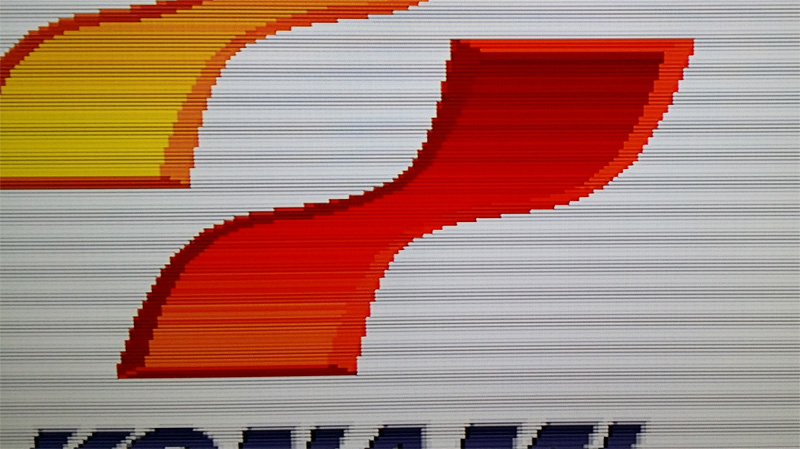
my favorite is caligari, crt-hyllian glow is also great, but it looks kinda weird when background is bright (konami logo for example).04/13/2015 at 21:48 #94780bruncheroParticipantThe Moon looks great with the hyllian glow! I like the effect of thicker lines for brighter colors. Having never seen a Sony BVM in real life, I expect that is near to what it should look like. I want to get rid of a “blocky” pixel vision.
I tried to find your recommended shaders, but they were not on my system (retropie 2.6 image). So I downloaded the common shader set from libretro github, converted them using themaister’s cg2glsl.py script (via Nvidia CG Toolkit), which at least allows my to use the caligari shader now. But the hyllian glow had parse errors and looks far from correct.I copied the CRT set from 3.0 beta to my 2.6 shaders, but had the same LEX/PARSE errors with the glow sub shaders. So I’ll stick with caligari.
04/15/2015 at 19:37 #94999squallrsParticipantHello guys :)
I’ve just buy a Rasperry pi 2, and it’s fantastic.
But i try to have a good CRT look, but i have some problems.I have put my pi on 720p
and for test, on my nes retroarch.cfg i put this:
#include "/opt/retropie/configs/all/retroarch.cfg"
# All settings made here will override the global settings for the current emulator core
input_remapping_directory = /opt/retropie/configs/nes/
video_shader = /opt/retropie/emulators/retroarch/shader/crt/crt-hyllian-glow/crt-hyllian.glsl
video_shader_enable = true
video_smooth = false
video_aspect_ratio = 4:3
video_crop_overscan = false
video_scale_integer = true
But the result is good on GBA, GB, GBC:

And really sux with snes, MD, NES, etc….
Did i miss something ?
Thanks for ur help :)
04/15/2015 at 22:36 #95046dem1980ParticipantAre you sure that this code is correct ?
video_shader = /opt/retropie/emulators/retroarch/shader/crt/crt-hyllian-glow/crt-hyllian.glsli guess, we have to use this instead :
video_shader = /opt/retropie/emulators/retroarch/shader/crt/crt-hyllian-glow/crt-hyllian-glow.glslpWe need to select the preset, not the shader. No ??
04/15/2015 at 22:44 #95047shadowmosesParticipantyeah, i had same problems with crt-hillian on clear blackground. I use now crt-caligari. (but there maybe something we miss)
04/16/2015 at 06:33 #95079patrickmParticipant[quote=94780]The Moon looks great with the hyllian glow! I like the effect of thicker lines for brighter colors. Having never seen a Sony BVM in real life, I expect that is near to what it should look like. I want to get rid of a “blocky” pixel vision.
I tried to find your recommended shaders, but they were not on my system (retropie 2.6 image). So I downloaded the common shader set from libretro github, converted them using themaister’s cg2glsl.py script (via Nvidia CG Toolkit), which at least allows my to use the caligari shader now. But the hyllian glow had parse errors and looks far from correct.I copied the CRT set from 3.0 beta to my 2.6 shaders, but had the same LEX/PARSE errors with the glow sub shaders. So I’ll stick with caligari.
[/quote]That’s odd – here’s the filepath on my system:
/opt/retropie/emulators/retroarch/shader/crt/crt-hyllian-glow/crt-hyllian.glsl.
I did a binary install using the retropie setup script, so maybe it’s not included with the version you used?
If that doesn’t work, I’ll try uploading the file directly.
04/16/2015 at 06:39 #95080patrickmParticipant[quote=94999]Hello guys
I’ve just buy a Rasperry pi 2, and it’s fantastic.
But i try to have a good CRT look, but i have some problems.I have put my pi on 720p
Did i miss something ?
Thanks for ur help
[/quote]edit: see Gizmo’s reply :)
04/16/2015 at 06:42 #95081patrickmParticipantdelete
04/16/2015 at 06:49 #95087gizmo98Participant@all check if your video_fullscreen_x/y settings are 0. Otherwise your resolution will be upscaled. Hardware upscaling should be default enabled for rpi1 performance reasons.
There will be a performance drop if you use a HD resolution with shaders.
04/16/2015 at 06:56 #95091patrickmParticipant[quote=95046]Are you sure that this code is correct ?
video_shader = /opt/retropie/emulators/retroarch/shader/crt/crt-hyllian-glow/crt-hyllian.glsli guess, we have to use this instead :
video_shader = /opt/retropie/emulators/retroarch/shader/crt/crt-hyllian-glow/crt-hyllian-glow.glslpWe need to select the preset, not the shader. No ??
[/quote]nope, just the single pass shader is what you want. The other component doesn’t work on the pi :)
04/16/2015 at 07:01 #95092patrickmParticipant[quote=95087]@all check if your video_fullscreen_x/y settings are 0. Otherwise your resolution will be upscaled. Hardware upscaling should be default enabled for rpi1 performance reasons.
There will be a performance drop if you use a HD resolution with shaders.
[/quote]Ah, I guess I should have made it more clear that I’m using a Rasp Pi model 2! I’d probably just go with “scanline” and a bilinear filter, or “sharp-bilinear-scanlines” (need to set filter to linear) if on the pi 1. I’m not sure the other shaders would look right in low res, but I haven’t tested them to see.
04/16/2015 at 12:02 #95124AnonymousInactive[quote=95087]@all check if your video_fullscreen_x/y settings are 0. Otherwise your resolution will be upscaled. Hardware upscaling should be default enabled for rpi1 performance reasons.
[/quote]
Is this only for rpi1 or should we check those settings for rpi2 too?04/16/2015 at 12:21 #95125gizmo98ParticipantIt’s for rpi2 as well. Actually most rpi1/2 settings are equal. You can modify the render resolution of libretrocores at startup with x/m key press.
04/16/2015 at 22:19 #95184AnonymousInactiveMy video_fullscreen_x/y settings are set at 0, but as i was comparing patrickm settings with mine, i realized that contrary to him i had video_windowed_fullscreen on true and video_fullscreen on false, is there a difference between those two modes?
04/16/2015 at 22:45 #95188gizmo98ParticipantNo.
04/16/2015 at 22:53 #95190AnonymousInactiveOk thanks, i didn’t notice any difference but i just wanted to be sure ;)
04/17/2015 at 09:16 #95230patrickmParticipantimportant changes!
First, keep your monitor in its native resolution! Changing your video output resolution can introduce input lag. I didn’t notice it at first, but when I switched back to 1080p from 720p for my video output resolution, the input lag reduction was noticeable (my monitor is 1080p native resolution).
Instead, change “Retroarch render resolution” to 720p. This will achieve the same effect without the input lag. Keep “video output resolution” at whatever your display’s native resolution is.
04/17/2015 at 09:19 #95231patrickmParticipant[quote=95087]@all check if your video_fullscreen_x/y settings are 0. Otherwise your resolution will be upscaled. Hardware upscaling should be default enabled for rpi1 performance reasons.
There will be a performance drop if you use a HD resolution with shaders.
[/quote]Actually, I was wondering about this. I thought that since the RPi1 and RPi2 had the same GPU that they would be able to run the same shaders. Is this not the case, and do you know why not?
So far I have not had any performance issues with my monitor set to 1080p and Retroarch’s render resolution at 720p on an RPi2.
04/17/2015 at 10:47 #95234AnonymousInactive[quote=95230]
Instead, change “Retroarch render resolution” to 720p.
[/quote]
I can’t find this setting, is this only available in retropie 3.0?04/17/2015 at 19:37 #95269patrickmParticipant[quote=95234]
<div class=”d4p-bbt-quote-title”>patrickm wrote:</div>
Instead, change “Retroarch render resolution” to 720p.I can’t find this setting, is this only available in retropie 3.0?
[/quote]I’m not sure; try holding down “m” or “x” on the keyboard as the game launches from EmulationStation, this should bring up a list of options. If not, then the options are buried in the config file somewhere. Let me know if holding down “x” or “m” when launching from ES doesn’t work.
04/19/2015 at 22:45 #95678AnonymousInactiveI’m still running retropie 2.6 and it doesn’t have this option, I checked retropie 3.0 changelog and it is Only available since beta 2.
Guess i’ll have to update eventually.04/19/2015 at 22:59 #95682gizmo98ParticipantIt’s a new 3.0 option. A binary update should bring the new option as well.
04/22/2015 at 22:59 #95927kitchukParticipantI’ve noticed that when using the recommended settings in the first post, Snes seems to fill the screen whereas master system, megadrive does not. Is there a reason for this?
04/24/2015 at 01:43 #96030patrickmParticipant[quote=95927]I’ve noticed that when using the recommended settings in the first post, Snes seems to fill the screen whereas master system, megadrive does not. Is there a reason for this?[/quote]
Sorry, I wasn’t able to replicate the problem on my system. Be sure to double check all settings. Hold “x” or “m” when launching a game to configure the video settings for that emulator – set video output to your monitor’s native resolution and set retroarch render res to 720. This has to be done for each emulator. Then enter the other settings via the retroarch GUI.
-
AuthorPosts

- The forum ‘Video Output on RetroPie’ is closed to new topics and replies.