Homepage › Forums › RetroPie Project › Peoples Projects › SNES pi
- This topic has 11 replies, 5 voices, and was last updated 10 years, 8 months ago by
 rdhanded2.
-
AuthorPosts
-
10/23/2015 at 22:29 #108251
 severdhedParticipant
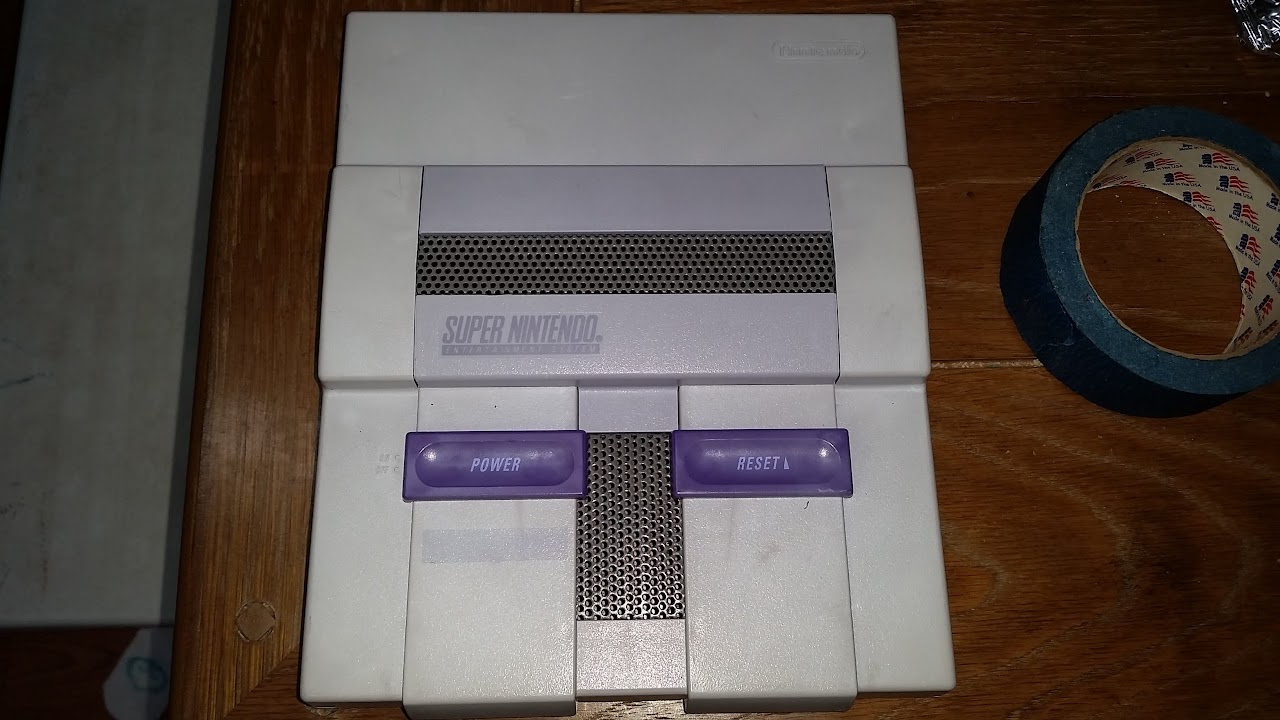
Here is my Pi-powered SNES.

I initially picked up a dead SNES for $10. the power jack was broken off of the motherboard, it was full of dead bugs and just nasty in general. It was also incredibly discolored. I managed to brighten it up with peroxide, but it was very unevenly colored
I wanted to minimize damage to the case, i did however modify the connector plate to accommodate the required connectors. HDMI, USb (for keybaord/mouse) and a standard USB type B jack for power.
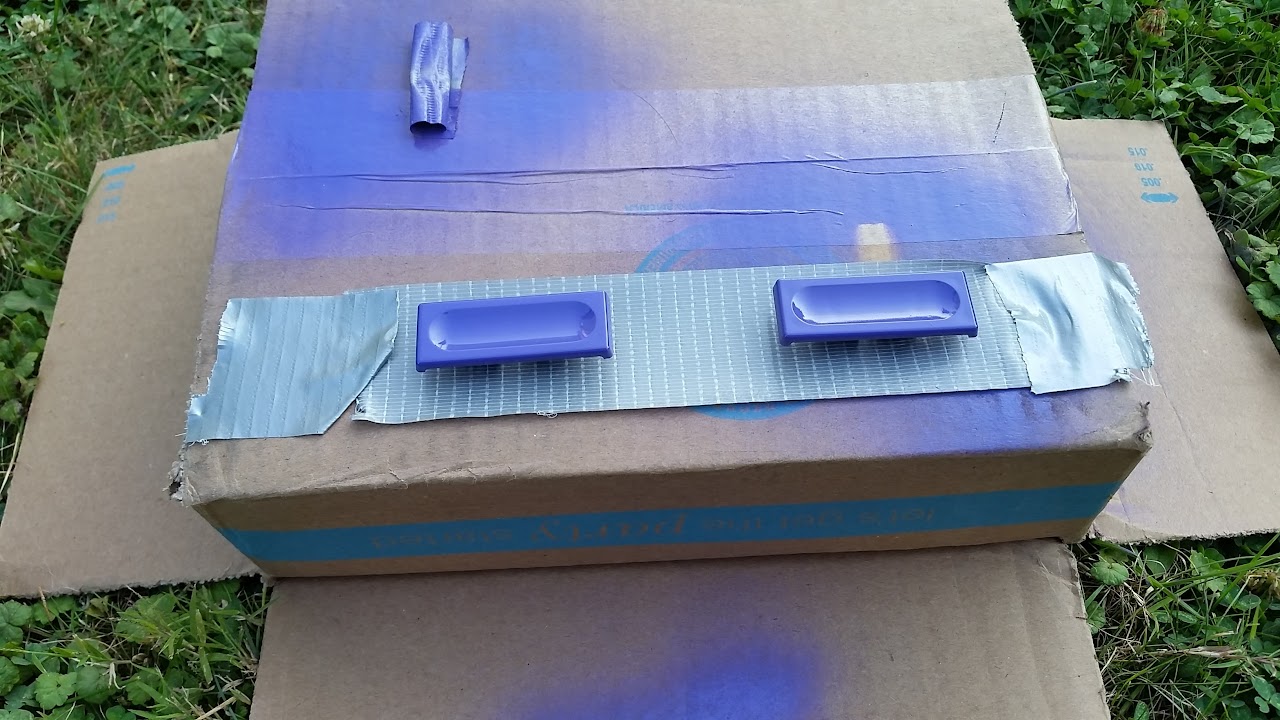
at this point, i painted the shell with Charcoal colored Duplicor Vinyl and fabric coating.
i found some Rustoleum gloss purple plastic spraypaint that very closely matched the original purple buttons, so i put a few coats on the buttons.
I cut some metal mesh from an old PC case and made panels to fill in the cartridge slot and eject button holes, since they are no longer needed. I painted them a medium gray, which very closely matches the original eject button color.
i wired up the original controller ports to a mayflash dual snes to usb adapter i picked up on amazon. Keeping the original PCB intact also allows the original LED to draw power from the controller adapter.
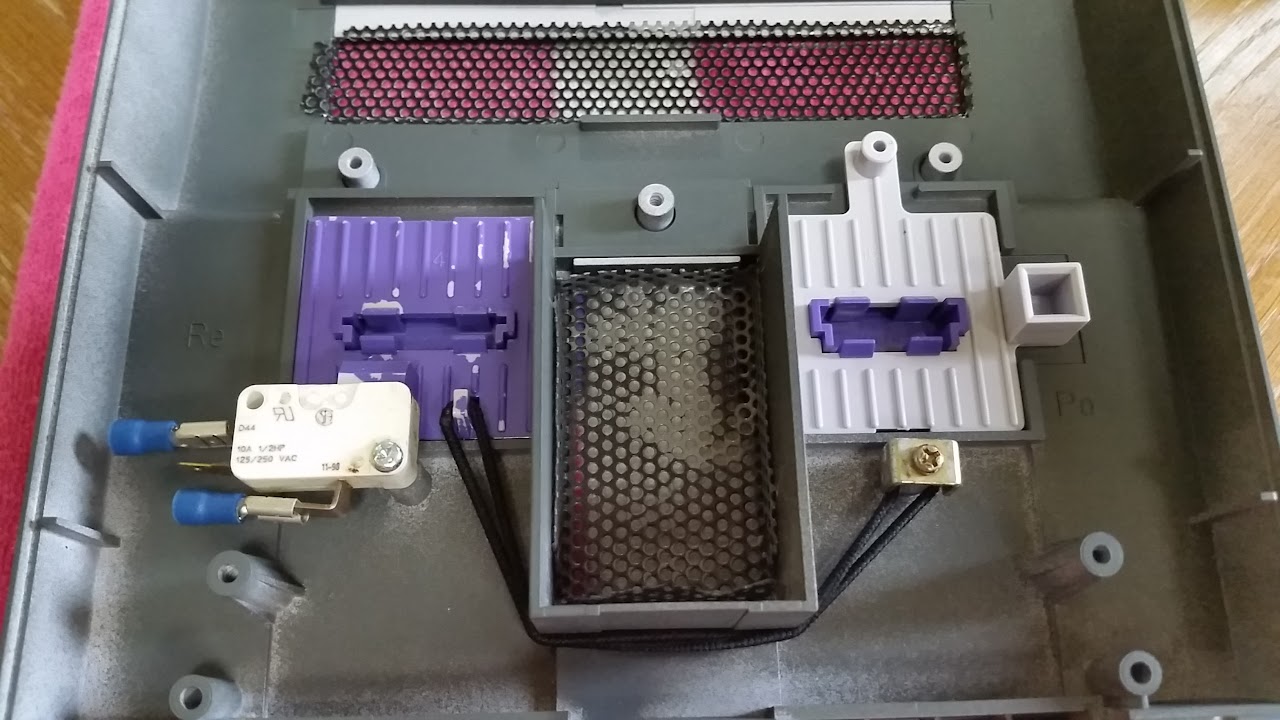
I reused the original SNES power switch, but the reset switch had to be modified. i simply screwed down an arcade style microswitch to one of the original screw posts. used an elestic hair tie to replace the spring i lost for the reset switch slider. in this position, the switch is normally closed, so i had to wire it accordingly.
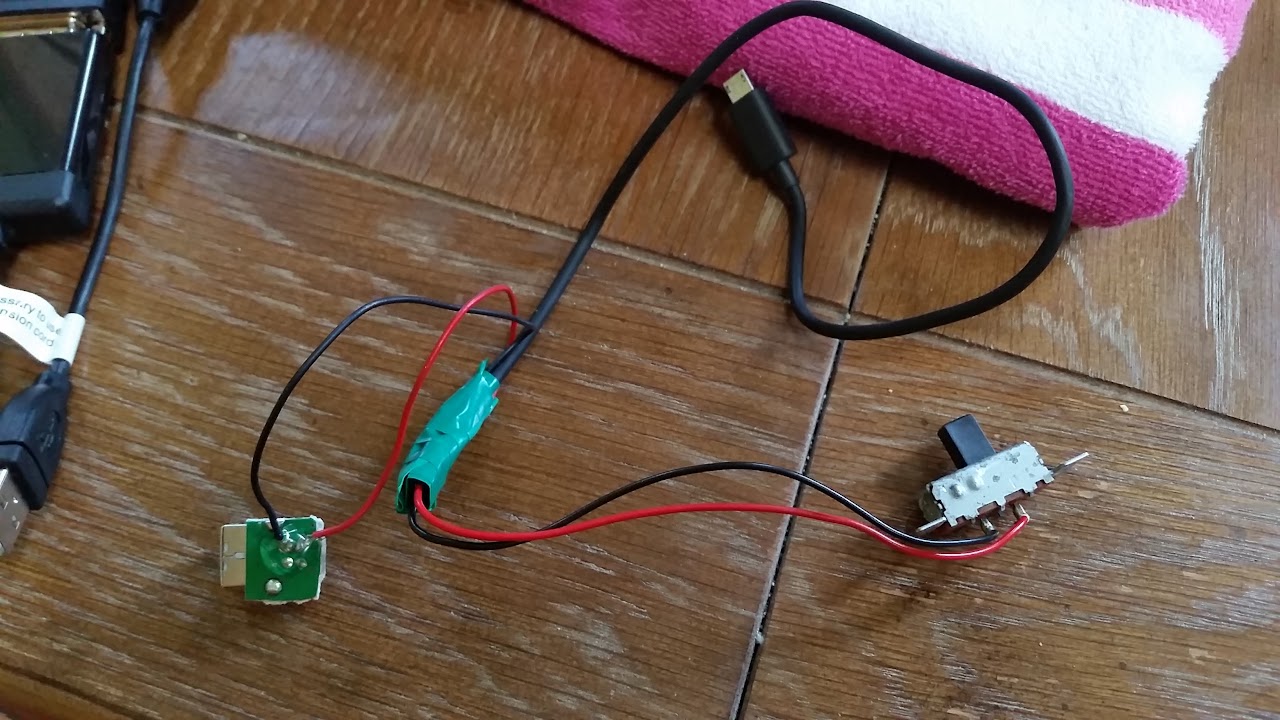
for my power circuit, i didn’t want to use a flimsy micro usb connector, so i cut a usb type B connector from an old dead external hard drive enclosure and spliced it into a micro usb cable. the ground goes directly to the micro usb plug, the 5v line runs through the original snes switch.
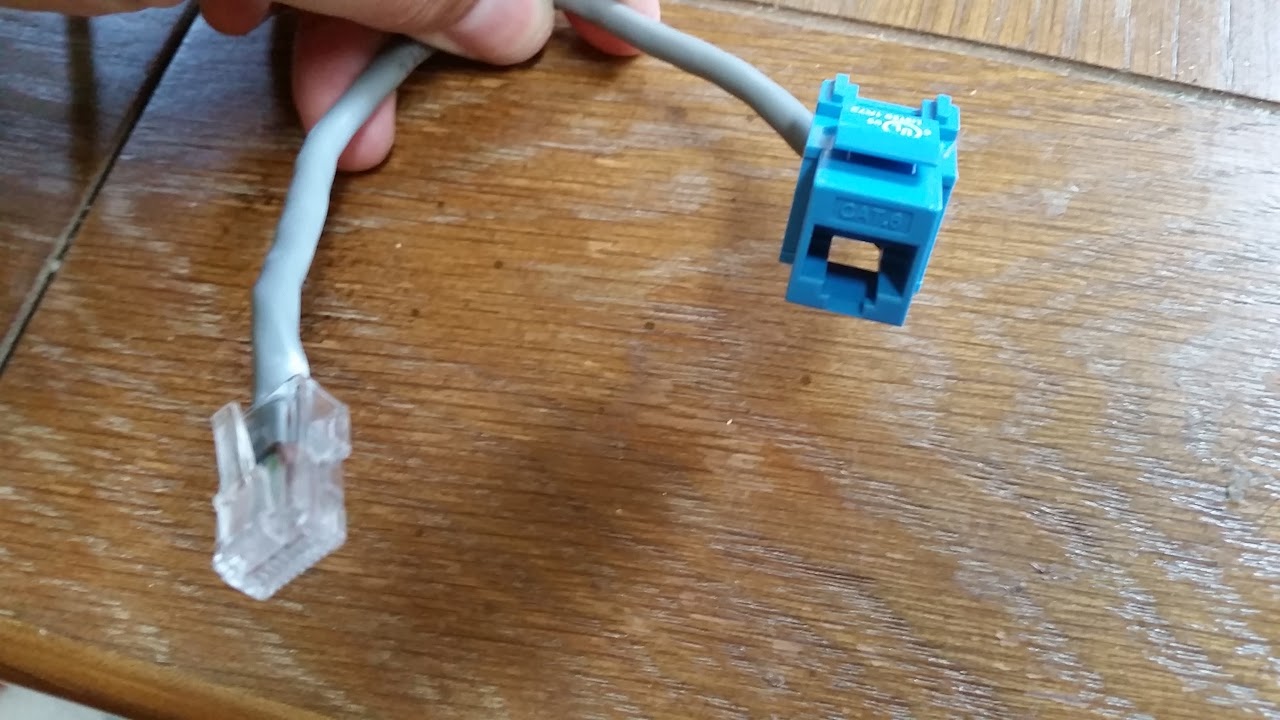
i also made a small ethernet extension so i could connect to the lan if i need to.
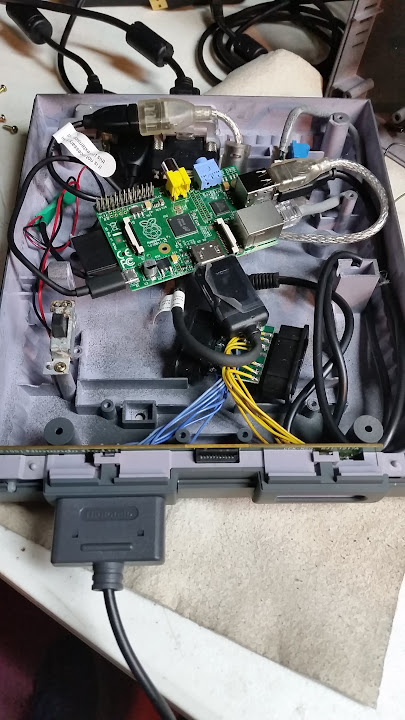
i had a ton of crap to fit inside this thing, i should have done it nicely, but it is just all shoved in there. there is a usb extension cable running to the back panel, as well as an HDMI extension. It is a mess, but it works.
the ethernet jack wouldn’t fit in the back panel, and since i shouldn’t need it much once everything is set up, i mounted it under the expansion door on the bottom. that way i can still access it without opening it up, and i didn’t have to make any new holes. it is just held in place with tons of hot glue.
here it is next to my unmodified snes.
the power switch cuts the power to the pi, so it has to be shutdown properly before turning it off. I have no problem doing this from the emulationstation menu, but to make it easier on my kids (and to give the reset switch a purpose) i have the reset switch wired to the gpio header, and a script running that triggers a shutdown command when the reset switch is pressed. that way when you are done, just press reset, wait for it to shut down, then power it off with the power switch. I know i could have bought one of those mausberry things, but this was cheap and it works fine for me.
Right now it is setup to play SNES, NES, turbografx and Genesis games. however my kids asked me to do a new project, so we are working on building a Pi powered Genesis next. eventually i’d like to do an NES and a playstation for dedicated action with the original controllers.
I hope you enjoyed.
10/23/2015 at 22:33 #108253FloobMemberThats really impressive. Good job!
10/23/2015 at 23:22 #108257redhaloParticipantThat is seriously cool. If I were to guess, you have a background in pc case modding as well?
10/24/2015 at 05:22 #108263severdhedParticipantno, no case modding background. I am an I.T. consultant, there were some client computers on the bench in the background when i took some of the pics. I did a lot of the work on this at work during some down time. This is the first time i’ve done anything like this. I’ve built a few custom mame arcade cabinets and modded some xboxes, but nothing quite like this before. i can’t wait to get started on my next one.
10/27/2015 at 01:57 #108503rdhanded2ParticipantI am stealing your reset button idea. I don’t have mind hoked up! Great build, I like it.
How durable is the vinyl dye?
10/27/2015 at 03:39 #108509severdhedParticipantthanks. the vinyl dye seems pretty durable. it soaks into the top layer of the plastic, which should make it more durable than paint. i haven’t purposely tried to scratch it off, but it has been sitting on my tv stand within reach of my 4 small children…so far, so good. i am so happy i went with the vinyl dye over regular paint. it doesn’t even look painted, it looks like it came from the factory that color. i’ve had several people ask me where i got a SNES that color because they couldn’t believe it was painted. I used paint on the purple buttons, and while i love the color, they look painted.
i got my vinyl dye at autozone, but they only had a few colors (charcoal, black, light gray, red and blue) i love the charcoal color, i couldn’t be happier with it. it is very thin, so you have to use very light coats..i think i did 3 light coats on mine.
10/27/2015 at 14:35 #108533rdhanded2ParticipantI have used it several times on interior pieces for cars and sometimes it bonds great and does not scratch, sometimes it does not. Seems to depend on the plastic so I wondered how this worked. I have also used adhesion promoter first and that tends to help if it does not want to penetrate the plastic.
10/27/2015 at 20:42 #108548severdhedParticipanti’ll check it a little more thoroughly tonight. i’ll test it out on the bottom side somewhere to see how it holds up and get back to you.
10/27/2015 at 21:27 #108550rdhanded2ParticipantThanks, I appreciate it!
10/27/2015 at 23:30 #108557MRKaneParticipantVery nice work! As a quick question: Speaking of kids: I’ve always found that directed design (such as “get this raspberry pi into this case and working”, or “we’ve three toy wheels, some wood, and this motor…how to make a bike”) is substantially more educational than one of the kitset projects from the hobby store. Nice one!
10/29/2015 at 02:54 #108673severdhedParticipantI scratched at the bottom of the case, i’m going to have to say it is pretty durable. i didn’t take any sharp tools to it, but i’m going to say it will hold up to regular wear and tear with no problems. Vinyl dye rocks.
10/29/2015 at 05:16 #108681rdhanded2ParticipantAwesome
-
AuthorPosts


- The forum ‘Peoples Projects’ is closed to new topics and replies.