Homepage › Forums › RetroPie Project › Peoples Projects › My build: IKEA arcade table
- This topic has 19 replies, 12 voices, and was last updated 8 years ago by
 Jonathan Lundström.
-
AuthorPosts
-
06/08/2013 at 01:32 #2009
 Jonathan LundströmParticipant
Hey guys!
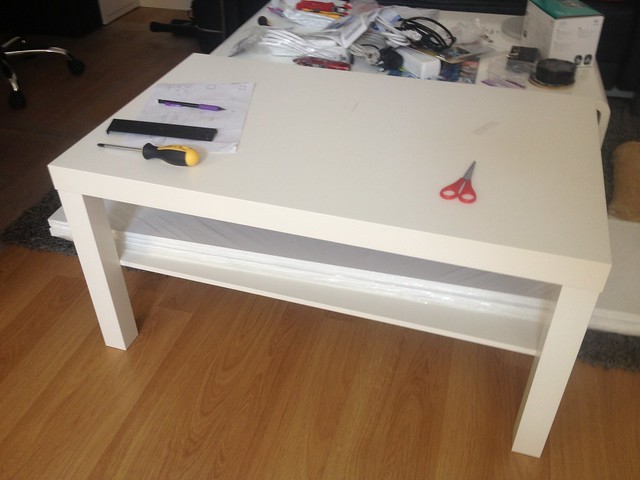
About a month ago I started building my custom arcade table, based on a 90x55cm IKEA LACK table. Now it’s finally time to unveil the build, which at this point is 98% finished. The only thing missing now is the back panel.
It started like this:

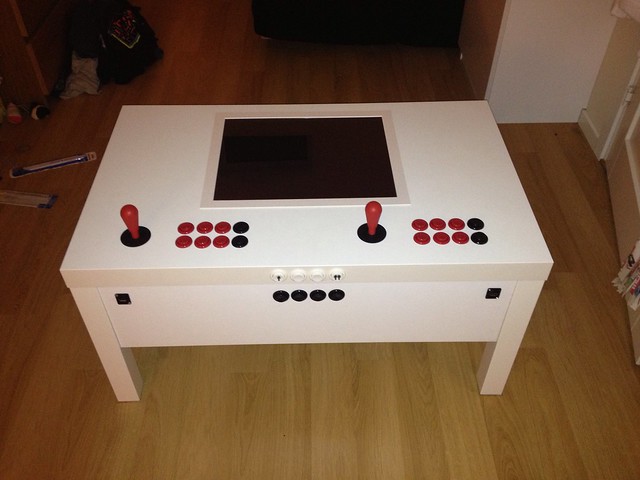
But now it looks like this:
The screen is a VA panel from a monitor called Eizo FlexScan L768, which has great viewing angles without discoloration. I’ve uploaded all of the photos to a Flickr set, and you can browse them all at the link below.

Enjoy, and please comment if you have any questions! :)
06/08/2013 at 02:08 #2011jlpubarchParticipantAwesome man! Can I ask a question unrelated to the actual physical build? What changes did you make to the theme.xml file to center the text? I’m trying to modify the pages to shrink the text bodies.
Thanks, and nice work!
06/08/2013 at 02:29 #2012Jonathan LundströmParticipant[quote=2011]Awesome man! Can I ask a question unrelated to the actual physical build? What changes did you make to the theme.xml file to center the text? I’m trying to modify the pages to shrink the text bodies.
Thanks, and nice work!
[/quote]Thank you, I appreciate it! To answer your question, I haven’t made any changes to those files what so ever. The themes and their files are stock and came with the image. Doesn’t yours look the same?
06/08/2013 at 10:48 #2014karlossParticipantif u haven’t run es scraper for it to go and grab the info/pics, the list is centred…im very close to my table being finished…will post up some pics soon..
06/08/2013 at 18:58 #2016Jonathan LundströmParticipantHello!
I did run ES Scraper but since I have quite a few games (a couple of thousand) it decreased the overall performance. In this case I’d rather have the performance over the box art. I’m looking forward to seeing your table build! :)
08/12/2013 at 19:22 #2644pilipParticipantwhere did you get the side/front/rear panels to cover the bottom part of your table?
11/26/2013 at 16:31 #3291husarParticipantNice work.
01/26/2014 at 05:12 #4366danmanxParticipantThis is absolutely fantastic! And a cup holder??? :-) I am looking at the same table right now in front of me in my living room….and I’m totally jealous.
Very creative!
01/26/2014 at 12:19 #4373Jonathan LundströmParticipant[quote=2644]where did you get the side/front/rear panels to cover the bottom part of your table?[/quote]
The front panels are actually shelves that I picked up from IKEA. I took them to a friends house and used their industrial saw to cut them in order to fit them perfectly.
[quote=3291]Nice work.[/quote]
Thanks! :)
[quote=4366]This is absolutely fantastic! And a cup holder???
I am looking at the same table right now in front of me in my living room….and I’m totally jealous.Very creative!
[/quote]Thank you! The cup holders are there since I did not want to use silicone to make everything waterproof. I want to be able to take it apart if I ever need to, so I figured cup holders were the next best thing.
If you have one and got the time, go for it. It’s a really fun project :)
I’m actually considering building a new version in a more designed table with hidden controls. If I ever get to that I’ll make sure to post it as well.03/08/2014 at 01:55 #5538jonarParticipantThis is great, I like it so much I headed to Ikea today and bought that exact table to finally get my retrocade underweigh. I’ve had the joysticks and kit for well over 2 years sat on the shelf.
What did you do with the buttons for your screen? I’m wondering how best to deal with them, if at all.
Also, what did you use to surround your screen? I’m contemplating going for a full size plexi glass top, but will still need to hide the ugliness.
Great work, and thanks for sharing.
03/08/2014 at 09:20 #5539Jonathan LundströmParticipantHi!
I’m glad to hear you enjoyed my project and that it inspired you to get started as well.
When I took off the screen casing the buttons were on a separate board and hanging from a ribbon cable, so I just folded the cable over and taped the board to the back of the screen.
Since the table lost a lot of stability when I started taking out the honeycomb filling I made a frame of solid wood exactly 5cm high (the internal table height). This frame surrounds the hole for the screen, I then bought some iron angles that the screen is played flat on to. They are attached to the wooden frame.
I adjusted the angles so that the screen is exactly 4mm down, and then covered it up with a piece of plexiglass.
It was then all covered by an aluminum frame that I ordered custom made.
You can see the rest here:
Good luck, let me know if you want to know more!
Best regards,
Jonathan03/13/2014 at 01:52 #5608jonarParticipantHi,
So I got the whole thing usable this evening, wired up all the controls to the ipac, but am seeing certain buttons not respond start and coin for P1 in games and button a/1 in the menu. Did you encounter any issues with yours?don’t suppose you have a working config you would like to share do you?
03/15/2014 at 01:54 #5639nightParticipantHey Jonathan, could you detail how did you build your power supply in picture this ? http://www.flickr.com/photos/jonathanlundstrom/8728046277/in/set-72157633455245463
Or if you have any tutorial to do this ?
Cheers,
05/19/2014 at 17:56 #6887paulcParticipantHey man that is an absolutely awesome build!
I’m looking to do something similar, I am a bit worried about the joystick and buttons breaking through the top of the table though, is it strong enough to support the joystick and buttons? Did you have to put any supports under the top part of the table?
02/01/2016 at 04:09 #115826thegift912ParticipantIs there a electrical diagram for this?
02/01/2016 at 09:14 #115840Jonathan LundströmParticipantHey!
Every button in my build works as intended. I’d be more than happy to share it with you guys, should you need it.
Regarding the power supply wiring, I had an electrician friend of mine wire this up, so I really don’t know the exact specifics, and it’s also made for european outlets with protective grounding.
The IKEA table is quote strong, believe it or not, but I added pieces of 1cm thick plywood underneath the top where the joysticks fit, since they are the ones taking the most pressure. I did not strengthen the top underneath the buttons, and it has worked so far, but if you were to build one, make sure to strengthen the entire bottom of the top finish.
There are no schematics for my build.
Regards,
Jonathan04/05/2016 at 10:54 #122433robthedudeParticipantHi
This is amazing. Can i please ask what the white framing is around the monitor and plexiglass is? Is it just plastic, where do you get it from?
Thank you
Rob
04/05/2016 at 15:34 #122439meneerjansenParticipantThis thing is GREAT! where did you buy the joysticks and buttons?
04/08/2016 at 09:46 #122553Jonathan LundströmParticipant[quote=122433]Hi
This is amazing. Can i please ask what the white framing is around the monitor and plexiglass is? Is it just plastic, where do you get it from?
Thank you
Rob
[/quote]Hi Rob!
Thank you! The white frame is made out of aluminium, custom made by a local print shop. The plexiglass was bought at a local hardware store and cut to the right dimensions.
Regards,
Jonathan04/08/2016 at 09:49 #122555Jonathan LundströmParticipant[quote=122439]This thing is GREAT! where did you buy the joysticks and buttons?[/quote]
Thank you! The joysticks and all the buttons, as well as the iPac VE were bought from the Ultimarc shop.
-
AuthorPosts

- The forum ‘Peoples Projects’ is closed to new topics and replies.