Major Update for RetroPie
Jul
Some of you might have heard or notices that there has been an update of the RetroPie SD-card image recently. This is a major update with some big changes. This article describes these.
Major Changes
In the following, you will get an overview about the major changes that come with the update to version 2.0 version 2.1 of RetroPie.
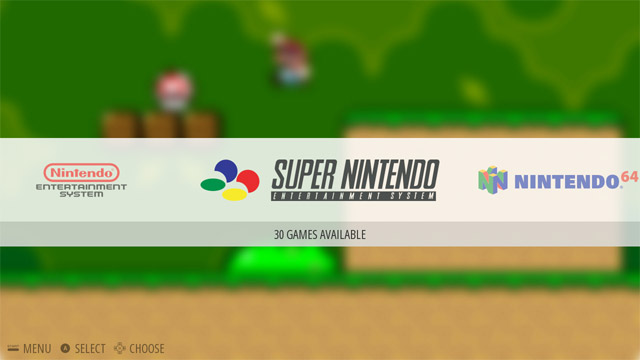
EmulationStation 2
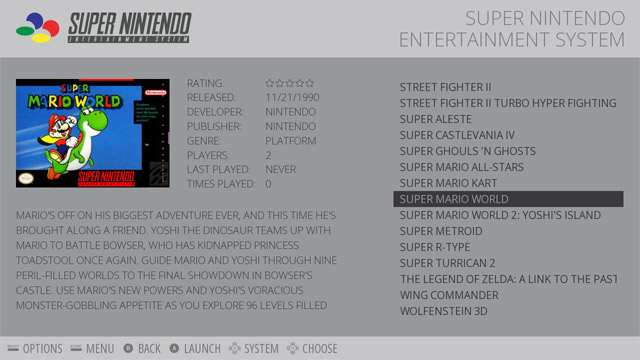
EmulationStation 2 was recently released after ten months of development. It is a major update that brings a new rock-solid look-and-feel. Also, it comes with an internal scraper for ROMs meta data and a new input configuration handling.
EmulationStation 2 also introduces some changes regarding a typical RetroPie installation. Here is a short list of important things related to EmulationStation 2:
- SDL 2.0.1 is needed by EmulationStation 2. This can be installed with the RetroPie-Setup Script and is already located in the RetroPie SD-card image.
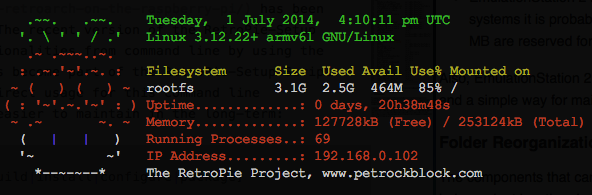
- The binary of EmulationStation is located at
/opt/retropie/supplementary/EmulationStation/ - The theme files are now located at
/etc/emulationstation/themes - The systems configuration file for EmulationStation, previously located at
~/.emulationstation/es_systems.cfghas moved to/etc/emulationstation/es_systems.cfgIf you would like to customize it, you should copy it to~/.emulationstation/es_systems.cfgand edit that file according to your needs. - As with the previous version of EmulationStation the input configuration is located at
~/.emulationstation/ - EmulationStation 2 makes way more use of graphic elements. Depending on the number of emulated systems it is probable that you need a Raspberry Pi Model B with 512 MB shared RAM, where 256 MB are reserved for the GPU. This is the default configuration of the RetroPie SD-card image.
Also, EmulationStation 2 introduces a much nicer look-and-feel, an internal scraper for ROM meta data, and a simple way for maintaining multiple themes. Overall, it is an awesome update.
Folder Reorganization
The components that can be installed with the RetroPie-Setup Script were relocated to a user-independent location. In future updates, this will be used to better support updates and installation with the APT package system.
- All components that come with RetroPie are relocated at
/opt/retropieas root directory:
<br />
pi@raspberrypi ~ $ find /opt/retropie -maxdepth 1<br />
/opt/retropie<br />
/opt/retropie/emulatorcores<br />
/opt/retropie/emulators<br />
/opt/retropie/configs<br />
/opt/retropie/supplementary<br />
It can be seen that
- The ROMs directory still resides in the user’s home directory and is located at
/home/pi/RetroPie/romsper default. - Also the BIOS directory is still located in the user’s home directory at
/home/pi/RetroPie/BIOS
Rebuild of all Components
All emulators and LibretroCores were compiled with their latest sources.
Reorganization of the RetroPie-Setup Script
The RetroPie-Setup Script has been rewritten and refactored heavily. The recent version of the RetroPie-Setup Script now allows to run all functionalities from command line by using the script retro_packages.sh that has become part of the RetroPie-Setup Script. While most users will not have a direct usage for this command line capability, this will make things easier to maintain in the long-term:
<br /> ./retropackages.sh [sources|build|install|configure|package]</p> <p>This is a list of valid commands:</p> <p>Command-ID: Description: List of available actions [sources|build|install|configure|package]<br /> --------------------------------------------------<br /> 100: RetroArch : dependencies sources build install configure<br /> 101: AdvMame : dependencies sources build install configure<br /> 102: Amiga emulator UAE4All : sources build install configure<br /> 103: Atari 800 emulator : sources build install configure<br /> 104: Armstrad CPC emulator : sources build configure<br /> 105: DOS Emulator Dosbox : install configure<br /> 106: Atari2600 emulator STELLA : install configure<br /> 107: Macintosh emulator : sources build install configure<br /> 108: C64 emulator VICE : sources build install configure<br /> 109: C64 ROMs : install<br /> 110: Duke3D Port : install<br /> 111: GameBoy Advance emulator : sources build configure<br /> 112: NeoGeo emulator GnGeoPi : sources build install configure<br /> 113: Atari emulator Hatari : install<br /> 114: MAME emulator MAME4All-Pi : sources build configure<br /> 115: Gamegear emulator Osmose : sources build configure<br /> 116: Intellivision emulator : sources build configure<br /> 117: Apple 2 emulator Linapple : sources build configure<br /> 118: N64 emulator MUPEN64Plus-RPi : sources build configure<br /> 119: SNES emulator SNES9X-RPi : dependencies sources build configure<br /> 120: FBA emulator PiFBA : sources build install configure<br /> 121: SNES emulator PiSNES : sources build configure<br /> 122: DOS Emulator rpix86 : install configure<br /> 123: ScummVM : install<br /> 124: ZMachine : install<br /> 125: ZXSpectrum emulator Fuse : install<br /> 126: ZXSpectrum emulator FBZX : sources build<br /> 127: MSX emulator OpenMSX : dependencies sources build configure<br /> 128: DOS emulator FastDosbox : sources build install<br /> 200: SNES LibretroCore PocketSNES : sources build configure<br /> 201: Genesis LibretroCore Picodrive : sources build install configure<br /> 202: Atari 2600 LibretroCore Stella : sources build configure<br /> 203: Cave Story LibretroCore : sources build configure<br /> 204: Doom LibretroCore : sources build configure<br /> 205: Gameboy Color LibretroCore : sources build configure<br /> 206: MAME LibretroCore : sources build configure<br /> 207: FBA LibretroCore : dependencies sources build configure<br /> 208: NES LibretroCore fceu-next : sources build configure<br /> 209: Genesis/Megadrive LibretroCore : sources build configure<br /> 210: TurboGrafx 16 LibretroCore : sources build configure<br /> 211: Playstation 1 LibretroCore : sources build configure<br /> 300: Update APT packages : install<br /> 301: Package Repository : install<br /> 302: SDL 2.0.1 : dependencies sources build install<br /> 303: EmulationStation : dependencies sources build install configure package<br /> 304: EmulationStation Theme Simple : install<br /> 305: Video mode script 'runcommand' : install<br /> 306: SNESDev : sources build install configure<br /> 307: Xarcade2Jstick : sources build install configure<br /> 308: RetroArch-AutoConfigs : install<br /> 309: Bash Welcome Tweak : install<br /> 310: Samba ROM Shares : install configure<br /> 311: USB ROM Service : install configure<br /> 312: Enable/disable Splashscreen : configure<br /> 313: Select Splashscreen : configure<br /> 314: RetroNetplay : configure<br /> 315: Modules UInput, Joydev, ALSA : install<br /> 316: Set avoid_safe_mode : install<br /> 317: Disable system timeouts : install<br /> 318: Handle APT packages : install<br /> 319: Auto-start EmulationStation : configure<br /> 320: Install XBox contr. 360 driver : install<br /> 321: Install PS3 controller driver : install<br /> 322: Register RetroArch controller : install<br /> 323: Install SDL 2.0.1 binaries : install<br /> 324: Configure audio settings : configure<br /> ==================================================<br />
Later, this interface will also be used for generating Raspbian APT packages.
Upgrading from RetroPie Version 1.X
First of all, there is not automatic upgrade function, if you would like to migrate your configurations from a RetroPie version 1.X installation. That being said a migration is not too difficult. As described above most folder that previously were located at /home/pi/RetroPie are now located at /opt/retropie (Please note the upper and lower case here). So you need to copy the folder shown above to /opt/retropie The ROMs stay in /home/pi/RetroPie/roms Note that RetroPie version 2 has two ROM folders for arcade games now: fba and mame. These two folders are connected with the corresponding emulators (piFBA and imame4all-rpi per default).
Conclusions
The update to version 2.0 of the RetroPie-Setup Script together with the release of EmulationStation 2 and an updated RetroPie SD-card image introduce some major changes to the folder organization. EmulationStation 2 adds a new look-and-feel to the RetroPie experience.
However, all the restructoring and reorganization has probably introduced one or another bug. Please post any findings at the issues list of the RetroPie-Setup Script at Github and discuss possible improvements in the forum.
It is still needed to manually configure the various emulators. An automatic configuration of the controllers for the emulators would be a major gain for the user experience. The realization of this feature is not that easily to accomplish, though. But we will see with which ideas the community members will come up with …
If you think that there are important information missing in this post about the recent update, feel free to say so, e.g. in the comments below.

Where did my mame games go after the update and how do I recover them?
I have RetroPie and EmulationStation running successfully. I can’t find the Super Nintendo, N64 or the Playstation emulators, how can I go about installing them on the EmulationStation?
Thanks a lot!
I am trying to use the gpio pins to use a joystick and buttons from adafruit. Ive read that the SDL2 does not work on retropie V2.0+, but I have also read that SDL2 is packaged with the retropie setup. either way, I cannot control any of my mame games with joystick/buttons… any ideas?
I have used pin layout descried here http://www.philtopia.com/?p=1571
Hi there. I am new on here and just wondering why the Mame frontend will not save my controller configurations when I exit. It does save however when I am in terminal. I did try to see if I have permissions for the pi user with the cfg file. I am not sure if it is just cfg, mame.cfg, or mame.template.cfg as to where these settings are stored. I am finally throwing in the towel on trying to get this to work. Any suggestions please?
Where is the directory that there are files for each emulator that show what key id does what? For instance, I am playing on the nes, and I don’t want the b button to be load quicksave. How would I go about doing this?
I like RetroPi I’m sorta new to Raspberry (2 weeks lol) and am learning Linux fast (Im an old early 90’s DOS gamer so Im used to the command line) I have everything working great /w the wireless XBOX 360 controller, get roms to load flawlessly. But there’s one small issue that driving me crazy right now. When Im playing, lets say SNES games – the Emulation Station controls (I think) are mapped on top of my SNES controls. eg. Like buttons Y & B make Mario jump but it also quick-saves and quick-loads at the same time. For the life of me I cant find information on how to move or disable these emulator controls. Is there a separate game-pad configuration Im missing?
Hi, I am a beginner with the Raspberry Pi, I have a 16Gb card and managed to install NOOBS. I have downloaded the RetroPie SD-card image, how or where I can install this image on the SD card to use along the other OS, can I just put the Retropie image into the OS folder? Thx
Install using the script method as described on RetroPis site. The link is on the front page all you need to do is type everything in exactly as you see and it does teh rest. It can work with your existing Raspbian installation but I HIGHLY recommend using a separate SD card until you get comfortable with everything since your new. If you break the installation the hastle isint worth it until your more comfortable with Linux.
Hi. I’m sorry if this is a very noobish question, but how do I acess the OPT directory from the startx GUI or Cyber Duck?
I need to copy a BIOS into the GBSP folder, and I need to modify the RetroArch.cfg, and I would much rather do this without the terminal…
You need to use root as user name. The default password for that is also raspberry
use sudo, signing in as root is causing home directory confusion for new users.
as they end up in /root/ instead of /home/pi/ where they need to be.
‘cd /opt’ for OPT
Could someone explain how to configure and run amiga, because I have only black screen.
Is there any way to reload Emulationstation from the ES screen like I used to do with retropie < 2.0 ? (I am used to the PS button bringing the OSD with the Reload Option when I add some ROMs)
Anyone still using that function ? It was especially usefull when adding roms to refresh the UI.
As far as I know this function is not included in ES anymore. However, EmulationStation is developed and maintained by Aloshi. Please post these feature requests at https://github.com/Aloshi/EmulationStation/issues.
I did some research and this issue has been reported many times.
Aloshi add it to the list of future enhancements. For now we will have to reboot the Pi.
I have found the directory that the Register RetroArch Controller script saves the controller mappings: (thanks andlinux!)
/opt/retropie/emulators/RetroArch/configs/*controllername*.cfg
It does one for each model controller. This holds the global controller settings for all RetroArch emulators.
Does anybody know where to edit controller settings per individual emulator? (I would like to move the A + B buttons for NES and SMS and editing retroarch.cfg in /opt/retropie/configs/nes/ and /opt/retropie/configs/mastersystem/ didn’t override the global mappings as I expected).
Turns out /opt/retropie/configs/*system*/retroarch.cfg is the correct place to edit per-system settings that override global settings.
I got the shortcut keys for exit emulator, load/save state, etc. to work properly from here. Still not sure why A + B didn’t remap to the keys I specified.
I wasn’t able to make it work (exit button with PS Button)
Here is what I added to my config file to make Select + Start exit the emulator. your button numbers are likely a bit different:
input_enable_hotkey_btn = “8”
input_exit_emulator_btn = “9”
input_enable_hotkey_btn = “8”
input_menu_toggle_btn = “4”
input_enable_hotkey_btn = “8”
input_save_state_btn = “11”
input_enable_hotkey_btn = “8”
input_load_state_btn = “10”
“8” is my select button and “9” is start. Your controller might have these buttons as a different number.
If you want to apply this shortcut to all emulators, add this to:
/opt/retropie/emulators/RetroArch/configs/*controllername*.cfg
I am still unable to make it work. I tried hotkey for select+start as well just in case. Can you paste the whole file ?
I was finally able to do it with Select+Start but not using the PS button. So it’s not a show stopper for now.
Sorry! Been busy. Here is what my file looks like if it still helps:
input_device = “DragonRise Inc. Generic USB Joystick ”
input_driver = “udev”
input_b_btn = “2”
input_y_btn = “3”
input_select_btn = “8”
input_start_btn = “9”
input_up_axis = “-1”
input_down_axis = “+1”
input_left_axis = “-0”
input_right_axis = “+0”
input_a_btn = “1”
input_x_btn = “0”
input_l_btn = “6”
input_r_btn = “7”
input_l2_btn = “4”
input_r2_btn = “5”
input_l3_btn = “10”
input_r3_btn = “11”
input_l_x_plus_btn = “3”
input_l_x_minus_axis = “-0”
input_l_y_plus_axis = “+1”
input_l_y_minus_axis = “-1”
input_r_x_plus_btn = “1”
input_r_x_minus_btn = “3”
input_r_y_plus_btn = “2”
input_r_y_minus_btn = “0”
input_enable_hotkey_btn = “8”
input_exit_emulator_btn = “9”
input_menu_toggle_btn = “11”
Notice the first line: input_device = “DragonRise Inc. Generic USB Joystick “. The part in quotations also makes up the file name: “DragonRise Inc. Generic USB Joystick.cfg” this will vary depending on the controller model. You will have one each for each different model of controller you use.
Hi Petrock – this is bloody awesome! However, I’m v. new to linux etc. and am having a spot of bother. I’m unable to copy my kick.rom into the amiga emulator folder as i’m getting a permission denied error (in the gui). Was wondering if you could point me in the right direction?
Hi – I’m having exactly the same issue. Any ideas anyone?
You could try logging in as “root” user in the gui, or FTP in to your pie as root.
All I need to know is how to exit a game using the controller. I know how to do it with the keyboard but I do not want a keyboard connected. There is no retroarch.cfg nor is there an etc directory. Also, I’m using a Logitech Dual Action controller and doing all of the setup through SSH.
Press Start and Select at the same time.
Great job! Thank you so much.
I just got a Raspberry Pi and downloaded and installed the Retropie package. I put on some roms for the NES emulator and that worked, but how do I setup the controller for it? I searched around and just found some info about copy a file to each emulator or whatever it was, but the paths are all wrong so nothing works.
With a keyboard it works, but there is some lag time? It takes about 0.5 second from then I press a button until I see a reaction on the screen.
Hi – put roms in the Mame folder but when emulation station loads – there’s no mame in the menu anymore. I edited the es_systems file and put in ~/.emulationstation but still nothing.
Oh and what happened to Megadrive emulatior DGEN? Its in the systems_cfg but there’s no emulator in /opt/emulators anymore and there’s no option to build it from source.
Thanks.
ok – worked out that I needed to add .7z for my mame roms. But does anyone know why DGEN is now missing from source build menu?
You are right – DGEN is missing! Thanks for that hint – I will add it back to the RetroPie-Setup Script as soon as possible …
I just (re-)added DGEN to the RetroPie-Setup Script.
I’m so confused on how to update this. :(
new version look great, it’s amazing work..but it have few troubles.
The preconfiguration shades of Retroarch was lost.
Script for joypad configuration was lost
Samba server crash system in the front end, must closed it for correct working
The new preinstalled openMSX not work properly.
I appreciate that Mame and PSX work fine with bios, before version was very complex configuration.
i don’t change to previous version, but I will waiting new version with automatic update system.
Can I run the RetroPie script from the ‘first’ version to upgrade, or will I have to reinstall from scratch?
Is there a native support for the GIPO controller adapter with this version of the SD image or we still have to go through the bunch of installation to make it work ? I’m not even sure what I’m doing while installing all those things, all I know is it doesn’t work before and it works after.
Keep up the good work guys I’ve tried other emulation system on my Pi and its nowhere near the ease of use and performance of your stuff !!!
All you need to do is to activate SNESDev, the driver for the RetroPie GPIO Adapter, from within the RetroPie-Setup Script. Everything is already installed – it just has to be activated:
Exit EmulationStation by pressing F4. Start the RetroPie-Setup Script. Choose “Setup” and configure SNESDev such, that both controllers and the button are activated. You can restart EmulationStation then or restart the RPi. That’s it.
I’ll install the newest version and I will try that, thanks !!
Hi, OK so I did what you told me, the controllers seems to work OK I guess but they only work in the UI (Very nice UI in 2.2 btw). The controllers don’t work in the games. There used to be a Menu where I could configure the controllers. All I had to do is select the ES config next the the others (Doom, Duke Nukem, Cave Story, etc). Now it’s gone. I’ve tried doing it in the terminal but without success. It’s really not as user friendly as it used to be. Is there a way to put back the old ES config menu along with the others ?
Thanks a lot for your help !!
I have added ES-Config back to the RetroPie-Setup Script. However, ES-Config is not completely adapted to the new folder organization yet, see https://twitter.com/petrockblog/status/485476960228089856.
Is there a way to make the GPIO LCD-PI32 ( http://www.hwlevel.com/hwlevel/LCD-PI32/lcd-pi32.html ) to work with retropie ? i manged to make it work on boot, but after the splashscreen it automatic goes to HDMI outbut and the little screen goes blank, but if i press alt+F4 to exit the emulationstation the display turns on again and the terminal windows is showing. hope you can help me so i dont need to buy a new external HDMI monitor as im going to build myself a little portalble retropie
I do not have a solution for that now, but I suggest that zoo post your question in the forum at https://www.petrockblock.com/forums/forum/retropie-project-forum/emulators/ to get more attention.
Control in games only through the keyboard, the controller does not work
Unfortunately, the controllers still have to be configured separately for EmulationStation and the emulators.
This might change in the future, though.
I’m sorry, I’m very new to Linux. I can’t for the life of me figure out how to configure a controller for use with the emulators. I found a guide here https://www.petrockblock.com/forums/topic/no-luck-getting-any-controllers-to-work-with-emulators/ but it’s for an old version and none of the files and folders are in the same places. Is there a guide or set of instructions for the new version anywhere?
Should add I’m using a generic USB controller.
I tried setting up my xbox controller through the setup menu and only some of the buttons work in game. none of the analogue sticks or D-pad work.
I too, am having this problem. I have tried running Retro Arch gamepad config scripts from several different guides but keep getting a “No such file or directory” line. Gamepads work in the UI but nothing in-game.
Yeah, me too. the only folders i can found are RetroPie and RetroPie-Setup. home and other folders seem to be gone. I’m struggling to use an older image just because i only find tutorials featuring the old folder structure.
Thank god, I’ve been close to smashing my Pi because I cant find the file structure that is constantly ref’d. I did find this http://pastebin.com/L6qddJCb but I have no idea where I would put it…. ANYONE?!?!?
I just made a YouTube video on how to configure the X Box 360 USB controller. I tried everything under the sun, and it never worked until I randomly ran across someone else’s configuration for RetroArch. Here is the link:
https://www.youtube.com/watch?v=dhQ3Vs2tyUw
You can set up your usb controller (gamepas/joystick) in the RetroPie-Setup menu
Do this when all is loaded:
Press F4 to go to the console
Then do this in console
cd /home/pi/RetroPie-Setup/
sudo ./retropie_setup.sh
Then you see the menu
Select option 3 (SETUP)
Then option 322 (Register RetroArch Controller)
And follow the onscreen instructions.
Here’s a pic of the menu.
Is there better support for 2 ps3 controllers connected with bluetooth ? ? I never got it working on the older version :(
don’t update the kernel. This is how I got it to work. sixpair has a bug with newer kernels.
sounds awesome. Just got a new external hard drive aswell. I’m planning to make a RetroPie + XBMC with the OS running on a 3 TB drive. so i’ll definetly try this new version out. You were only talking about the SD-Card Image though, will the setup script from github be latest aswell?
Is it wise to use a 3TB external drive? i never read of something like this for some reason ..
The RetroPie installation on the SD card image is set up with the RetroPie-Setup Script on Github.
Using an external hard drive needs some sort of configuration, but should work.
Great work, thanks!
Perfect timing too just started my holidays, and was planning on spending some time on setting up a fresh install.
great work guy’s thanks!
ok /opt/retropie/emulators/mame4all-pi/roms/ still needs to be root, for roms to be added
I am not sure what you mean exactly. Could you explain that a little bit more? Maybe the RetroPie-Setup Script could be fixed/enhanced accordingly …
Might want to mention that ~/.emulationstation/es_systems.cfg has moved to /etc/emulationstation/es_systems.cfg, and if you would like to customize it, you should copy it to ~/.emulationstation/es_systems.cfg and edit it there.
Also, I actually have plans for integrating emulator configuration directly into EmulationStation by way of Lua scripts (eventually).
Thanks for that hint! I have added that information.
Curious about the progress on integration of emulator configurations into EmulationStation – has this process begun? I might be interested in helping with that development work.